Bathroom Ceiling Paint Peeling? How to Fix It Permanently
Tired of paint flakes raining down during your shower? Learn why your bathroom ceiling paint is peeling and how to fix the underlying moisture problem permanently.
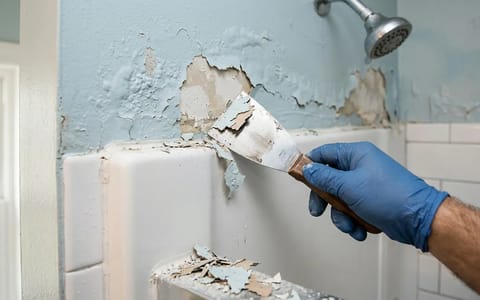
Few things ruin a relaxing morning shower quite like looking up and seeing flakes of paint hanging above your head. If you are dealing with bathroom ceiling paint peeling, you are experiencing one of the most common—and frustrating—homeowner headaches. It usually starts as a few small bubbles directly above the showerhead. Left ignored, those bubbles crack, expand, and eventually fall to the floor like snow.
Many homeowners try to solve this by simply brushing a fresh coat of paint over the damaged area. A few months later, the new paint fails, and the cycle repeats. To fix this permanently, you have to treat the root cause: trapped moisture. Bathrooms are high-humidity environments, and when steam has nowhere to go, it attacks your walls and ceilings.
We are going to break down exactly why your paint is failing, the correct materials needed to patch it, and the step-by-step process to ensure your ceiling stays smooth and protected for years to come.
Why Is My Bathroom Ceiling Paint Peeling?
Before you pick up a putty knife, it helps to understand why the paint failed in the first place. Paint peels when the bond between the paint layer and the drywall (or the previous layer of paint) is broken. In a bathroom, this almost always comes down to a battle against water vapor.
First, inadequate ventilation is the primary culprit. For optimal moisture removal, an exhaust fan should typically be rated for at least 50 cubic feet per minute (CFM) for bathrooms up to 50 square feet. When you take a hot shower, the room fills with steam. If your exhaust fan is undersized, broken, or simply not turned on, that steam rises to the ceiling and turns back into liquid water. This constant wetting and drying cycle causes the paint to swell, lose adhesion, and separate from the drywall surface.
Second, using the wrong paint finish sets you up for failure. Builders often use cheap, flat white paint on ceilings to hide drywall imperfections. Flat paint is highly porous. It acts like a sponge, absorbing moisture from the air. Over time, that moisture penetrates through the paint and degrades the drywall paper underneath. According to the EPA guidelines on moisture control, managing indoor humidity is crucial for preventing structural damage and mold growth, and your paint choice plays a large role in that defense.
Last year, I noticed the paint directly above my own shower starting to bubble. I tested the airflow in my guest bathroom and realized the fan was just making a loud grinding noise, not actually moving any air. We replaced the motor for about $30, scraped the ceiling, and repainted. The peeling stopped completely because we finally addressed the trapped steam.
The Essential Repair Toolkit
Fixing a peeling ceiling requires a bit of prep work. Having the right tools on hand makes the job much cleaner and faster. Expect to spend about $40 to $60 on materials if you need to buy everything from scratch.
Do not skip the safety goggles. Scraping a ceiling means debris will fall directly toward your face, and dried paint chips can easily scratch an eye.
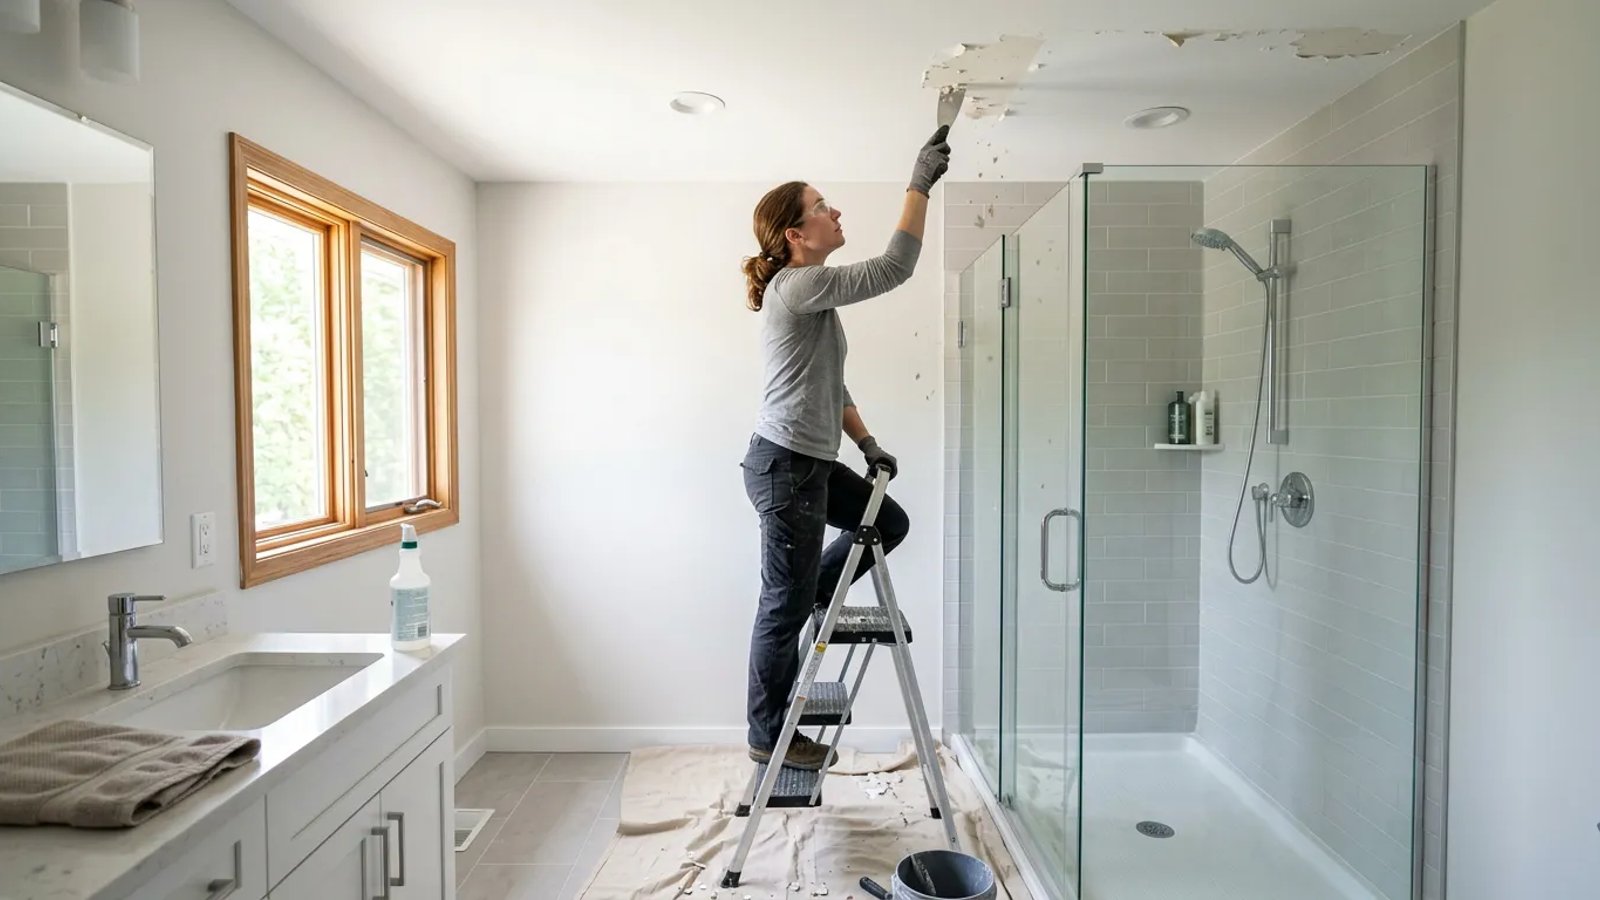
How to Fix Peeling Paint on a Bathroom Ceiling
Repairing the ceiling takes a weekend to complete, mostly because you need to allow proper drying time for the joint compound, primer, and paint. Rushing the drying process will trap moisture under your new layers, leading right back to bubbling.
- Protect the room. Remove your shower curtain, towels, and rugs. Lay a canvas drop cloth over the tub or shower floor, and tape plastic sheeting over your vanity. Scraping and sanding will create a significant amount of fine dust.
- Scrape the loose paint. Put on your goggles and mask. Take your metal putty knife and gently push it under the edges of the peeling paint. Keep the blade at a shallow 30-degree angle to avoid gouging the drywall. Continue scraping until you reach solid paint that refuses to lift. Do not worry if the scraped area ends up being much larger than the initial bubble; you only want firmly attached paint left on the ceiling.
- Skim coat the edges. Once you finish scraping, you will notice a distinct ridge between the bare drywall and the remaining old paint. If you paint over this now, the outline of the scraped area will be highly visible. Use your putty knife to spread a thin layer of joint compound over the transition edge. Feather the compound out so it creates a smooth, gradual slope.
- Sand it smooth. Let the joint compound dry completely—usually 2 to 4 hours depending on the humidity. Once dry, take your 120-grit sanding sponge and lightly sand the patched area. Run your hand over the surface; if you can feel a ridge, sand a bit more or apply a second, thinner coat of compound. Wipe the ceiling down with a barely damp microfiber cloth to remove all dust.
- Apply a moisture-blocking primer. This step is non-negotiable. Bare drywall and joint compound will absorb moisture from your topcoat if not sealed. Brush or roll a coat of high-quality, moisture-blocking primer over the patched areas. For bathrooms, a stain-blocking primer like Zinsser or Kilz works incredibly well. Let it dry according to the manufacturer's instructions, usually about 1 to 2 hours.
- Paint with the right finish. Finally, apply your topcoat. Choose a premium interior paint formulated for bathrooms, ideally with a mildewcide additive. Use a satin or semi-gloss finish to ensure water beads up and rolls off rather than soaking in. Apply two thin coats, waiting at least 4 hours between coats.
Painting over peeling paint is like putting a band-aid on a wet sponge—it won't stick, and the problem will just keep growing.
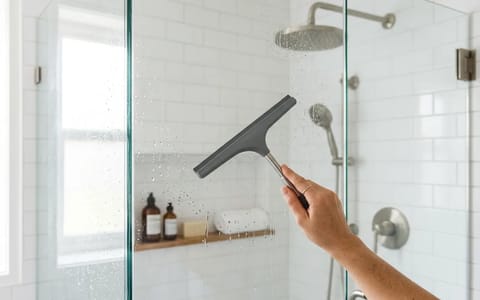
Stop the Peel: How to Control Bathroom Moisture
Now that your ceiling looks pristine, you need to protect your hard work. The best paint in the world will eventually fail if your bathroom routinely feels like a steam room. Controlling humidity requires a mix of good habits and functional equipment.
Start by evaluating your exhaust fan. Many homeowners turn the fan on when they step into the shower and turn it off the second they step out. This is a major mistake. The bathroom is still full of humid air. You should run your exhaust fan for at least 20 to 30 minutes after you finish showering. If remembering to turn it off is a hassle, replace your standard switch with a countdown timer switch. You can buy one at any hardware store for about $20, and it ensures the fan runs long enough to completely clear the room.
Next, check your bathroom door. If your bathroom door is completely sealed at the bottom, your exhaust fan has to work twice as hard. Exhaust fans need "makeup air" to function. They push wet air out, but they need to pull dry air in from the hallway. Leave the bathroom door cracked open an inch or two while showering, or ensure there is at least a half-inch gap under the door.
Does Your Exhaust Fan Actually Work? The Tissue Test
Sometimes, a fan sounds like a jet engine but moves absolutely no air. This happens when the motor is failing, the fan wheel is caked in years of dust, or the ductwork in the attic has become disconnected or crushed.
You can verify your fan's performance in about ten seconds using the tissue test.
Turn your exhaust fan on. Take a single square of toilet paper and hold it up to the fan grille. Let go of the tissue. If the fan holds the tissue firmly against the plastic cover, your suction is adequate. If the tissue flutters and falls to the floor, your fan is failing to pull moisture out of the room.
If your fan fails the test, pull the plastic cover down (most are held by simple tension springs). Vacuum out any dust bunnies clogging the motor. If it is clean and still fails the test, you likely need a replacement motor. Fortunately, many manufacturers sell plug-and-play replacement motors that snap right into the existing housing without requiring drywall work or electrical rewiring.
Fixing a peeling bathroom ceiling takes a little elbow grease, but doing it right the first time saves you from repeating the chore every spring. By properly scraping the old material, sealing the drywall with a quality primer, and upgrading your ventilation habits, your bathroom ceiling will stay smooth, dry, and structurally sound.
- Painting directly over peeling paint guarantees another failure within months; you must remove the loose flakes first.
- Flat and matte paints absorb moisture, making them terrible choices for bathrooms. Always use satin or semi-gloss finishes.
- Your exhaust fan is your first line of defense against ceiling damage. Test its suction and let it run long enough to clear the humidity.