10 Clever DIY Basement Lifehacks Every Homeowner Needs
Transform your dark, cluttered basement into a usable, organized space with these 10 budget-friendly DIY lifehacks covering storage, lighting, and moisture control.
Basements are often the dark, forgotten corners of our homes. Underneath your main living area lies massive square footage just waiting to be reclaimed, yet many homeowners view their unfinished or semi-finished basement as a dark, cluttered dungeon where old boxes go to gather dust, spiders, and mildew. The problem is that without smart organization and basic maintenance, this space becomes unusable and can even introduce musty odors into the home's air.
Fortunately, you do not need to spend thousands of dollars on a professional remodel to make the space safe and functional. If you are looking to reclaim your subterranean space, implementing a few clever diy basement lifehacks can completely transform the environment. By taking a practical, budget-friendly approach, you can maximize utility while protecting your belongings from common basement threats like moisture and pests. Here are ten actionable strategies to upgrade your basement this weekend.
1. Maximize Overhead Storage in Ceiling Joists
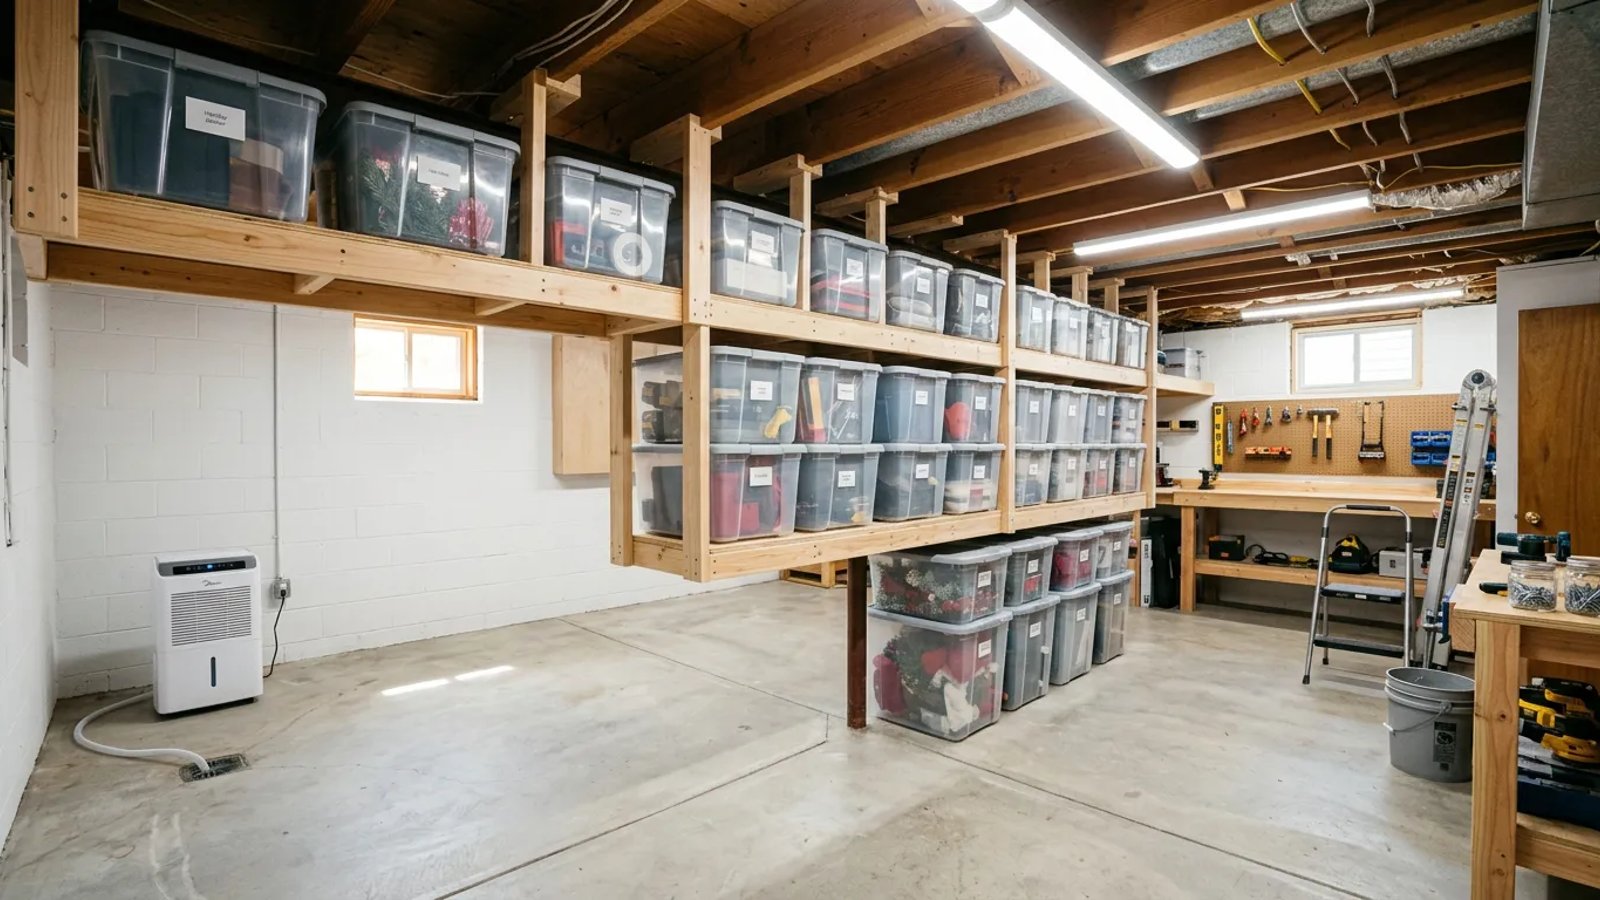
If you look up in an unfinished basement, you will see a massive grid of exposed wooden floor joists. This is prime, unused real estate. Instead of stacking boxes on the floor where they take up walking space, you can build simple wooden tracks to hold plastic storage bins overhead. By screwing lengths of 2x4s and 1x4s into the bottom of the joists to create an inverted "T" shape, you form a sturdy lip that the rim of a standard storage tote can slide right onto.
This project requires basic tools: a drill, some wood screws, and scrap lumber. For around $15 to $25 in materials at your local hardware store, you can create enough ceiling track to hold six to eight large bins. This keeps seasonal items, like holiday decorations or winter gear, completely out of the way while remaining easily accessible. Just ensure you measure the width of your specific bins before securing the tracks.
2 & 3. Elevate Everything and Ditch the Cardboard
One of the most critical diy basement lifehacks involves understanding the nature of your foundation. Concrete is porous. Even if your basement has never actively flooded, the concrete slab floor continuously wicks trace amounts of moisture from the earth below. When you place items directly on the floor, they absorb this moisture. This brings us to hack number two: elevate absolutely everything. Use plastic freestanding shelving units, wooden pallets, or even scrap 2x4s to ensure nothing touches the raw concrete. Creating just a two-inch air gap prevents wicked moisture from ruining your belongings.
Hack number three works hand-in-hand with elevation: banish cardboard from your basement entirely. Cardboard is effectively a sponge for ambient humidity. Over a few seasons, it will soften, sag, and become an all-you-can-eat buffet for silverfish, roaches, and mold. Swap all cardboard moving boxes for heavy-duty, airtight plastic totes with latching lids. While this requires a small upfront investment, it is significantly cheaper than replacing a box full of ruined family photo albums or winter coats.
Concrete is essentially a hard sponge; if you leave cardboard on a basement floor, it is only a matter of time before moisture wins.
4, 5 & 6. Banish Shadows with Smart Lighting Tricks
Most unfinished basements suffer from "dungeon syndrome" simply because they rely on one or two bare incandescent bulbs dangling from the ceiling. Hack number four solves this instantly: install linkable LED shop lights. You do not need to hire an electrician to hardwire new fixtures. Modern LED shop lights come with standard plugs and can be daisy-chained together. For about $30 to $40, you can buy a four-pack of 4000K to 5000K (daylight color temperature) LED strips. Plug the first one into the outlet adapter of your existing ceiling light, link the rest across the room, and hang them from the joists using the included cup hooks and chains.
Hack number five is to maximize that new light by painting the masonry walls and, if you are feeling ambitious, the exposed ceiling joists, bright white. White paint reflects light rather than absorbing it, instantly making the space feel twice as large and significantly cleaner. Use a masonry-specific waterproofing paint (like Drylok) on concrete block walls to add a layer of moisture protection while you brighten the room.
If painting the whole basement is too large a project, hack number six is a quick localized fix. Tape pieces of reflective foil tape or rigid foil-faced foam board directly to the ceiling joist above your existing bare lightbulbs. This acts as a makeshift reflector, bouncing the light downward into the room instead of letting it get lost in the dark cavities of the ceiling structure.
7 & 8. Master Moisture Control
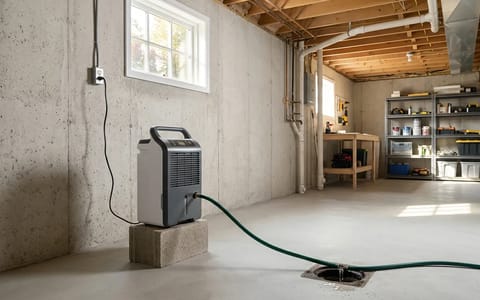
Indoor air quality in your entire home is heavily influenced by your basement. Because warm air rises, the musty, damp air from downstairs is constantly being pulled up into your living spaces. Hack number seven is proper dehumidifier placement. Do not shove your dehumidifier into a tight corner or against a wall where airflow is restricted. Place it centrally, and elevate it at least 18 to 24 inches off the floor on a sturdy table or cinder block stand. Elevating the unit allows it to pull in the damper air that settles near the floor more efficiently.
Hack number eight makes your moisture control completely hands-off: route a continuous drain hose. Emptying a dehumidifier bucket every day is a chore that most homeowners eventually forget to do, causing the machine to shut off and humidity to spike. By attaching a standard garden hose to the drainage port on the back of the unit and routing it directly into a floor drain or your sump pump pit, the machine can run continuously.
9 & 10. Streamline Utility Access and Safety
Your basement is the mechanical heart of your home, housing the furnace, water heater, and main plumbing lines. Hack number nine is to color-code your exposed utility pipes. When an emergency leak happens, you do not want to be guessing which pipe to shut off. You can buy rolls of colored electrical tape for $5 at any hardware store and mark your lines.
- Mark the hot water. Wrap a strip of red electrical tape every few feet along the pipes exiting the top of your water heater.
- Mark the cold water. Use blue tape to trace the main water supply line coming into the house and leading to the water heater.
- Mark the gas lines. Use yellow tape to clearly identify the iron pipes supplying gas to your furnace or water heater.
- Tag the shutoffs. Hang a highly visible, physical tag on the main water shutoff valve and the main gas shutoff valve so anyone in the family can find them instantly.
Finally, hack number ten is a crucial safety measure: establish a strict 36-inch clear perimeter around your furnace and water heater. Over time, it is tempting to let storage boxes creep closer to these appliances. However, gas-fired appliances need adequate ambient air to combust properly. Blocking them can lead to carbon monoxide buildup or create a severe fire hazard. Use bright floor tape to mark a 3-foot square around your HVAC equipment, and make it a strict house rule that absolutely nothing crosses that line.
Taking back your basement does not require a contractor or a massive budget. By getting items off the floor, upgrading your lighting with plug-and-play LEDs, managing humidity automatically, and keeping your mechanicals accessible, you turn a stressful, messy area into a valuable extension of your home. Dedicate a few hours this weekend to tackling just one or two of these projects, and you will immediately notice a brighter, drier, and more organized space.