10 Clever DIY Garage Organization Hacks to Maximize Space
Transform your cluttered garage into a functional workspace without spending a fortune. These 10 weekend DIY storage projects will help you reclaim your floor space.
With spring cleaning in full swing, many of us are finally turning our attention to the most intimidating space on the property: the garage. Over the winter, it likely became a dumping ground for holiday decorations, half-empty bags of ice melt, and tools you meant to put away months ago. Now, with summer projects looming, you need that space back. The good news is that reclaiming your floor space does not require a $2,000 custom cabinet installation or a complete renovation.
The secret to a functional workspace lies in maximizing vertical and overhead areas using materials you can find at any local hardware store. By tackling a few simple projects over the weekend, you can build custom storage that perfectly fits your gear. If you are tired of tripping over rakes or digging through cardboard boxes to find a Phillips-head screwdriver, these 10 clever DIY garage organization hacks will help you build a clean, highly efficient workspace.
The Foundation of DIY Garage Organization Hacks
Before you cut a single piece of wood, the most crucial step is understanding your garage's anatomy. Most garage walls are framed with 2x4 studs spaced 16 inches apart. Every heavy-duty storage solution you build must anchor directly into these studs. Relying on drywall anchors for ladders, heavy tools, or loaded bins is a recipe for disaster. Invest in a reliable stud finder, a box of 2.5-inch or 3-inch wood screws, and a drill. Once you map out your studs, you are ready to implement these DIY garage organization hacks.
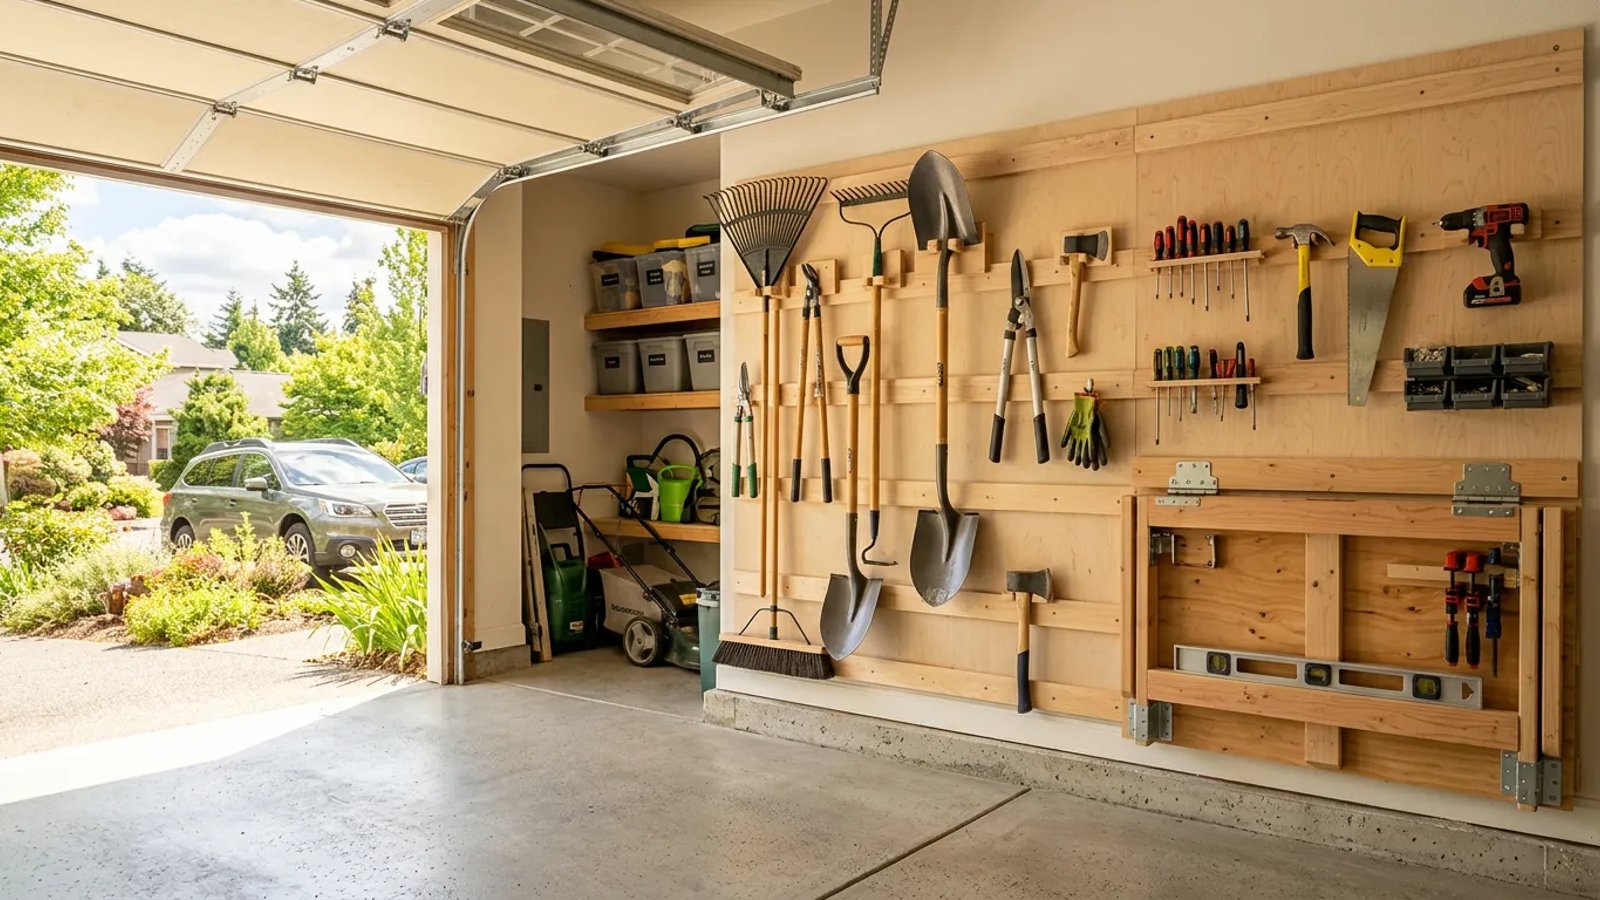
1. PVC Pipe Organizers for Long-Handled Tools
Shovels, rakes, and brooms are notorious for sliding down walls and creating a tangled mess in the corner of the garage. You can solve this permanently for under $15 using a single length of 2-inch PVC pipe. PVC is incredibly durable, cheap, and easy to cut, making it the perfect material for custom tool holsters.
- Cut the PVC pipe. Using a miter saw or hacksaw, cut the PVC pipe into 6-inch sections. Make a 45-degree angle cut at the top of each section to make sliding the tool handles in and out easier.
- Sand the edges. Run a piece of 120-grit sandpaper over the cut edges to remove sharp plastic burrs.
- Drill mounting holes. Drill two holes in the back of each PVC section. The top hole should be slightly larger so your screwdriver bit can pass through it to reach the screw head on the back wall of the pipe.
- Mount to the wall. Screw the PVC holsters directly into a wall stud or a horizontal 2x4 backer board, spacing them about 8 inches apart.
Slide the handles of your tools down into the pipes. They will stand perfectly upright, flush against the wall, completely eliminating the corner clutter.
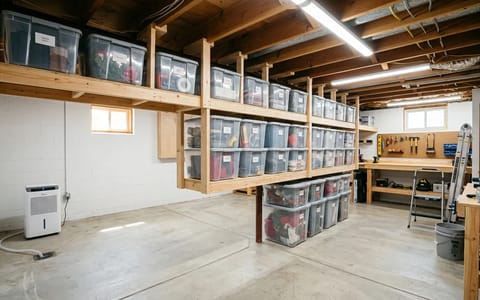
2. Ceiling-Mounted Sliding Storage Bins
The ceiling is the most underutilized real estate in any garage. It is the perfect place to store lightweight, bulky seasonal items like holiday lights, camping tents, and winter clothing. Instead of buying expensive wire racks, you can build a custom sliding track system using standard 2x4 lumber and plywood.
By attaching 2x4s to your ceiling joists and screwing 3/4-inch plywood strips to the bottom of them, you create an inverted "T" shape. The reinforced rims of standard 27-gallon black-and-yellow storage bins can slide smoothly into these tracks. Measure your bins carefully before installing the tracks—you want about a quarter-inch of play so the bins slide easily without the risk of falling through.
3. The DIY Magnetic Tool Strip
Small metal hand tools—pliers, wrenches, screwdrivers, and drill bits—often get lost in deep toolbox drawers. A magnetic tool strip keeps your most-used items visible and within arm's reach. While you can buy these at hardware stores, you can build a custom, heavy-duty version for a fraction of the cost.
Purchase a pack of strong neodymium magnets online. Take a 1x2 strip of hardwood (like oak or maple) and use a Forstner bit to drill shallow, evenly spaced holes into the back of the wood—being careful not to drill all the way through to the front. Glue the magnets into the holes using two-part epoxy. Once dry, screw the wooden strip to the wall above your workbench. The wood protects your tools from getting scratched, while the hidden magnets hold them firmly in place.
4. Upcycled Pallet Rack for Sports Gear
If you have kids, your garage is likely overflowing with baseball bats, hockey sticks, tennis rackets, and pool noodles. A discarded wooden shipping pallet can be transformed into the perfect corral for tall sports equipment with almost zero effort.
Find a clean, chemically untreated pallet (look for the "HT" stamp, which means heat-treated rather than chemically treated). Give the rough edges a quick sanding to prevent splinters. Stand the pallet upright against the wall and secure it directly into the studs using heavy-duty lag screws. The gaps between the top slats are perfectly sized for sliding bats and sticks into, while the internal cavity holds them upright. You can even add hooks to the front slats for helmets and gloves.
Advanced Wall-Mounted Storage Systems
Once you have tackled the simple hacks, it is time to look at modular systems that can grow and change as your tool collection expands. The beauty of a modular system is that you are never locked into one layout.
5. The French Cleat Wall System
The French cleat is the holy grail of DIY garage organization. It is a method of securing cabinets, shelves, and tool holders to a wall using interlocking 45-degree angles. You start by ripping a sheet of 3/4-inch plywood into 4-inch strips with a 45-degree bevel cut down the center. One half is mounted to the wall with the angle pointing up and away from the wall. The other half is attached to the back of your custom tool holder with the angle pointing down.
When you slide the tool holder onto the wall cleat, gravity locks it firmly in place. You can build custom holders for your power drills, circular saws, and battery chargers. If you buy a new tool or want to rearrange your workflow, you simply lift the holder off the wall and move it to a new location on the cleat. No unscrewing required.
6. Custom Pegboard with a Twist
Pegboard is a classic garage staple, but installing it incorrectly makes it useless. A common mistake is screwing pegboard directly flat against the drywall, leaving no room for the hooks to slide in behind the board. To do it right, build a simple frame out of 1x2 furring strips and mount the frame to the studs. Then, screw the pegboard to the frame.
7. Repurposed Mason Jars for Hardware
I cannot tell you how many times I have spent twenty minutes hunting for a specific 1.5-inch wood screw or a stray 10mm socket, only to find it buried under a pile of sawdust in a random coffee can. Sorting small hardware is a nightmare, but the mason jar hack is a classic for a reason.
Take a handful of empty glass jars (mason jars or thoroughly cleaned pasta sauce jars work perfectly). Using two small wood screws, attach the metal lids of the jars to the underside of a wooden shelf. Fill the jars with your sorted nails, screws, washers, and nuts, and simply twist the jar up into the mounted lid. It utilizes dead space beneath the shelf, keeps your workbench clear, and allows you to see exactly what hardware you have at a glance.
Creating a Functional Workspace
Organization is only half the battle; a garage also needs to function as a workspace. But a permanent, deep workbench can eat up valuable floor space, making it impossible to park your car inside.
8. The Folding Wall-Mounted Workbench
If space is tight, a fold-down workbench is the ultimate solution. Cut a piece of 3/4-inch MDF or heavy plywood to your desired size (typically 24 inches deep by 48 inches wide). Attach a sturdy 2x4 ledger board to your wall studs at your preferred working height (usually around 36 inches). Connect the back edge of your MDF tabletop to the ledger board using heavy-duty strap hinges.
For the legs, attach two 2x4s to the front corners of the table with locking hinges. When you need to work, pull the table up, and the legs lock into place. When you are done, fold the legs flat against the underside of the table, and drop the whole assembly flat against the wall. It takes up less than 3 inches of depth when folded.
A clean, well-organized garage doesn't just save you time searching for tools; it completely changes your mindset, turning a stressful chore zone into a welcoming space for weekend projects.
9. Jumbo Bungee Cords for Ball Storage
Loose basketballs, soccer balls, and volleyballs rolling around the garage floor are a massive tripping hazard. Build a simple rectangular frame out of scrap 2x4s—roughly 24 inches wide and 36 inches tall. Attach the top and bottom of the frame to the wall studs.
Take three or four heavy-duty bungee cords and stretch them vertically from the top board to the bottom board, spacing them a few inches apart. You can drop balls in from the top, and kids can easily pull the bungee cords apart to grab a ball from the bottom without emptying the whole rack.
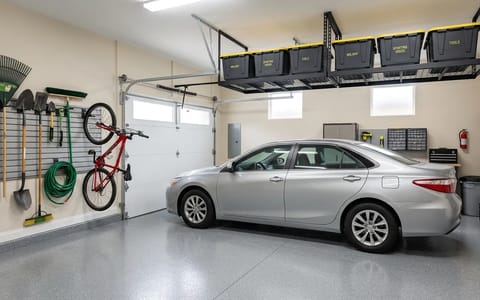
10. Overhead Bicycle Hoists
Bicycles consume a tremendous amount of floor space. While wall hooks work, they still protrude into the room. For less than $25, you can purchase an overhead bicycle hoist system. These use a simple rope and pulley mechanism attached to the ceiling joists. You hook the seat and handlebars, pull the rope, and hoist the bike completely out of the way. It is effortless to use and keeps the bikes safe from being bumped by car doors.
Tackling a messy garage can feel overwhelming, but you do not have to do it all in one day. Pick one or two of these storage solutions to start with this weekend. Building a single PVC tool rack or hanging your bikes from the ceiling will instantly free up floor space and give you the momentum to keep going. By the time the summer heat arrives, you will have a perfectly organized space ready for whatever projects come your way.