The Only Spring Home Maintenance Checklist You Need

Transitioning your home from winter to summer doesn't have to be overwhelming. Use this actionable late-spring checklist to tackle essential exterior, HVAC, and plumbing maintenance before the heat sets in.
As the late April showers fade and May brings consistent warmth, the transition into summer often feels like a race against the clock. Ignoring post-winter wear and tear usually guarantees a breakdown exactly when you need your home systems the most. This spring home maintenance checklist cuts through the noise, focusing strictly on the high-impact tasks you should tackle right now to prevent water damage and costly summer repairs.
The Core Spring Home Maintenance Checklist for Your Exterior
Your home's exterior took a beating over the winter. Ice, snow, and freezing winds stress building materials, and the resulting damage often goes unnoticed until heavy spring rains force water inside. The first phase of your maintenance weekend should be entirely focused on the outer shell of your house.
Start by grabbing a sturdy ladder and inspecting your roof and gutters. You are looking for loose, missing, or cracked shingles, but pay special attention to the metal flashing around your chimney, vent pipes, and skylights. Flashing is notorious for pulling away from the roof deck during extreme temperature fluctuations. A quick 15-minute visual inspection can save you from a massive ceiling leak later this month.
Next, tackle the gutters. Even if you cleaned them in the fall, winter storms likely deposited a new layer of twigs, pine needles, and shingle grit. Clogged gutters force rainwater to spill over the edges, pooling directly against your foundation.
- Clear the bulk debris. Use a small plastic scoop or your gloved hands to remove the heavy, damp muck from the gutter channels.
- Flush the system. Run a garden hose at the opposite end of the downspout. Watch how the water flows.
- Check for leaks and sagging. As the water runs, look for drips at the seams and ensure the gutter hasn't pulled away from the fascia board.
- Clear the downspouts. If water backs up, use a plumber's snake or a high-pressure hose nozzle to blast the clog out of the downspout.
Finally, assess your wooden deck or patio. Winter moisture strips away protective sealants. Pour a tablespoon of water onto the deck boards. If the water beads up, your seal is intact. If the wood quickly absorbs the water, it is time to reseal. You will want to wait for a dry weekend, lightly sand the surface with 120-grit sandpaper, and apply a high-quality weatherproofing stain. Expect to spend $40 to $80 on a good gallon of sealant, which covers about 250 square feet.
HVAC & Air Quality: Pre-Summer Prep
Your air conditioning system is about to go from sitting idle to working overtime. Turning your AC on for the first time during an 85-degree day in late May without prepping it first is a recipe for a blown capacitor or a frozen evaporator coil.
The most crucial DIY task is changing your furnace or air handler filter. During spring allergy season, a standard fiberglass filter won't cut it. Upgrade to a pleated filter with a MERV rating of 8 to 11. These cost around $15 to $25 at any hardware store and will catch pollen, mold spores, and fine dust without suffocating your system.
Your air conditioner works twice as hard when it's breathing through a blanket of winter dust.
A few years ago, I ignored a slightly dusty filter in late April, figuring it could last until June. By mid-May, my AC was running constantly, the house was humid, and my energy bill spiked by 30 percent. The restricted airflow had caused the indoor coil to freeze solid into a block of ice. It was an entirely preventable headache.
Head outside to your condenser unit (the large metal box in your yard). Over the winter, leaves, dirt, and debris likely accumulated against the delicate metal fins. Gently clear away any vegetation, aiming for at least two feet of clear space around the entire unit. You can use a soft brush or a garden hose on a gentle setting to wash dirt off the exterior fins, pulling heat away from the house more efficiently.
Plumbing: Inspecting for Hidden Winter Freeze Damage
Plumbing issues are sneaky. A pipe that partially froze and cracked in January might not reveal itself until you turn the water back on in the spring. Your exterior hose bibs (spigots) are the most vulnerable points in your home's plumbing system.
You need to perform the "thumb test" on every exterior spigot. This simple procedure checks for a burst pipe hidden inside your walls.
First, turn on the water supply to your exterior plumbing. Next, go outside and turn the spigot on fully. Place your thumb firmly over the opening to block the water flow. If you can easily hold the water back with your thumb, you have a serious problem. The water pressure is escaping somewhere else—likely through a crack in the pipe inside your wall or basement. Turn the water off immediately and inspect your interior walls and basement joists for leaks.
If the pressure is strong enough to spray past your thumb, your pipe is intact. While you are at it, check the packing nut directly behind the handle. If it drips while the water is running, use an adjustable wrench to tighten the nut a quarter-turn until the dripping stops.
Inside the house, take 10 minutes to open every cabinet under your sinks. Run the water and check the P-traps and supply lines for slow drips. Winter air is incredibly dry, which can cause rubber gaskets and washers to shrink and crack. Catching a slow drip now prevents warped cabinetry and mold growth later.
Yard Prep and Foundation Checks
The final phase of your spring home maintenance checklist involves the perimeter of your house. How your yard handles spring rain directly impacts your foundation's integrity.
Walk the perimeter of your home and inspect the grading—the slope of the soil resting against your foundation. Over time, soil settles. If the ground slopes toward your house, heavy spring rains will pool against the foundation walls, eventually finding their way into your basement or crawlspace. You want the soil to drop at least six inches over the first ten feet away from the house. Buy a few bags of topsoil and build up any low spots near the foundation walls.
While checking the soil, look at the clearance between the dirt and your home's siding. There should be a minimum of six inches of exposed foundation between the soil (or mulch) and the bottom edge of your siding. If mulch touches the siding, it creates a superhighway for termites, carpenter ants, and moisture to enter the wood framing.
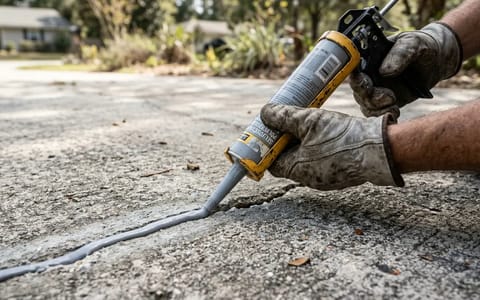
Tackling this list over a single weekend might require a bit of elbow grease, but the payoff is massive. By addressing these weak points now, you lock out moisture, optimize your cooling systems, and set your house up to handle whatever the summer weather brings. Grab your ladder, a fresh air filter, and a pair of work gloves, and get started while the spring weather is still working in your favor.