10 Clever DIY Laundry Room Lifehacks Every Homeowner Needs
Transform your laundry room from a neglected utility space into an efficient, safe zone with these 10 clever DIY lifehacks that prevent costly appliance repairs and home damage.
The laundry room is arguably the hardest working space in your home, yet it rarely gets the attention it deserves until something breaks. We expect our washers and dryers to handle endless loads of mud, sweat, and spills, but we often neglect the basic upkeep required to keep these expensive appliances running safely. Ignoring this space does not just lead to a disorganized room; it invites musty odors, dangerous lint buildup, and failing hoses that can cause tens of thousands of dollars in water damage.
You do not need a massive renovation budget to optimize your utility space. By implementing a few clever DIY laundry room lifehacks, you can extend the life of your appliances, lower your utility bills, and make laundry day significantly less frustrating. These upgrades focus on practical, preventative maintenance disguised as simple weekend projects. Here are ten essential hacks to protect your home and your wardrobe.
1. The Sponge Trick: Stopping Washing Machine Vibrations
If your washing machine sounds like a jackhammer during the spin cycle, it is doing more than just annoying you. Excessive vibration wears out the machine's shock absorbers, loosens internal plumbing connections, and can even damage your flooring. Often, this happens because the machine is slightly off-balance or sitting on a hard, unforgiving surface like tile or concrete.
Before you call an appliance repair technician, try the sponge trick. Purchase a pack of high-density cellulose kitchen sponges (the thick, heavy-duty kind without the scouring pad). Cut them into four equal squares and slide one under each of the washing machine's leveling feet. The dense sponge acts as a micro-shock absorber, deadening the vibration and preventing the machine from "walking" across the floor. If the sponges compress too much over time, you can upgrade to purpose-built rubber anti-vibration pads for about $15 at any hardware store.
2. Vinegar & Baking Soda: The Ultimate Monthly Drum Clean
Washing machines, particularly front-loaders, are notorious for developing a sour, mildew smell. Soap scum, fabric softener residue, and hard water minerals build up behind the drum, creating a perfect breeding ground for bacteria. You do not need expensive commercial washing machine cleaners to solve this; the solution is likely already in your pantry.
Performing a deep clean once a month will keep your machine smelling fresh and ensure its internal water pump does not get clogged with sludge.
- Add baking soda. Pour 1/2 cup of baking soda directly into the empty washing machine drum.
- Add white vinegar. Pour 2 cups of distilled white vinegar into the detergent dispenser drawer.
- Run a hot cycle. Set the machine to its hottest, longest cycle (often labeled "Sanitize" or "Tub Clean") and let it run completely empty.
- Wipe it down. Once the cycle finishes, take a damp microfiber cloth and wipe down the inside of the rubber door gasket and the glass door.
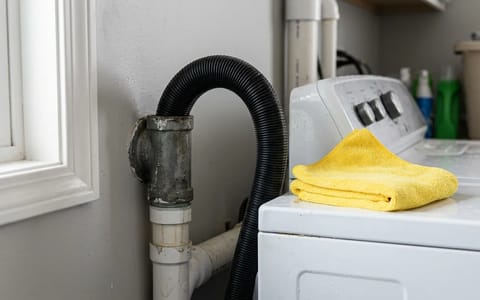
3. Dryer Vent Vacuum Hack: Removing Deep Lint
According to the National Fire Protection Association, local fire departments respond to nearly 3,000 home fires involving clothes dryers each year. The leading cause of these fires is a failure to clean the dryer vent system. Cleaning the lint screen after every load is not enough; microscopic lint particles bypass the screen and accumulate in the exhaust duct over time, restricting airflow and creating highly flammable kindling.
To prevent this, you need to clear the actual ductwork. Disconnect the dryer from the power source and pull it away from the wall. Detach the flexible foil duct from the back of the machine. Using a flexible dryer vent cleaning brush kit (which costs about $15 to $20), attach the brush to a power drill. Feed the flexible rod into the ductwork, spinning it slowly to dislodge the caked-on lint, while holding your shop vacuum hose right at the duct opening to catch the debris. Run the brush all the way to the exterior vent flap to ensure the entire line is clear.
4. Braided Steel Hoses: A $20 Upgrade to Prevent Floods
If you only take away one piece of advice from this entire list, let it be this one. Most new washing machines come with cheap, black rubber water supply hoses. Over time, the constant pressure of your home's water system, combined with the expansion and contraction from hot and cold water, causes these rubber hoses to weaken, bulge, and eventually burst.
A $20 set of braided steel hoses is the cheapest flood insurance you will ever buy.
When a washing machine hose bursts, it can pump hundreds of gallons of water into your home in a matter of hours, ruining floors, drywall, and ceilings. To prevent this disaster, turn off the water supply valves behind the washer, unscrew the old rubber hoses with a pair of slip-joint pliers, and replace them with braided stainless steel hoses. The steel mesh prevents the inner rubber tube from expanding and bursting. It takes 10 minutes to install and provides a decade of protection.
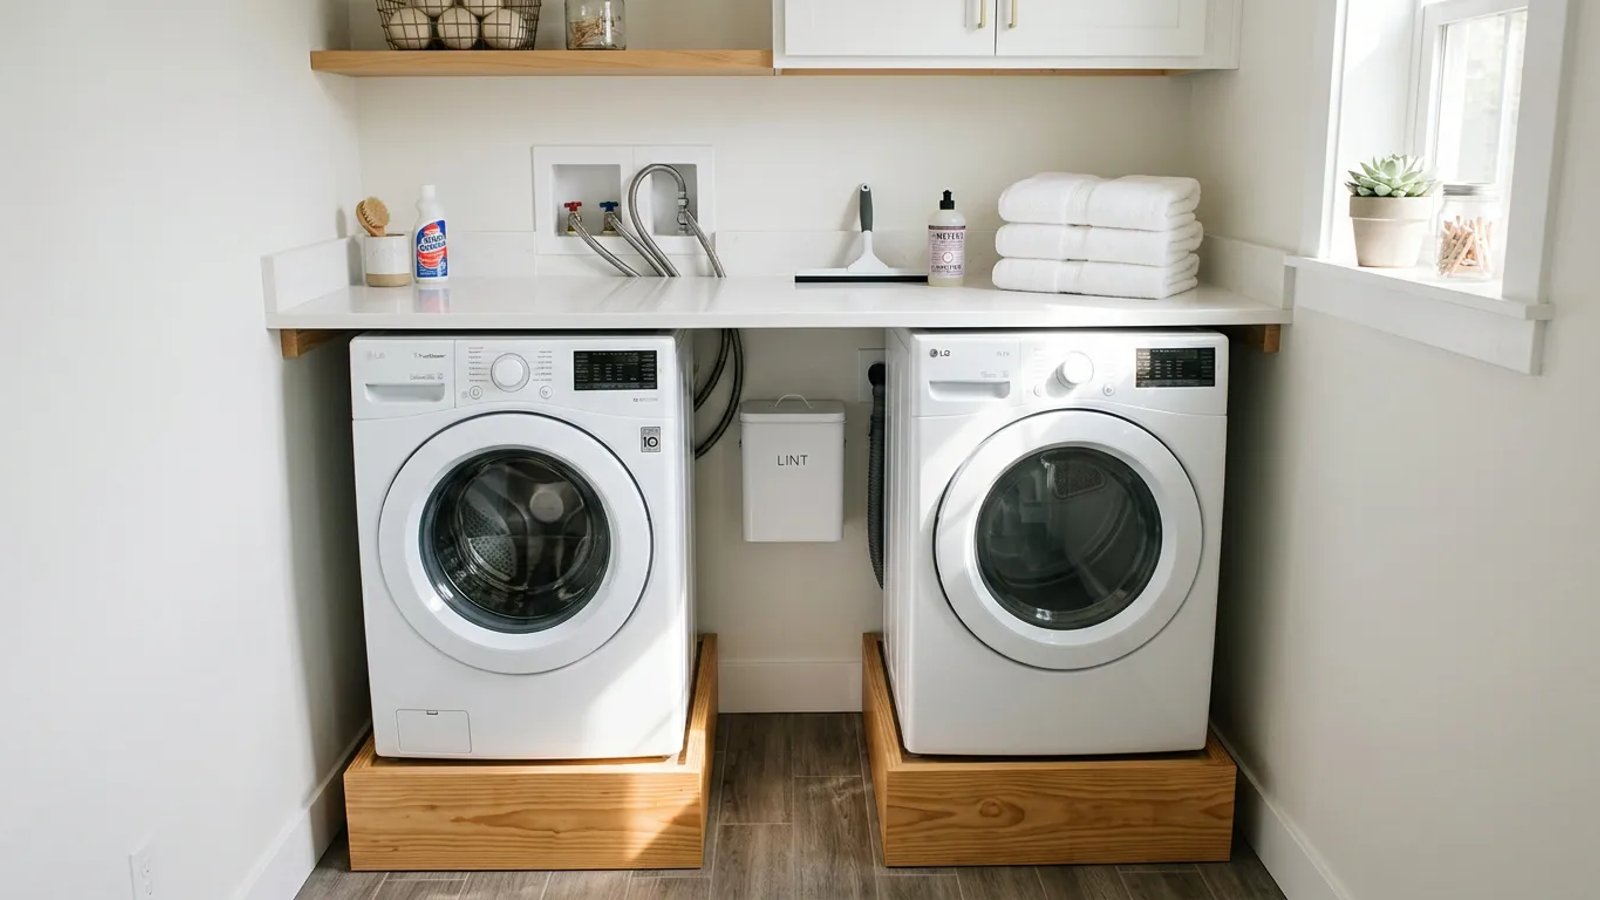
5. DIY Pedestals: Elevating Machines for Better Posture
Front-loading machines are incredibly efficient, but bending down to the floor to transfer heavy, wet clothes takes a toll on your lower back. Appliance manufacturers sell matching metal pedestals to raise the machines, but they often cost upwards of $250 to $300 each—a steep price for a simple metal box.
If you have basic carpentry skills, you can build a custom, rock-solid DIY pedestal for a fraction of the cost. Using 2x4 lumber for the internal framing and 3/4-inch sanded plywood for the top and sides, you can construct a platform that perfectly fits your space. Paint it to match your trim or machines. Not only does elevating the machines by 12 to 15 inches save your back, but you can also leave the front of the pedestal open to slide laundry baskets directly underneath, instantly solving your laundry room storage problems.
6. The Dry-Erase Marker Hack: Stopping Laundry Disasters
We all have those specific garments that absolutely cannot go into the dryer—wool sweaters, athletic gear, or delicate synthetics. But when you are rushing through chores, or if someone else in the family is switching the laundry over, it is incredibly easy to forget and accidentally shrink a favorite shirt to toddler size.
Keep a dry-erase marker specifically in the laundry room. Because most washing machines have a smooth, baked-on enamel finish, you can write directly on the top or front of the machine. Write a quick note like, "Do not dry the blue sweater!" right on the washer lid. Whoever moves the clothes to the dryer will see the unavoidable warning. When the laundry is done, simply wipe the ink away with a dry cloth or a paper towel.
7. Squeegee Pet Hair Before Washing
If you have dogs or cats, you know that pet hair weaves itself into fabric fibers. Throwing hair-covered blankets or clothes straight into the washing machine is a recipe for disaster. When wet, pet hair clumps together into dense mats that bypass the machine's internal filters and wrap around the drain pump impeller, eventually burning out the motor.
To save your machine's plumbing, take a standard rubber window squeegee and scrape it across pet beds, heavy coats, and upholstery before you wash them. The rubber blade creates static electricity and grips the hair, pulling it out of the fabric threads much more effectively than a standard lint roller. Throw the clumped hair in the trash, and your washing machine will only have to deal with dirt, not fur coats.
8. Tennis Ball Fluffers: A Cheap Alternative to Dryer Sheets
Dryer sheets are coated in synthetic waxes and fragrances that leave a residue on your clothes and your dryer's internal moisture sensors. Over time, this waxy buildup tricks the dryer into thinking clothes are dry before they actually are, leaving you with damp laundry. Furthermore, dryer sheets reduce the absorbency of bath towels.
Instead of buying disposable sheets, toss three clean tennis balls into the dryer with your wet clothes. The balls bounce around the drum, physically separating the heavy, wet fabrics. This creates pockets of hot air between the garments, fluffing them up and reducing overall drying time by 10% to 15%. If you prefer a completely natural option, 100% wool dryer balls work exactly the same way and are much quieter than tennis balls.
9. The Dedicated Lint Bin
Cleaning the dryer lint trap is a non-negotiable task that must be done before every single load. However, when the trash can is all the way in the kitchen or hidden inside a cabinet, laziness often wins, and the trap goes unemptied. This restricts airflow, wastes electricity, and increases fire risk.
Fix this behavioral bottleneck by mounting a dedicated lint bin directly to the wall next to the dryer, or attaching a magnetic bin right to the side of the machine. You can repurpose a sleek plastic mail organizer or buy a specific magnetic lint bin online for under $15. When the disposal spot is an arm's reach away, clearing the trap becomes an effortless habit rather than an annoying chore.
10. Leave the Door Ajar: The Simplest Hack of All
The most common complaint about front-loading washing machines is the smell. As mentioned earlier, the thick rubber gasket that makes the door watertight also traps small pools of water. If you shut the door immediately after pulling your clean clothes out, you are sealing that moisture inside a dark, warm steel drum.
The absolute best preventative maintenance for a front-loader costs zero dollars and takes zero effort: just leave the door open. Keep the door cracked open about two inches when the machine is not in use. This allows ambient air to circulate through the drum, evaporating the residual moisture before mold spores have a chance to take root. Do the same with the detergent dispenser drawer, pulling it out slightly so it can dry between wash days.
Taking care of your laundry room does not require a contractor or a massive budget. By swapping out those risky rubber hoses, keeping the dryer vent clear of lint, and managing moisture properly, you are actively protecting your home from its two biggest threats: water damage and fire. Spend a few hours this weekend implementing these simple DIY laundry room lifehacks, and your hard-working appliances will reward you with years of trouble-free service.