How to Map and Label Your Electrical Panel the Easy Way
Staring at a confusing breaker box in the dark is frustrating and unsafe. Learn the easiest step-by-step method to map and label your home's electrical panel.
Staring at a gray metal box in the dark while someone yells from upstairs is the absolute worst time to figure out which switch controls the kitchen lights. Every homeowner eventually faces a tripped breaker or needs to shut off power to a specific room for a quick DIY fix, like swapping a light fixture or replacing an outlet. Taking an hour on a Saturday to properly map and label your electrical panel will save you from major headaches and keep you safe during your next project or power emergency.
Why You Need a Perfectly Labeled Electrical Panel
Most of us inherit our electrical panels from the previous homeowner, complete with faded pencil scribbles, mysterious abbreviations like "Recpt 2," and crossed-out mistakes. While it is easy to ignore this metal box in the garage or basement until something goes wrong, an unlabeled or poorly labeled panel is a genuine safety hazard.
When you need to turn off the power to replace a ceiling fan, you need 100% confidence that the circuit is dead. Guessing and flipping breakers based on vague labels often leads to working on live wires, which can result in severe shocks. Furthermore, in an emergency—like a flooding washing machine or a sparking outlet—you do not have time to play a guessing game. You need to kill the power to that specific zone instantly.
Beyond safety, it is simply a matter of convenience. If you work from home, you do not want to accidentally kill the power to your home office router while trying to isolate the guest bathroom outlets. A properly mapped panel puts you in total control of your home's electrical system.
The Tools You Will Need for the Job
You do not need to be an electrician to map your home's circuits, nor do you need expensive diagnostic gear. You just need a few basic items and ideally, a willing helper.
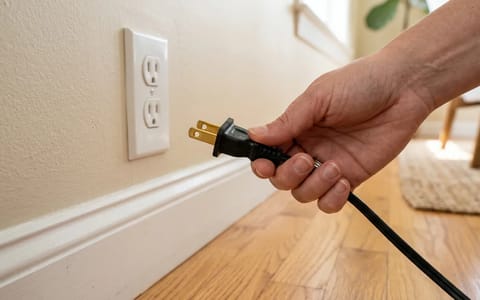
- A GFCI Receptacle Tester: This is a small, $10 to $15 plug-in tool available at any hardware store. It features three lights that illuminate when an outlet has power. It is much safer and faster than plugging a lamp into every outlet.
- A Loud Radio or Bluetooth Speaker: If you are working alone, plugging a loud radio into an outlet allows you to hear when the power cuts out from the panel room.
- Two Cell Phones: If you are using the buddy system (highly recommended), keep your phones on speakerphone so you can communicate across the house.
- A Headlamp or Flashlight: Panel rooms get dark when you start shutting off lights. A headlamp keeps your hands free.
- A Notepad and Pen: Do not write your final labels directly on the panel until you have mapped the entire house on paper first.
Step-by-Step: How to Map Your Home's Circuits
Mapping your panel is a process of elimination. You are going to systematically turn things on, flip a breaker off, and record exactly what goes dark. It requires a bit of walking, but the peace of mind is entirely worth it.
- Prep the house. Walk through every room and turn on all the overhead lights and lamps. If you have rooms without lights, plug in your radio or your GFCI tester. Leave the main breaker ON, but make sure computers or sensitive electronics are safely shut down before you begin.
- Establish the buddy system. Station one person at the electrical panel (the "Flippper") and one person inside the house (the "Scout"). Get on a phone call and put each other on speaker.
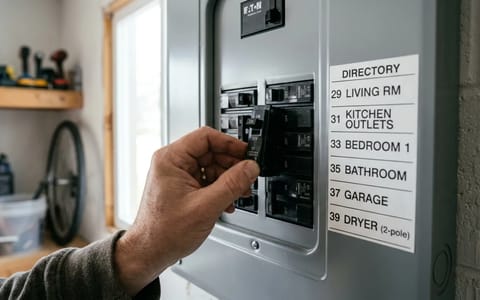
- Test the 240V appliances first. Look for the large, double-pole breakers (two switches tied together with a bar). These control heavy appliances like your electric dryer, oven, AC condenser, and water heater. Have the Scout verify these appliances lose power when the Flipper turns off the corresponding breaker. Write down the results on your notepad.
- Work down the single-pole breakers. Start at breaker number one. The Flipper turns it off and calls out, "Number one is off!" The Scout walks through the house looking for what just went dark. Check overhead lights, wall outlets, and outdoor receptacles.
- Document thoroughly. Write down everything that breaker controls. Do not just write "Kitchen." Write "Kitchen overhead lights and island outlets." Repeat this process for every single breaker in the box until everything is mapped.
You will likely discover some strange wiring quirks during this process. In older homes, it is incredibly common to find that a single breaker controls the primary bedroom, the hallway lights, and mysteriously, one single outlet in the downstairs powder room. This is exactly why we map the system. I once spent an hour trying to find the breaker for a garage outlet only to discover it was tied to the second-floor bathroom GFCI circuit—a leftover quirk from a 1980s renovation.
Creating a Permanent, Readable Directory
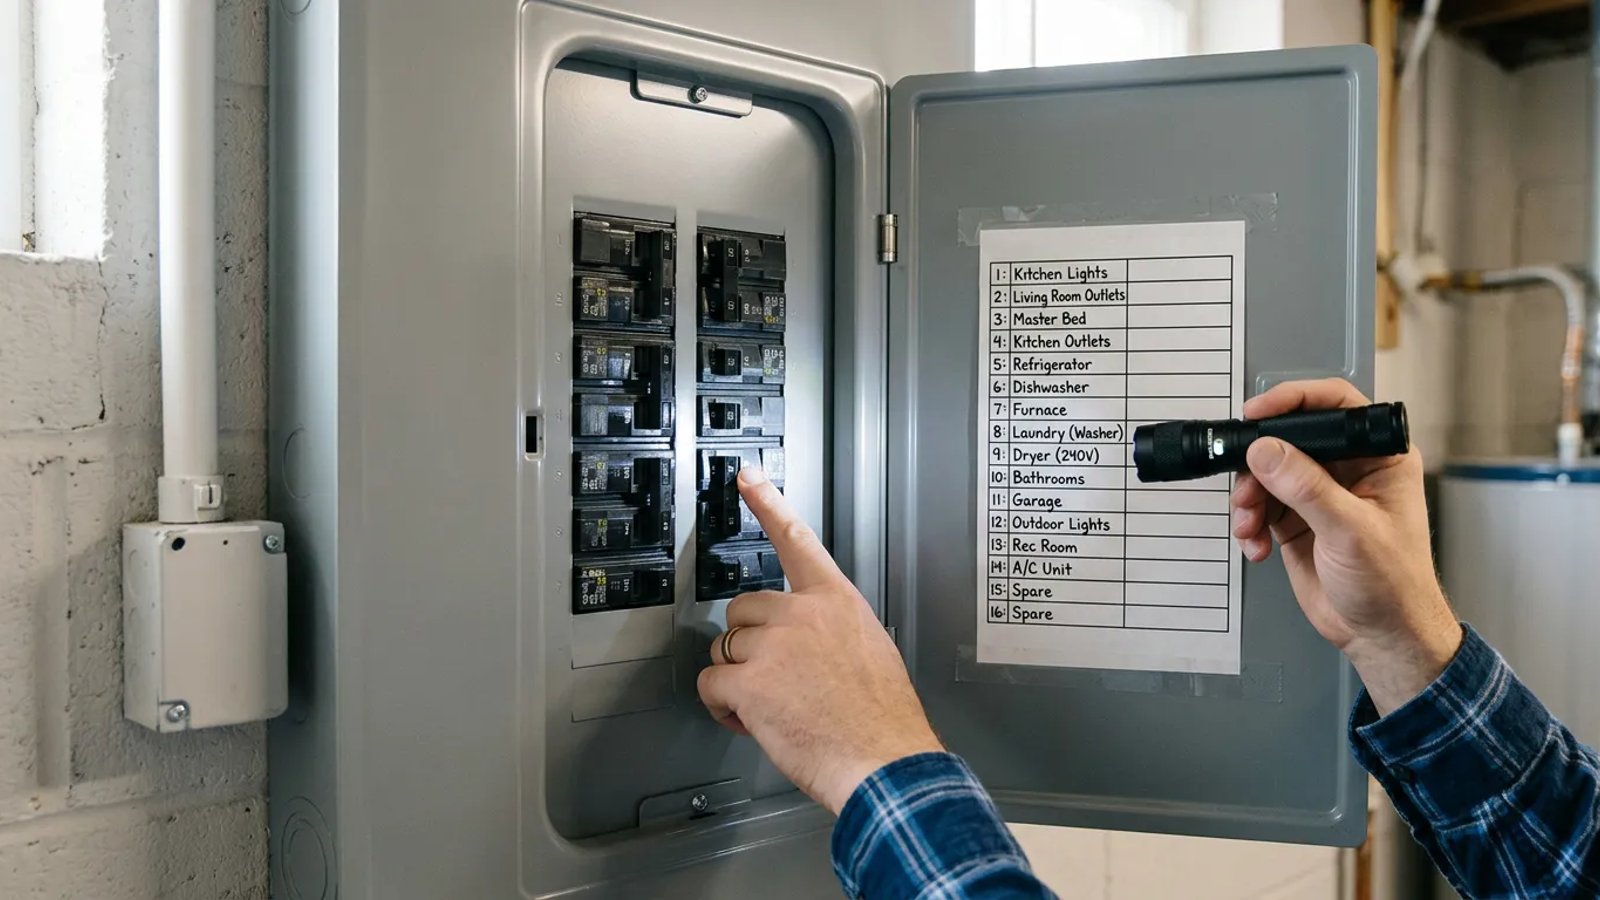
Once your notepad is full of detailed descriptions, it is time to create the final directory. Please, put down the Sharpie. Writing directly on the metal panel next to the breakers is a messy habit that leaves no room for future updates.
Instead, look at the inside of the panel door. Most panels have a paper directory card housed in a plastic sleeve. If yours is missing, torn, or covered in faded pencil, you have a few better options.
The best method is to open a spreadsheet on your computer. Create two columns representing the left and right sides of your panel, and number the rows to match the breaker numbers stamped into the metal cover. Type out your detailed descriptions (e.g., "15A - Master Bed Outlets & Hall Light"). Print it out, cut it to size, and tape it securely to the inside of the panel door using clear packing tape.
A printed spreadsheet or a clean label-maker sticker is the difference between a professional-looking panel and a confusing, scribbled mess.
If you prefer, a handheld label maker (like a Brother P-Touch) using 1/2-inch white tape with black text works beautifully. You can place the stickers directly on the metal plate adjacent to each breaker, provided the surface is clean and dry. Just ensure you use a clear, readable font.
Red Flags: When to Stop and Call an Electrician
While mapping your panel is a safe, low-risk activity since you are only touching the plastic breaker switches, the panel itself is the heart of your home's electrical system. While you have the door open and are paying close attention to it, you might spot signs of underlying trouble.
Pay attention to how the breakers feel and sound. A very faint hum from a breaker under heavy load can be normal, but a loud, aggressive buzzing or crackling sound is a sign of arcing electricity. This is dangerous and requires immediate professional attention.
Similarly, gently touch the plastic face of the breakers. They should be room temperature or only slightly warm. If a breaker is hot to the touch, it is failing or the circuit is dangerously overloaded. Look closely at the metal panel cover surrounding the breakers for any brown scorch marks or melted plastic.
Taking the time to accurately map and label your electrical panel is one of the highest-value, lowest-cost home maintenance tasks you can perform. It costs almost nothing, requires no special skills, and transforms a confusing metal box into an organized, safe system. The next time a storm knocks out a circuit or you decide to upgrade your dining room chandelier, you will be incredibly grateful you took the time to do this right.