Ceiling Fan Clicking Noise? How to Stop the Wobble Fast
Stop the annoying clicking and dangerous wobble of your ceiling fan. Learn how to diagnose loose hardware, check for warped blades, and use a balancing kit.
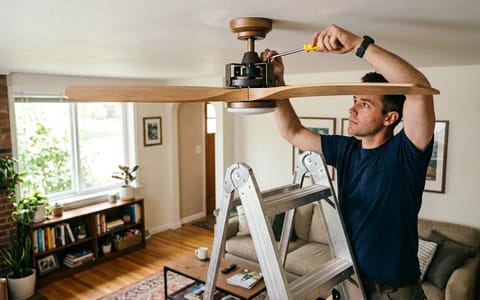
As the days get warmer and early summer approaches, it is time to flip the switch on your ceiling fans for the first time in months. But instead of a quiet, cooling breeze, you are met with a rhythmic, annoying ceiling fan clicking noise and a fixture that shakes like it is about to take flight. A wobbling fan is not just an irritating distraction; if left unchecked, the excess vibration can loosen the mounting hardware and create a real safety hazard.
Last summer, I dealt with a fan in my guest room that clicked so loudly it kept visitors awake. The wobble was so severe I worried the whole unit would rip out of the drywall. After 15 minutes of troubleshooting with a basic step ladder and a Phillips-head screwdriver, the room was silent again. Most of the time, fixing a noisy fan requires zero replacement parts and minimal DIY experience.
What Causes a Ceiling Fan Clicking Noise?
Before you start taking things apart, it helps to understand the physics of your fan. A ceiling fan operates on precise balance. The motor spins a heavy central hub, and the blades extend outward to catch the air. If one blade is slightly heavier, sitting at a different angle, or loosely attached, even by a fraction of an inch, the entire center of gravity shifts off the axis.
This imbalance causes the motor housing to sway. As the housing sways, parts that are supposed to be stationary rub against each other. That annoying click is usually metal-on-metal or plastic-on-metal contact happening once per revolution. The most common culprits are loose blade iron screws, a warped wooden blade, an unseated ceiling canopy, or rattling glass shades on the light kit.
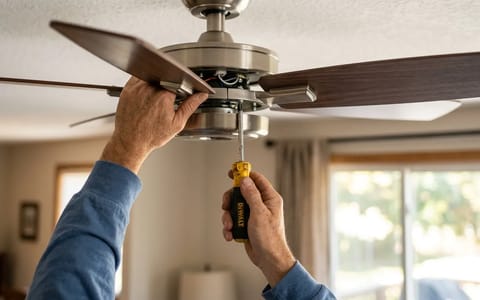
To fix it, you need to systematically eliminate the loose points. Grab a sturdy step ladder, a Phillips-head screwdriver, a damp microfiber cloth, and a standard tape measure.
Step 1: Clean and Tighten the Hardware
The simplest and most common fix for a clicking fan is tightening the screws. In my experience, this resolves about 70% of clicking fan issues. Over years of use, the microscopic vibrations of the motor cause threaded screws to slowly back out. Also, a thick layer of dust on top of the blades can actually weigh them down unevenly.
Start by wiping down the top and bottom of each blade with a damp cloth. Once clean, follow this tightening sequence to ensure every connection is solid:
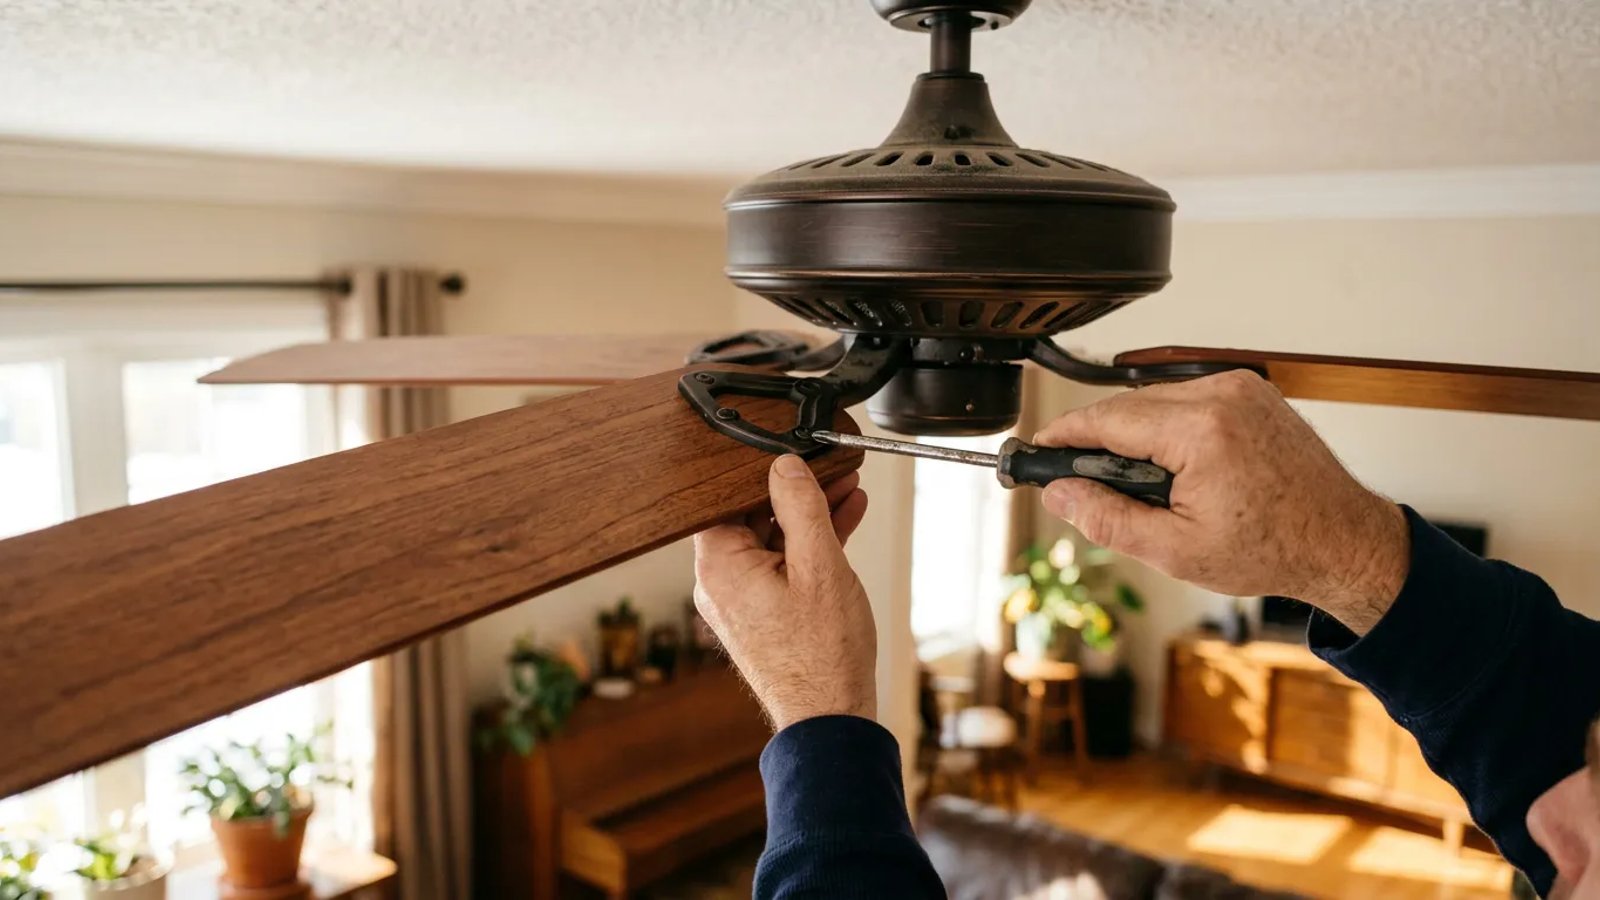
- Tighten the blade to the iron. The blade iron is the metal bracket holding the wooden blade to the motor. There are usually three screws connecting the wood to the metal. Snug them down firmly, but do not overtighten and strip the wood.
- Tighten the iron to the motor. Follow the bracket to where it meets the motor housing. You will usually find two heavy-duty screws here. Tighten these aggressively. This is the most common location for a wobble to originate.
- Check the motor housing screws. Look around the central motor housing for any exposed casing screws. Give each one a quarter-turn to ensure the casing is tightly sealed.
How Do You Test for Warped Blades?
If every screw is tight but the fan still wobbles and clicks, you likely have a warped blade or a bent blade iron. Wood and composite blades can warp over time due to humidity changes, especially in bathrooms, kitchens, or outdoor patios.
You do not need a specialized tool to check for this; a standard tape measure works perfectly. Here is how to measure blade alignment:
Hold your tape measure vertically against the ceiling, directly above the tip of one blade. Note the exact measurement from the ceiling to the top edge of the blade tip. Manually rotate the fan so the next blade comes into the exact same position. Measure again. Repeat this for all blades.
All blades should measure within 1/4 inch of each other. If one blade is significantly higher or lower, the blade is warped or the metal iron is bent. You can attempt to gently bend the metal iron back into alignment by pressing up or down on it. If the wood itself is severely warped, you will need to order a set of replacement blades from the manufacturer.
Step 2: Secure the Canopy and Light Kit
Sometimes the blades are perfectly balanced, but the clicking noise persists. In this case, the noise is usually coming from the accessories attached to the motor.
First, inspect the light kit at the bottom of the fan. If your fan has glass shades, check the small thumb screws holding the glass in place. The vibration of the motor can cause these screws to loosen, allowing the glass to rattle against the metal housing. Tighten the thumb screws by hand—do not use pliers, or you risk cracking the glass. Also, check that the lightbulbs are screwed in securely.
Next, look at the canopy at the top of the downrod, right against the ceiling. The canopy hides the mounting bracket and wiring. If the screws holding the canopy cover are loose, the metal cover can slip down and rub against the spinning downrod, creating a rhythmic scrape or click. Push the canopy flush against the ceiling and tighten the side screws.
A wobbling fan is not just an irritating distraction; if left unchecked, the excess vibration can loosen the mounting hardware and create a real safety hazard.
Step 3: How to Balance a Wobbling Ceiling Fan
If you have tightened every screw, confirmed the blades are straight, and secured the accessories, but a minor wobble remains, you need a ceiling fan balancing kit. You can pick one up for about $5 at any hardware store. The kit contains a plastic U-shaped clip and several adhesive lead weights.
Balancing a fan is a process of trial and error. You are essentially trying to find the lightest blade and add weight to it so it matches the others.
Start by sliding the plastic clip onto the trailing edge of one blade, positioning it halfway between the motor and the blade tip. Turn the fan on high speed and observe the wobble. Turn the fan off, move the clip to the next blade, and test again. Repeat this until you find the blade that, when clipped, significantly reduces the wobble.
Once you locate the problem blade, you need to fine-tune the placement. Slide the clip outward toward the tip, test the fan, then slide it inward toward the motor and test again. Find the exact spot on that specific blade where the fan spins the smoothest.
Finally, peel the backing off one of the adhesive weights. Stick it to the top center of the blade, directly in line with where the plastic clip was sitting. Press it down firmly, remove the plastic clip, and test the fan one last time. It should now spin quietly and smoothly.
A ceiling fan should be seen and felt, but rarely heard. By taking 20 minutes to tighten the hardware, measure the alignment, and balance the blades, you protect the fixture from premature wear and tear. You will also reclaim the peace and quiet of your home, ensuring your rooms stay comfortably cool all season long.
- Tighten every screw on the fan, starting from the blades and working your way up to the motor housing.
- Clean your fan blades thoroughly before troubleshooting; heavy dust accumulation alone can cause an imbalance.
- Measure the distance from the ceiling to each blade tip; a variance of more than 1/4 inch indicates a bent bracket or warped blade.
- Check the light kit's glass shades, as loose thumb screws are a major source of rattling and clicking.
- Use a balancing clip to find the light spot on your fan, then apply the adhesive weight to permanently smooth out the spin.