Clothes Still Damp? How to Clean Your Dryer Moisture Sensor
If your dryer shuts off while clothes are still damp, a clogged vent might not be the issue. Learn how a simple 5-minute cleaning of your dryer's moisture sensor can fix the problem and lower your energy bill.
You pull a heavy load of towels out of the dryer, expecting them to be warm, fluffy, and ready to fold. Instead, they are lukewarm and distinctly damp. Frustrating, right? You toss them back in, dial up another 45-minute cycle, and hope for the best. If this is a regular occurrence in your laundry room, you might assume your appliance is on its last legs or that you have a severe mechanical failure on your hands.
If you are searching "dryer: clothes still damp" in sheer frustration, you are not alone. A damp dryer is one of the most common household complaints. Before you start shopping for a replacement or calling in an expensive appliance repair technician, there is a simple, five-minute DIY fix you need to try. While a clogged exhaust vent is a famous culprit for poor drying performance, there is another highly common issue that causes a dryer to shut off prematurely. To get your laundry routine back on track, you likely just need to learn how to clean your dryer sensor.
Symptoms of Dirty Moisture Sensors
How do you know if your specific problem is a dirty sensor and not a broken motor? The symptoms of dirty moisture sensors are highly predictable. First, your dryer leaves clothes still damp at the end of an "auto-dry" cycle, but the garments dry perfectly fine if you manually set a "timed dry" cycle for 60 minutes. Second, you might notice the digital timer on your machine acting erratically. For example, the display might say 45 minutes, but suddenly drop to 5 minutes and shut off just a few minutes after you press start. You may also notice that heavy items like jeans remain soaking wet while lighter t-shirts are bone dry. If these scenarios sound familiar, your sensor is the likely culprit.
How the Auto-Dry Function Actually Works
To understand why your dryer is failing, it helps to understand how it operates. Decades ago, dryers relied entirely on manual timers. You set the dial for 60 minutes, and the machine blasted heat for exactly 60 minutes, regardless of whether the clothes were dry in 20 minutes or still soaking wet an hour later. This was incredibly inefficient and often resulted in scorched fabrics and wasted electricity.
Modern dryers are much smarter. They utilize an "auto-dry" or "sensor dry" feature that detects the actual moisture level of the garments tumbling inside the drum. This system relies on two small metal strips known as the moisture sensor bars. These bars conduct a very low-voltage electrical current.
When wet, heavy clothes tumble around the drum, they constantly brush against these metal bars. Because water is an excellent conductor of electricity, the moisture in the fabric bridges the gap between the two bars, completing the electrical circuit. As the clothes dry out, they lose their moisture and their electrical conductivity drops. When the clothes are finally dry, they can no longer conduct the current between the bars. The dryer's control board senses this continuous break in the circuit, determines the laundry is dry, and signals the machine to shut off.
The Invisible Culprit: Dryer Sheets and Fabric Softener
So, why does this clever system suddenly stop working? The answer is almost always sitting right on top of your washing machine: liquid fabric softener and dryer sheets. While these products make your clothes smell like a spring meadow and reduce static cling, they are notoriously hard on your laundry appliances. With laundry product concentrations reaching all-time highs as of 2026, residue buildup is happening faster than ever before.
Dryer sheets are coated in a layer of stearic acid, animal fats, and synthetic conditioning agents. When exposed to the high heat of the dryer drum, these compounds melt and transfer onto your clothing. Unfortunately, they also transfer onto the inside of the dryer drum itself.
A clear, waxy film from dryer sheets tricks your machine into thinking the clothes are dry, causing the cycle to end while the laundry is still damp.
Over time, a clear, invisible, waxy film builds up on the metal moisture sensor bars. This wax is an electrical insulator. Once the bars are heavily coated, the wet clothes can no longer make physical contact with the bare metal. Because the wax blocks the electrical current, the dryer's computer assumes the clothes must be perfectly dry. The machine cheerfully shuts off after 15 or 20 minutes, leaving you with a pile of damp, musty laundry.
A few years ago, I almost bought a brand-new $800 dryer because my old one kept leaving heavy loads of jeans and towels damp. A retired appliance tech told me to try a cotton ball and some isopropyl alcohol first. Five minutes later, the machine worked like it had just rolled off the assembly line. It is amazing how much trouble a microscopic layer of wax can cause.
How to Locate Your Dryer Moisture Sensor Bars Inside the Drum
Before you can clean the sensor, you have to find it. Fortunately, manufacturers usually place these sensors in very accessible locations. You will be looking for two parallel, curved strips of metal. They are typically about two to three inches long and sit roughly half an inch apart.
On most common front-loading and top-loading dryer brands (like Whirlpool, Maytag, and Kenmore), the dryer moisture sensor bars inside drum are located on the front bulkhead. Open the dryer door and look just inside the drum, directly next to or slightly below the lint screen housing. You might have to stick your head in slightly and look back toward yourself to spot them.
On some other models (frequently LG and Samsung), the sensor bars are located on the rear wall of the drum, specifically on the back bulkhead near the heating grates. If you cannot find them in either location, consult your owner's manual or search your specific model number online to pinpoint their exact placement.
How to Clean Moisture Balance Sensors
If you own an LG or Samsung dryer, you might notice the auto-dry function is branded as a "Moisture Balance" or "Sensor Dry" system. Homeowners frequently search for how to clean moisture balance sensors, assuming this requires a specialized technique. The good news is that a moisture balance system uses the exact same metal sensor bars as any other modern dryer. You can locate these bars near the lint filter or on the back wall of the drum, and you will clean them using the standard rubbing alcohol method outlined below.
Dryer Moisture Sensor, Rubbing Alcohol, and Manufacturer Recommendations
Homeowners often wonder if using strong solvents is safe for their appliances. If you are looking for dryer moisture sensor rubbing alcohol manufacturer guidelines, you will find that almost all major appliance brands endorse this exact method. As of 2026, companies like Whirlpool, LG, and Samsung officially recommend using a small amount of 91% isopropyl rubbing alcohol applied to a soft cloth to clean the sensor bars.
Manufacturers prefer rubbing alcohol because it cuts through the waxy stearic acid left by dryer sheets and evaporates in seconds, leaving zero residue behind. Using harsh household chemical cleaners can actually void your appliance warranty. If you do not have rubbing alcohol on hand, manufacturer manuals suggest using a single drop of mild liquid dish soap on a damp cloth, followed immediately by a thorough wipe with a dry towel.
Step-by-Step Guide to Clean Your Dryer Moisture Sensor
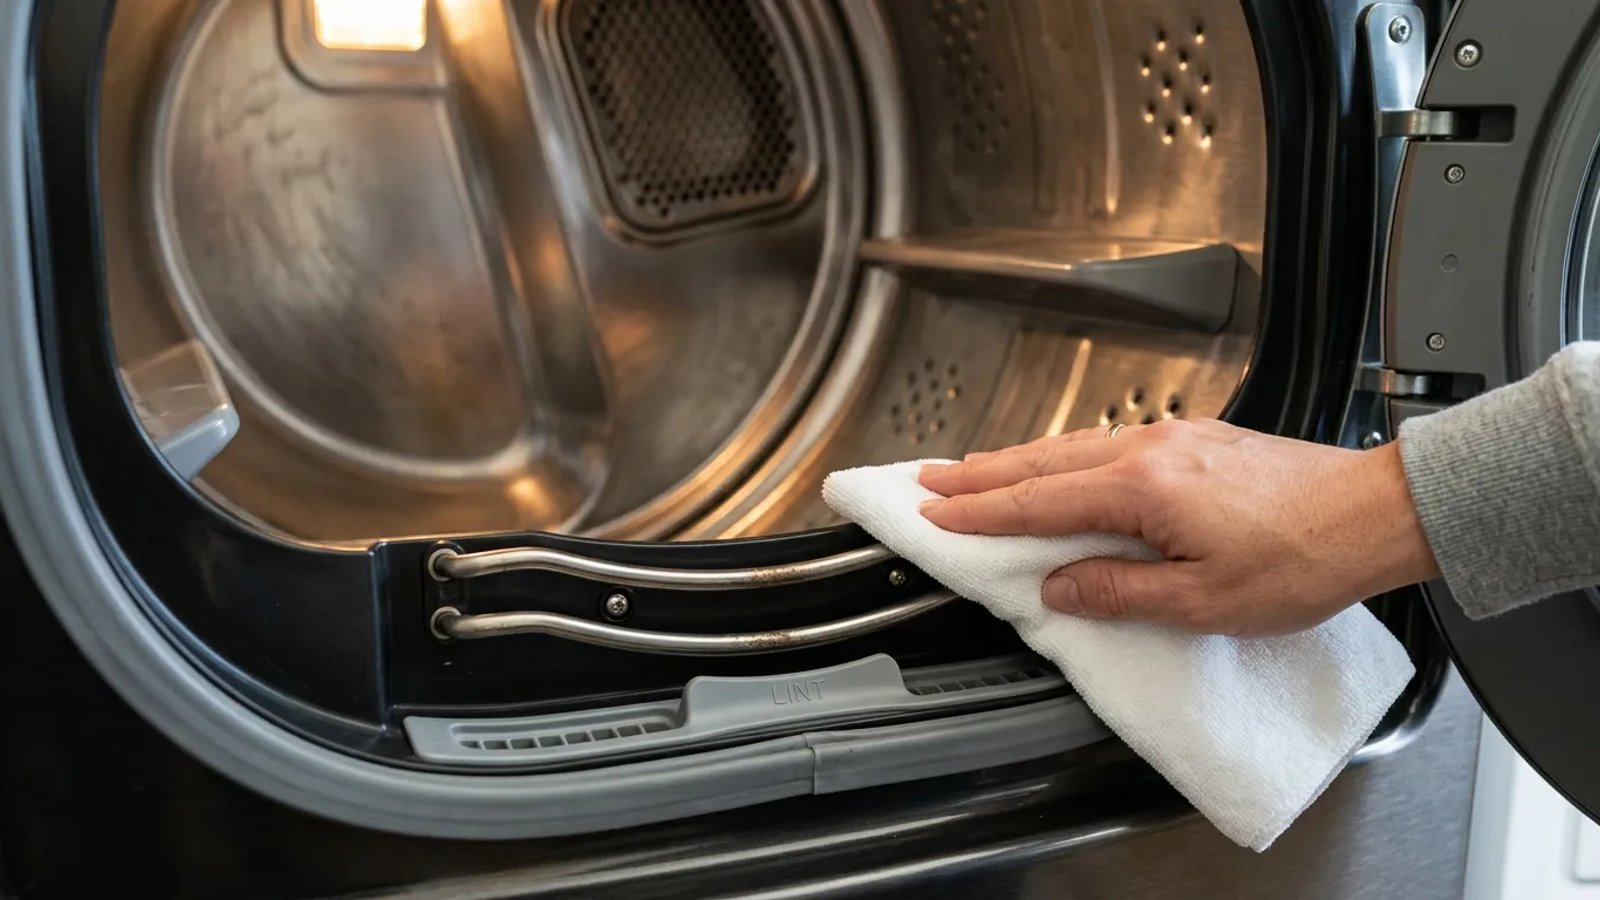
Cleaning the sensor is one of the easiest home maintenance tasks you can perform. You do not need any specialized tools, and you do not need to take the machine apart. Grab a bottle of rubbing alcohol (91% isopropyl alcohol works best because it evaporates quickly and cuts through grease) and a clean microfiber cloth or a handful of cotton balls. When you clean your dryer sensor with alcohol, you rapidly dissolve the invisible barrier preventing your machine from reading moisture levels. Here is exactly how to clean dryer sensor bars safely and effectively.
- Unplug the appliance. Safety always comes first. Disconnect the dryer from the 240-volt power source to ensure there is no risk of accidental startup or mild shock.
- Apply the alcohol. Dampen your microfiber cloth or cotton ball generously with the isopropyl alcohol. Do not pour the alcohol directly onto the sensor bars, as you do not want liquid seeping behind the drum housing and damaging the internal wiring.
- Scrub the sensor bars. Rub the damp cloth firmly back and forth across the two metal strips. When you clean dryer moisture sensor bars, you likely will not see the wax coming off, but you might feel the surface transition from slightly tacky to smooth and slick. Spend about 30 to 60 seconds scrubbing the bars thoroughly to ensure all dirty moisture sensors are completely clear.
- Wipe down the surrounding area. While you are at it, use the alcohol cloth to wipe down the plastic housing immediately surrounding the bars, as lint and wax often accumulate there as well.
- Dry the sensors. Take a dry section of your microfiber cloth and buff the metal bars until they are completely dry and shiny.
If you have been heavily using dryer sheets for years without cleaning the machine, the wax might be incredibly stubborn. If alcohol alone isn't cutting it, you can take a dry, rough scrubbing sponge and gently buff the metal bars to break the waxy seal, then follow up with the alcohol wipe. Never use aggressive sandpaper or sharp metal tools, as deeply scratching the bars can permanently damage them.
The Financial Impact of Ignoring a Dirty Sensor
Running a dryer that constantly shuts off prematurely isn't just an annoyance; it is a direct drain on your wallet. Clothes dryers are among the most energy-hungry appliances in your home. A typical electric dryer draws anywhere from 3,000 to 5,000 watts of power while the heating element is active. As of 2026, the national average residential electricity rate hovers around 17 cents per kilowatt-hour, meaning those wasted cycles add up fast.
When your sensor fails and you have to run the machine for a second or third 40-minute cycle to finish the job, you are doubling your energy consumption for that load of laundry. Over the course of a year, those extra cycles can add a significant amount to your monthly electric bill. Furthermore, repeatedly exposing your clothing to unnecessary tumbling and heat breaks down fabric fibers faster, meaning you will have to replace your wardrobe more frequently. Considering a new baseline dryer costs between $800 and $1,200 in 2026, maintaining your current machine is the smartest financial move.
What If You Have a Condenser Dryer?
Heat pump and ventless models are incredibly popular in 2026 thanks to new energy efficiency tax rebates, but they come with their own learning curves. If you own a ventless unit and your condenser dryer clothes are still damp, you are dealing with a slightly different machine. Ventless condenser dryers and heat pump dryers extract moisture from the air and pump it into a reservoir tank or down a drain line. These machines still use moisture sensor bars inside the drum, and you should clean them using the exact same rubbing alcohol method.
However, if your condenser dryer is still leaving clothes damp after cleaning the sensor, you must also check the condenser unit itself. Pull out the heat exchanger (usually located behind a flap at the bottom left or right of the machine) and rinse the metal fins under running water to remove built-up lint. Additionally, ensure the water collection tank is fully emptied before every cycle. A full tank will automatically halt the drying process.
What About Washing Machines and Hand Dryers?
Because sensors are everywhere in modern life, we often get questions about other household and commercial fixtures. If you are wondering how to clean a washing machine moisture sensor for efficiency, the truth is that washing machines do not actually use moisture sensors. They use load size and water level sensors. To keep those functioning properly, simply run a self-clean cycle with an Affresh tablet or two cups of white vinegar once a month to remove soap scum. Similarly, if you are dealing with a commercial hand dryer sensor not working in a public restroom or garage, that is an optical infrared sensor, not a moisture sensor. You can usually fix a hand dryer by gently wiping the plastic sensor eye under the air nozzle with a damp microfiber cloth to remove dust and soap splatters. Never use rubbing alcohol on optical plastic lenses, as it can cloud the surface.
When to Call a Professional
Cleaning the moisture sensor is a highly effective fix, but it is not a magic cure-all for every dryer ailment. If you have scrubbed the sensor bars clean and your machine is still struggling to dry clothes, you need to investigate further.
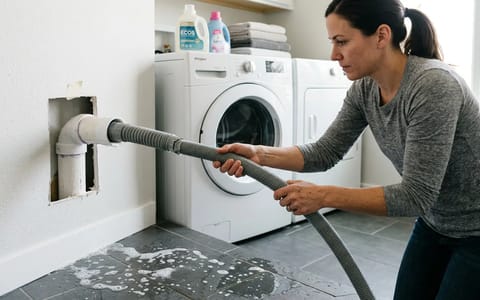
The next step is always to check your dryer exhaust vent. A clogged vent restricts airflow, trapping heavy, moist air inside the drum. If the moisture cannot escape the machine, the clothes will never dry, regardless of how perfectly the sensor is functioning. Disconnect the flexible transition hose from the back of the dryer and use a vacuum to clear out any lint blockages.
Preventive Maintenance: Ditching the Wax
The best way to fix a dirty moisture sensor is to prevent it from getting dirty in the first place. If you want to keep your dryer running at peak efficiency, it is time to reconsider your relationship with commercial fabric softeners and dryer sheets.
Consider switching to natural wool dryer balls. These dense balls of compressed wool bounce around the drum alongside your clothes. They naturally separate heavy garments, allowing hot air to circulate more efficiently, which can actually reduce your drying time by 10 to 25 percent. They also naturally soften fabrics and reduce static cling without leaving any chemical residue behind.
If you prefer liquid fabric softener in the washing machine, try substituting it with half a cup of plain white vinegar during the rinse cycle. The vinegar strips away detergent residue, naturally softening the clothes, and the vinegar smell completely dissipates during the drying process.
Taking five minutes today to wipe down those little metal bars can save you from the endless frustration of damp towels and repeated cycles. It is a completely free maintenance task that restores your appliance's efficiency, protects your clothing, and keeps your household running smoothly.