Garbage Disposal Humming? How to Safely Unjam It Fast
Is your garbage disposal humming but not spinning? Don't panic. Here is a step-by-step, safe method to unjam the flywheel and reset your motor in under five minutes.
You are standing at the kitchen sink, finishing up the dishes. You flip the wall switch to grind up the last few food scraps, but instead of the familiar, aggressive grinding noise, you hear an angry, menacing electrical buzz. You flip the switch off, try again, and get the same result. The sink is backing up, and you are left wondering if you just destroyed a major kitchen appliance.
Take a deep breath. A garbage disposal humming is actually a good sign. There is nothing quite as jarring as expecting the loud grind of a disposal and getting an angry electronic buzz instead, but in my experience, that noise simply means the unit is receiving electricity. The motor is trying its hardest to spin, but the internal grinding plate—called the flywheel—is physically stuck. You do not need a plumber, and you probably do not need a new disposal. You just need to clear the jam.
Why is My Garbage Disposal Humming?
To fix the problem, it helps to understand what is happening under your sink. Inside the dark chamber of your disposal sits a heavy metal disk called a flywheel. Attached to this flywheel are two small metal lugs called impellers. When you turn the unit on, the motor spins the flywheel at roughly 2,000 RPM, and centrifugal force pushes food waste against a stationary grinding ring, pulverizing it so it can wash down the drain.
Because the tolerances between the flywheel and the grinding ring are very tight, hard objects can easily get wedged between them. This instantly stops the flywheel from turning. The motor, however, is still trying to spin. The electrical current continues to flow into the stalled motor, creating that loud humming noise.
Last year, I spent an hour taking apart a friend's plumbing because their disposal was locked up tight, only to find a single, rock-hard cherry pit wedged firmly under the impeller blade. It takes very little to stop these machines in their tracks.
Step 1: Disconnect the Power
Before you stick any tools—or heaven forbid, your hands—anywhere near the disposal, you must kill the power. Relying on the wall switch is not enough, as someone could accidentally bump it while you are working.
Open the cabinet doors under your sink and look for the disposal's power cord. Most modern units plug directly into a standard wall outlet located right under the sink. Simply pull the plug. If your disposal is hardwired directly into the wall (common in older homes), you will need to go to your main electrical panel—typically in your basement or garage—and flip the specific breaker (often labeled "Kitchen Outlets" or "Disposal") that controls the kitchen sink area. Test the wall switch to confirm the power is completely dead before proceeding.
The Allen Wrench Fix: The Bottom-Up Approach
Almost all major disposal brands, including InSinkErator, design their units with a manual override socket specifically for this exact problem. You will need a 1/4-inch hex wrench, commonly known as an Allen wrench. Disposals usually come with a small, silver, Z-shaped wrench for this purpose, but any standard 1/4-inch Allen wrench from your toolbox will work perfectly. If you don't have one, you can buy a single wrench at any hardware store for about $3 to $5.
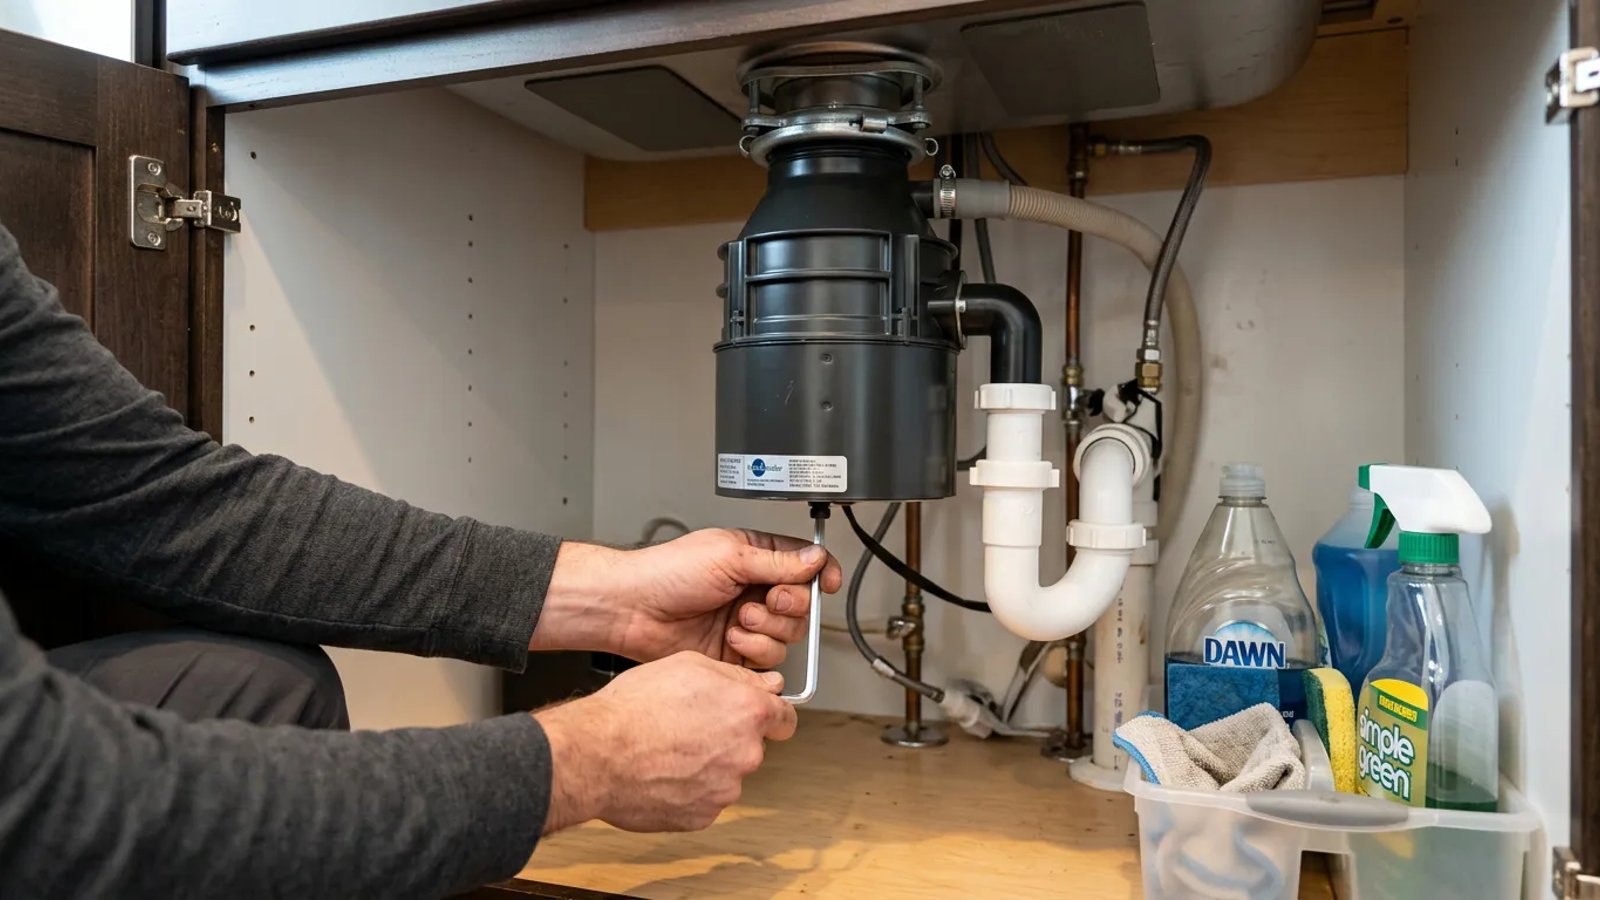
- Locate the hex socket. Look directly at the bottom-center of the disposal unit under the sink. You will see a small, recessed hexagonal hole. This socket connects directly to the bottom of the motor shaft.
- Insert the wrench. Push your 1/4-inch Allen wrench firmly up into the socket.
- Crank it back and forth. Try to turn the wrench clockwise, then counter-clockwise. At first, it will likely feel completely seized. Apply firm pressure and rock it back and forth. You are using mechanical leverage to force the flywheel to crush or dislodge whatever is wedged inside.
- Spin freely. Once the jam breaks, the wrench will suddenly turn easily. Spin it in a few complete circles in both directions to ensure the flywheel is completely clear.
- Remove the tool. Pull the wrench out of the socket before moving on to the next step.
The Allen wrench method is the safest and most effective way to clear a jammed disposal without risking damage to the internal impellers.
The Wooden Spoon Trick: The Top-Down Alternative
What if you don't own an Allen wrench, or you have an off-brand disposal that lacks a bottom hex socket? You can tackle the jam from the top down using items already in your kitchen. The goal is the same: apply leverage to the flywheel to force it to rotate.
Grab a sturdy wooden spoon or a wooden broom handle. Never use metal tools like screwdrivers or pry bars down the drain, as the hard metal can bend the impeller blades or crack the disposal housing, ruining the unit.
Shine a flashlight down the sink drain so you can see the metal plate and the raised impeller lugs. Insert the wooden handle down through the rubber splash guard. Rest the thick end of the handle against one of the impeller lugs. Using the side of the sink drain as a fulcrum, firmly push the top of the handle to lever the impeller counter-clockwise. If it won't budge, try pushing it clockwise. Once the plate breaks free, use the spoon to spin it a few times to ensure the obstruction is gone.
How to Reset the Disposal
Once you have physically unjammed the flywheel, you might find that the disposal still won't turn on. This is normal. When the motor stalled, it likely drew too much electrical current and tripped the unit's internal thermal overload protector. This is a built-in safety feature designed to prevent electrical fires.
To reset it, look at the bottom of the disposal again. Somewhere near the outer edge, you will find a small, square red button. If the internal breaker has tripped, this button will be popped out slightly. Press it firmly back in until you feel it click. If it won't stay pushed in, the motor is still too hot. Wait another 10 to 15 minutes for it to cool down, then try again.
Once the button is reset, plug the unit back into the wall or flip the main breaker back on. Turn on the cold water tap, then flip the wall switch. Your disposal should roar back to life with its normal grinding sound.
Prevention: Keep the Jam Away
The best way to fix a jammed garbage disposal is to prevent it from jamming in the first place. These units are designed to handle soft food scraps, not heavy-duty waste. Being mindful of what goes down the drain will dramatically extend the life of your appliance.
Avoid putting fibrous, stringy vegetables like celery, asparagus, or corn husks down the sink. The tough fibers wrap around the impeller blades like rope. Similarly, keep coffee grounds and eggshells out of the disposal. While they might seem fragile, they grind down into a thick, sandy paste that easily packs into the tight spaces around the grinding ring, acting like cement.
Run the cold water for at least 15 seconds after you turn the disposal off. This ensures all the ground-up particles are fully flushed out of the disposal chamber and through your P-trap.
Dealing with a humming disposal can be startling, but it is rarely a catastrophe. By keeping a 1/4-inch Allen wrench handy and knowing exactly where that bottom socket is located, you can resolve the issue safely and get your kitchen sink back in working order in just a few minutes.
- Never leave a jammed, humming disposal turned on, as it can quickly destroy the electrical motor.
- Always disconnect power at the plug or breaker before attempting any plumbing repairs.
- A standard 1/4-inch hex wrench is the only tool you need for the manufacturer-approved fix.
- Avoid putting fibrous vegetables, eggshells, or coffee grounds down the drain to prevent future jams.