Kitchen Sink Draining Slowly? How to Clear the Clog Fast
A slow-draining kitchen sink is frustrating, but you don't need harsh chemicals to fix it. Learn a simple, three-step DIY process to clear grease and food blockages safely.
You just finished cooking a heavy meal, the plates are stacked, and you turn on the tap to wash up. Within seconds, a pool of murky, gray dishwater is creeping up the sides of the basin. Finding your kitchen sink draining slowly is an incredibly common homeowner headache, and the instinct is usually to panic or reach for the nearest bottle of industrial-strength drain cleaner. Stop right there. Pouring harsh chemicals down your pipes is often the worst thing you can do for your plumbing system.
Chemical drain cleaners rely on volatile, heat-generating reactions to burn through blockages. While that sounds effective in theory, that intense heat can warp plastic PVC pipes, eat away at the rubber gaskets sealing your joints, and accelerate corrosion in older metal plumbing. Worse, if the chemical fails to breach the clog, you are left with a basin full of toxic, caustic water that makes fixing the problem manually dangerous.
Instead, we are going to walk through exactly how to clear this blockage safely, using simple physics and tools you likely already have in your house. By following a progressive, step-by-step approach, you can restore your sink to perfect working order in under 15 minutes, saving yourself a frustrating evening and a costly $150 plumber call-out fee.
Understanding Why Your Sink is Backing Up
Before we start fixing the problem, it helps to understand what is actually happening underneath your countertop. If you open your base cabinet and look inside, you will see a curved piece of pipe that dips down and comes back up before heading into the wall. This is called the P-trap. Its primary job is to hold a small amount of water at all times, which acts as a plug to prevent foul-smelling sewer gases from rising out of the drain and into your kitchen.
However, because of its curved shape, the P-trap is also the number one spot for clogs to form. When you wash dishes, liquid fats, oils, and grease wash down the drain. As soon as those fats hit the cooler pipes—usually around 60 to 70 degrees Fahrenheit—they congeal into a sticky, solid paste along the pipe walls. Once that sticky layer forms, it acts like flypaper for other debris. Coffee grounds, tiny scraps of food, rice grains, and eggshells stick to the grease. Over weeks and months, this creates a bottleneck.
When you notice your kitchen sink draining slowly, it means this bottleneck has grown large enough to restrict water flow, but a tiny channel still exists. This is the perfect time to act, before that tiny channel closes up completely.
Step 1: The Boiling Water and Baking Soda Flush
Because kitchen clogs are almost always organic matter held together by congealed grease, the most logical first step is to melt the grease. We do not need heavy machinery for this; we just need targeted heat and a mild abrasive. This method is incredibly effective for partial clogs and slow drains.
First, wait for the standing water in the sink basin to drain completely. If it takes an hour, let it take an hour. Once the basin is empty, pour half a cup of dry baking soda directly down the drain. Try to get as much of it into the actual drain hole as possible. Baking soda is a mild alkali that helps break down organic matter and acts as a gentle scrubbing agent.
Next, bring a full kettle of water to a rolling boil—around 212 degrees Fahrenheit. Slowly and carefully pour the boiling water directly down the drain over the baking soda. Pour in stages, giving the hot water a few seconds to work its way into the clog. The intense heat of the water will melt the congealed fats binding the clog together, while the baking soda helps to scrub the pipe walls clean.
Let the mixture sit for about five minutes, then run your hot water tap at full blast to see if the flow has improved. If the sink is still draining slowly, move on to the next step.
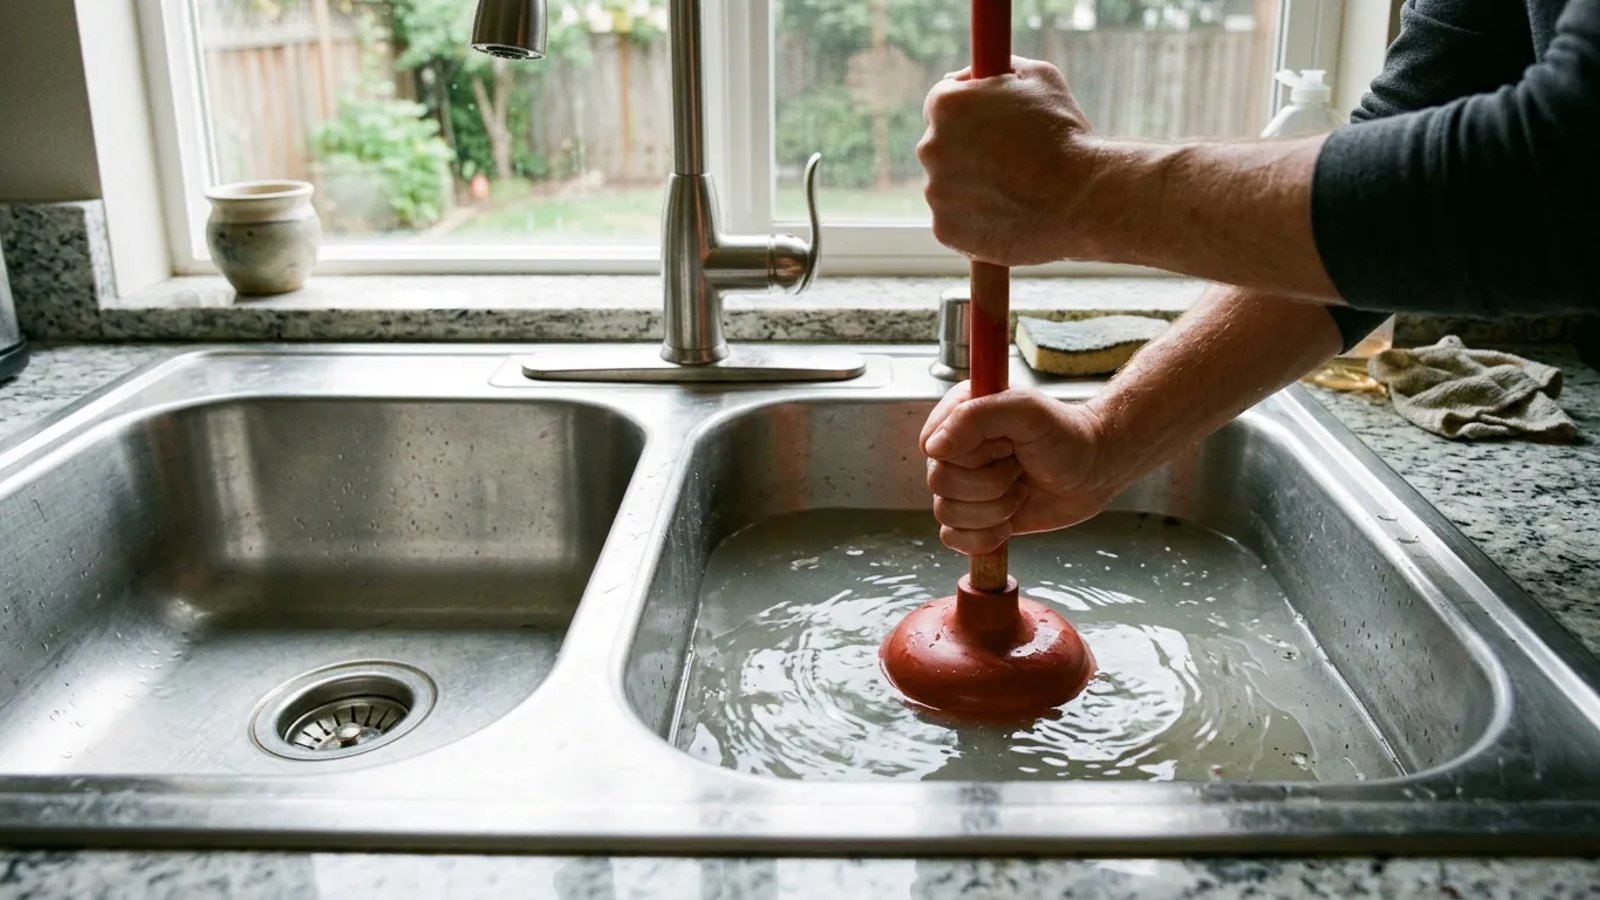
Step 2: How to Plunge a Double-Basin Sink Correctly
If melting the grease didn't work, we need to introduce physical force. Plunging uses hydraulic pressure to force the blockage back and forth until it breaks apart. However, plunging a kitchen sink is where most DIYers make a critical mistake, especially if they have a double-basin sink.
Your plumbing system is connected. If you push down on one drain in a double sink, the air and water pressure will simply shoot up and out of the second drain, completely bypassing the clog. To make a plunger work, you must create an airtight seal.
Take a wet dishcloth or rag and stuff it tightly into the second drain opening. If your sink has an overflow hole, plug that with a wet rag as well. You need all the pressure directed downward toward the P-trap.
The secret to effective plunging isn't just pushing hard; it's maintaining an airtight seal so the water does the heavy lifting.
Ensure you are using the correct type of plunger. You want a standard cup plunger with a flat rubber bottom, not a flange plunger (the kind with a narrower rubber flap protruding from the bottom, which is designed for toilets). Place the cup plunger over the drain, ensuring the rubber rim makes full contact with the sink basin. Run a few inches of water into the sink—enough to cover the lip of the plunger. Water does not compress like air does, so plunging with water in the sink transfers significantly more force to the clog.
Pump the plunger forcefully straight up and down 10 to 15 times, keeping the seal tight against the sink basin. On your final pump, pull the plunger up sharply to break the seal. If the water suddenly swirls and rushes down the drain, you have successfully dislodged the blockage. Run hot tap water for a full two minutes to flush the broken debris out to the main sewer line.
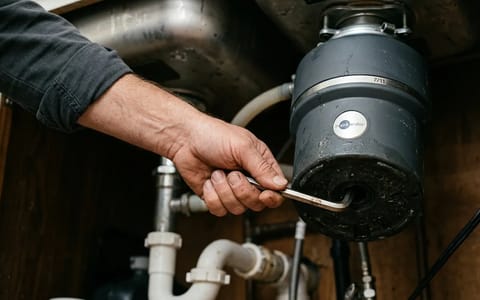
Step 3: Removing the P-Trap by Hand
If boiling water and plunging haven't solved the issue, the clog is likely a solid, compacted mass lodged tightly in the P-trap. Fortunately, modern plumbing is designed to be taken apart easily for exactly this reason. You do not need to be a contractor to do this. You just need a bucket, a towel, and perhaps a pair of slip-joint pliers if the fittings are tight.
I remember the first time I had to do this in my own home. I was nervous about causing a leak, but once I realized the P-trap is just held together by threaded plastic nuts, it took away all the intimidation. Plus, that same curve in the pipe once saved my wife's wedding ring from being lost to the city sewer system.
With your area prepped, follow these steps to manually clear the pipe:
- Locate the slip nuts. Find the two threaded rings holding the curved P-trap to the straight pipes above and behind it. These are usually made of white or black PVC plastic.
- Loosen the nuts. Turn the nuts counterclockwise to loosen them. In most cases, you can do this by hand. If they are stuck, gently use slip-joint pliers, being careful not to crack the plastic.
- Catch the water. As you loosen the nuts, the standing water trapped in the pipe will begin to leak out into your bucket. This is normal. Let it drain completely.
- Remove the trap. Once the nuts are fully unthreaded, pull the curved piece of pipe straight down and out. Take it to a trash can and use a wooden skewer, a butter knife, or a gloved finger to push out the compacted grease and debris.
- Clean and replace. Wash the P-trap out in a different sink or outside with a hose. Ensure the rubber or plastic washers are still in place on the pipe ends, then reattach the P-trap, hand-tightening the slip nuts securely.
Once reassembled, run the hot water tap. Check underneath the sink with a flashlight to ensure there are no drips coming from the slip nuts. If you see a drip, simply tighten the nut another quarter turn.
How to Prevent Future Kitchen Clogs
Now that your sink is draining perfectly, the goal is to keep it that way. The best defense against a slow-draining kitchen sink is a proactive offense. Prevention is incredibly simple and requires no special products.
First, change how you handle grease. Never pour cooking oil, bacon fat, or meat drippings down the drain. Instead, pour them into an old glass jar or a designated grease can. Once the grease solidifies, throw it in the household trash. Before washing greasy pots and pans, wipe them out thoroughly with a paper towel to remove the heavy residue.
Second, establish a weekly maintenance routine. Once a week, squirt a generous tablespoon of grease-cutting liquid dish soap directly into the drain. Follow this with a full kettle of boiling water poured slowly down the drain. The dish soap acts as an emulsifier, binding to the minor fat deposits that have accumulated over the week, while the boiling water flushes them safely out of your plumbing system before they can solidify into a problem.
By treating your drains with a little care and knowing how to tackle minor blockages with basic household items, you can keep your kitchen plumbing flowing smoothly year-round without ever needing to rely on damaging chemicals.