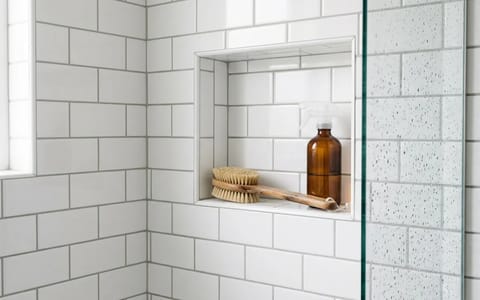
How to Clean and Seal Shower Grout (Before Leaks Start)
Discolored shower grout isn't just an eyesore—it's a sponge for water. Learn how to deep clean and apply a penetrating sealer to waterproof your tile walls and prevent costly hidden rot.
Many homeowners notice their shower grout looking dingy or taking hours to dry after a morning shower. The hidden danger here isn't just the stubborn mildew building up in the corners—it's that unsealed grout acts like a highly porous sponge. When water constantly seeps into these cement lines, it eventually bypasses the waterproofing behind the tiles, leading to costly water damage and wood rot inside your walls.
Taking the time to properly clean and seal shower grout creates an invisible, waterproof barrier. It keeps moisture out, makes weekly cleaning much easier, and protects the structural integrity of your bathroom.
How Do You Know If Your Grout Needs Sealing?
Cement-based grout is naturally porous. Without a protective layer, it absorbs water, soap scum, and body oils every time you turn on the shower. Over time, this constant saturation breaks down the grout structure and provides a perfect breeding ground for mold.
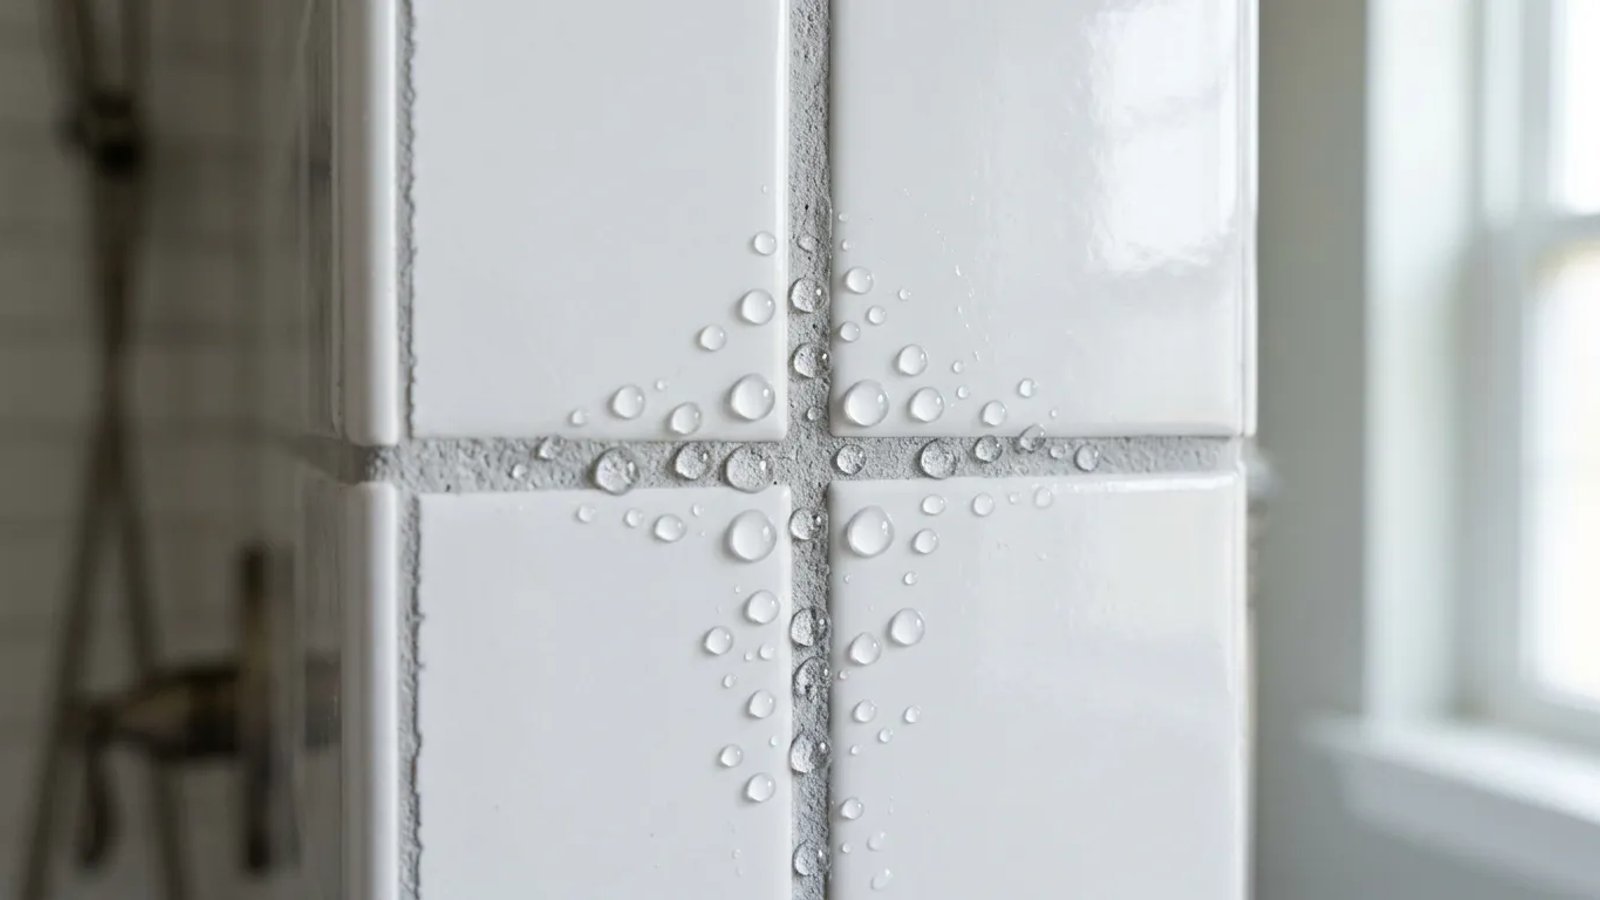
Last year, I tested the water-drop method on my own guest bathroom shower. The water soaked in so fast the grout turned dark gray in seconds. It took me about two hours on a Saturday and $25 in supplies to fix it. Now, the water beads up like rain on a freshly waxed car.
You can perform this exact same test right now. Flick a few drops of water onto a dry section of your shower grout. Watch it closely for about thirty seconds. If the water sits on the surface in a tight, round bead, your sealer is holding up. If the water flattens out and the grout line darkens as it absorbs the moisture, your protective barrier is gone.
Beyond Waterproofing: The Full Benefits of Sealed Shower Grout
Sealing your shower grout does more than just prevent water from seeping into your walls. It's a proactive step that significantly enhances the longevity, cleanliness, and aesthetic appeal of your entire bathroom.
Firstly, a properly sealed grout line becomes far more resistant to mildew and mold growth. Since moisture can't penetrate and linger, those unsightly black and pink stains have nowhere to take root. This means less scrubbing for you and a healthier environment for your family. Many homeowners report reducing their shower cleaning time by up to 30% after sealing their grout.
Secondly, sealed grout repels soap scum and hard water deposits, making routine cleaning a breeze. Instead of aggressive scrubbing with harsh chemicals, a simple wipe-down with a mild cleaner is often enough to keep your shower sparkling. This not only saves you time and effort but also protects the grout from abrasive cleaning products that can degrade its integrity over time.
Finally, maintaining sealed grout helps preserve the original color and pristine appearance of your shower. Unsealed grout tends to darken and become discolored as it absorbs grime, leading to a perpetually dingy look. Sealing acts as a protective shield, keeping your grout looking fresh and new for years, enhancing your bathroom's overall appeal and potentially boosting your home's value.
Gathering the Right Tools and Materials for Shower Grout Sealing
You do not need expensive commercial equipment to get professional results. A quick trip to the hardware store will give you everything required to clean and seal shower grout safely.
Expect to spend between $20 and $40 total. Here is exactly what you need to pick up:
- pH-neutral grout cleaner: Avoid heavy acids.
- Stiff nylon grout brush: Look for one with a narrow, angled head.
- Penetrating grout sealer: Impregnating or penetrating sealers work best for wet areas.
- Applicator bottle or brush: A small squeeze bottle with a brush tip gives you the best control.
- Clean microfiber cloths: You will need 3 to 4 dry cloths.
The Step-by-Step Shower Grout Cleaning and Sealing Process
Preparation is the most critical part of this job. If you seal over dirt, you will permanently lock that dirt into your walls. The goal is to strip the grout back to its original clean state, let it dry entirely, and then protect it.
- Deep clean the grout lines. Spray your pH-neutral cleaner directly onto the grout lines. Let it sit for 5 to 10 minutes to break down the soap scum. Scrub vigorously with your nylon brush, working in small sections from the top of the shower down to the floor.
- Rinse and dry. Rinse the walls thoroughly with warm water from your showerhead or a bucket. Inspect the lines. If you see any lingering dark spots, spot-clean them again. According to EPA guidelines on indoor moisture control, keeping surfaces thoroughly dry is the most reliable way to stop mold growth.
- Wait 24 to 48 hours. This is the step most people rush. The grout must be bone-dry before you apply sealer. If there is moisture trapped inside the pores, the sealer cannot penetrate, and it will fail within weeks. Do not use the shower during this time.
- Apply the penetrating sealer. Pour your sealer into the applicator bottle. Starting at the top corner of the shower, trace the grout lines with the brush tip, squeezing gently. Apply a liberal amount so the grout looks wet, but try to avoid slopping it all over the face of the tiles.
- Let it soak. Allow the sealer to sit on the grout lines for 5 to 10 minutes. You want the porous cement to drink in as much of the liquid as possible.
The Crucial Step: Wiping Off Excess Sealer
If you walk away after applying the sealer, you will ruin the look of your shower. Penetrating sealer is designed to soak into the grout, not to dry on top of the glazed tile. If left to dry on the tile surface, it leaves a stubborn, milky haze that is incredibly difficult to remove.
Water shouldn't soak into your shower walls; it should bead up and roll right down the drain.
After the sealer has soaked into the grout for about 10 minutes, take a dry, clean microfiber cloth and wipe down the entire wall. Press firmly to buff the face of the tiles clean. The grout will retain the sealer it absorbed, but you will remove the excess from the non-porous tile glaze.
Common Shower Grout Sealing Mistakes to Avoid
Even with the right tools and intentions, it's easy to make a few missteps that can compromise the effectiveness of your grout sealing project. Being aware of these common errors can save you time, effort, and the frustration of having to redo the work.
One of the most frequent mistakes is not cleaning the grout thoroughly enough before sealing. Any dirt, soap scum, or mildew trapped under the sealer will be permanently locked in, becoming almost impossible to remove later. Always ensure your grout is pristine before proceeding.
Another critical error is failing to allow sufficient drying time. Grout must be bone-dry, typically 24 to 48 hours, before sealer application. If moisture is present, the sealer cannot properly penetrate and bond, leading to premature failure and a short-lived protective barrier. Patience is key here!
Applying too little sealer is also a common oversight. While you don't want excess on your tiles, the grout lines themselves need to be saturated to absorb enough product for a durable seal. Don't be shy; ensure the grout looks visibly wet during application. Conversely, leaving excess sealer on the tile surface to dry will create a stubborn, cloudy haze that is incredibly difficult to remove without specialized products or considerable effort. Always wipe off excess promptly.
Lastly, rushing the curing process by using the shower too soon after sealing is a surefire way to undermine your efforts. Most sealers require a full 24 to 48 hours to fully cure and achieve maximum water resistance. Ignoring this wait time can wash away the fresh sealer, rendering your hard work ineffective.
When to Stop and Call a Professional
Sometimes, cleaning reveals a bigger problem. If you are scrubbing the walls and notice the grout is crumbling, washing away, or missing entirely in large chunks, sealing won't help you.
Maintaining Your Freshly Sealed Grout
Once you finish the job, let the shower sit unused for another 24 to 48 hours so the sealer can fully cure. After that, your walls are fully protected.
To extend the life of your new seal, keep a small rubber squeegee in the shower. Wiping down the walls after you bathe takes about fifteen seconds, but it drastically reduces the amount of hard water minerals and soap scum that settle on the grout. Stick to mild, pH-neutral daily cleaners rather than harsh bleach sprays, and your grout will easily stay waterproof and bright for the next one to two years. For even better long-term protection, consider reapplying sealer annually, especially in high-use showers, to maintain that crucial waterproof barrier against moisture and grime.
- Always wait 24 to 48 hours after cleaning before applying sealer to trap out moisture.
- Never use wire brushes or harsh acids on unsealed grout, as they degrade the cement mixture.
- Wiping off excess sealer is just as important as applying it to keep your tiles looking clear.
- Reseal your shower grout every 1 to 2 years for maximum waterproof protection.