How to Fix Cracked Shower Grout (Before Water Leaks)
Don't let a tiny crack in your shower grout turn into a massive repair bill. Learn how to safely remove and replace crumbling grout to keep your walls watertight.
You step into the shower, turn on the water, and spot it: a tiny, hairline crack in the grout line right at eye level. It is easy to brush off as a minor cosmetic flaw. After all, tiles are waterproof, right? Unfortunately, ignoring that small defect is one of the most common—and expensive—mistakes a homeowner can make.
Grout is the first line of defense against the gallons of water that hit your shower walls every day. When that defense is breached, water doesn't just sit there; it actively works its way behind the tile. Knowing how to fix cracked shower grout early is the difference between an afternoon DIY project and a massive bathroom demolition. We are going to walk through exactly how to spot-repair those failing joints, lock out moisture, and restore your shower's waterproof seal.
The Hidden Danger of Compromised Grout
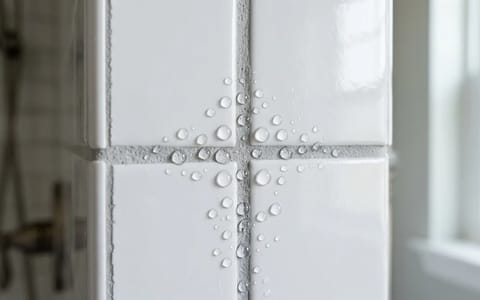
To understand why a tiny crack is such a big deal, you have to understand how water behaves. Through a process called capillary action, moisture is physically drawn into tight spaces. A hairline fracture in your grout acts like a microscopic straw, sucking water behind the tile every time you shower.
Once water gets behind the tile, it becomes trapped. The moisture begins to eat away at the thinset mortar holding the tile to the wall. Worse, if your shower wasn't perfectly waterproofed during installation, that water will soak directly into the drywall or wood studs behind the tile. I once ignored a tiny crack in my guest bathroom shower for six months. When I finally decided to address it, I ended up having to replace a 2-by-2-foot section of rotted wallboard and treat a serious mold issue. Lesson learned: water always wins if you give it a path.
Spot Repair vs. Full Regrouting
Many homeowners hesitate to fix cracked shower grout because they assume they have to grind out every single joint in the entire enclosure. Thankfully, that is rarely the case.
If the majority of your shower grout is solid, clean, and intact, spot repairing the damaged sections is a perfectly acceptable and effective strategy. You only need to remove and replace the grout in the specific areas where it is cracking, crumbling, or missing. The goal is to restore the watertight envelope, not to do busywork.
Tools and Materials You Will Need
You do not need heavy machinery or expensive power tools for this job. In fact, using power tools on a small spot repair often leads to accidentally chipped tiles. A trip to the hardware store should cost you between $20 and $35 for all the necessary supplies.
Here is your shopping list:
- Manual grout saw: A small hand tool with a carbide-grit blade, usually costing around $10.
- Utility knife: For cleaning up the edges of the joint.
- Rubbing alcohol and an old toothbrush: For prepping the joint.
- Powdered grout: Check your joint width. Less than 1/8-inch requires unsanded grout; 1/8-inch or wider requires sanded grout.
- Small mixing container and margin trowel: A clean plastic food container works perfectly.
- Rubber grout float: To press the new grout into the joint.
- Grout sponge: These have rounded edges specifically designed not to dig into fresh grout lines.
- Penetrating grout sealer: To protect your new repair.
How to Fix Cracked Shower Grout Step-by-Step
With your materials gathered, block out about an hour or two for the repair, plus some waiting time for drying. Make sure the shower is completely dry before you begin.
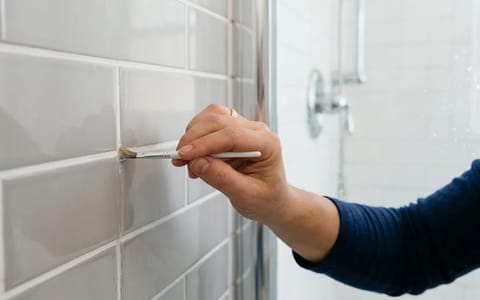
- Scrape out the old grout. Take your manual grout saw and firmly, but carefully, scrape it back and forth over the cracked grout. You need to remove the old material to a depth of at least 1/8 inch. If you don't go deep enough, the new grout won't have enough surface area to bond and will flake right off. Keep the blade centered to avoid scratching the glaze on the surrounding tiles.
- Clean and prep the joint. Once the old grout is removed, use a shop vacuum to suck up all the loose dust and debris. Next, dip an old toothbrush in rubbing alcohol and scrub inside the empty joint. The alcohol cleans away any residual soap scum and evaporates incredibly fast, leaving the joint bone-dry and ready for the new mix.
- Mix the new grout. Pour a small amount of powdered grout into your mixing container. Slowly add water, just a few drops at a time, and stir with your margin trowel. You are aiming for a consistency identical to smooth peanut butter. Once mixed, walk away for 10 minutes. This resting period, called "slaking," allows the water to fully penetrate the dry polymers in the powder. After 10 minutes, give it one final stir.
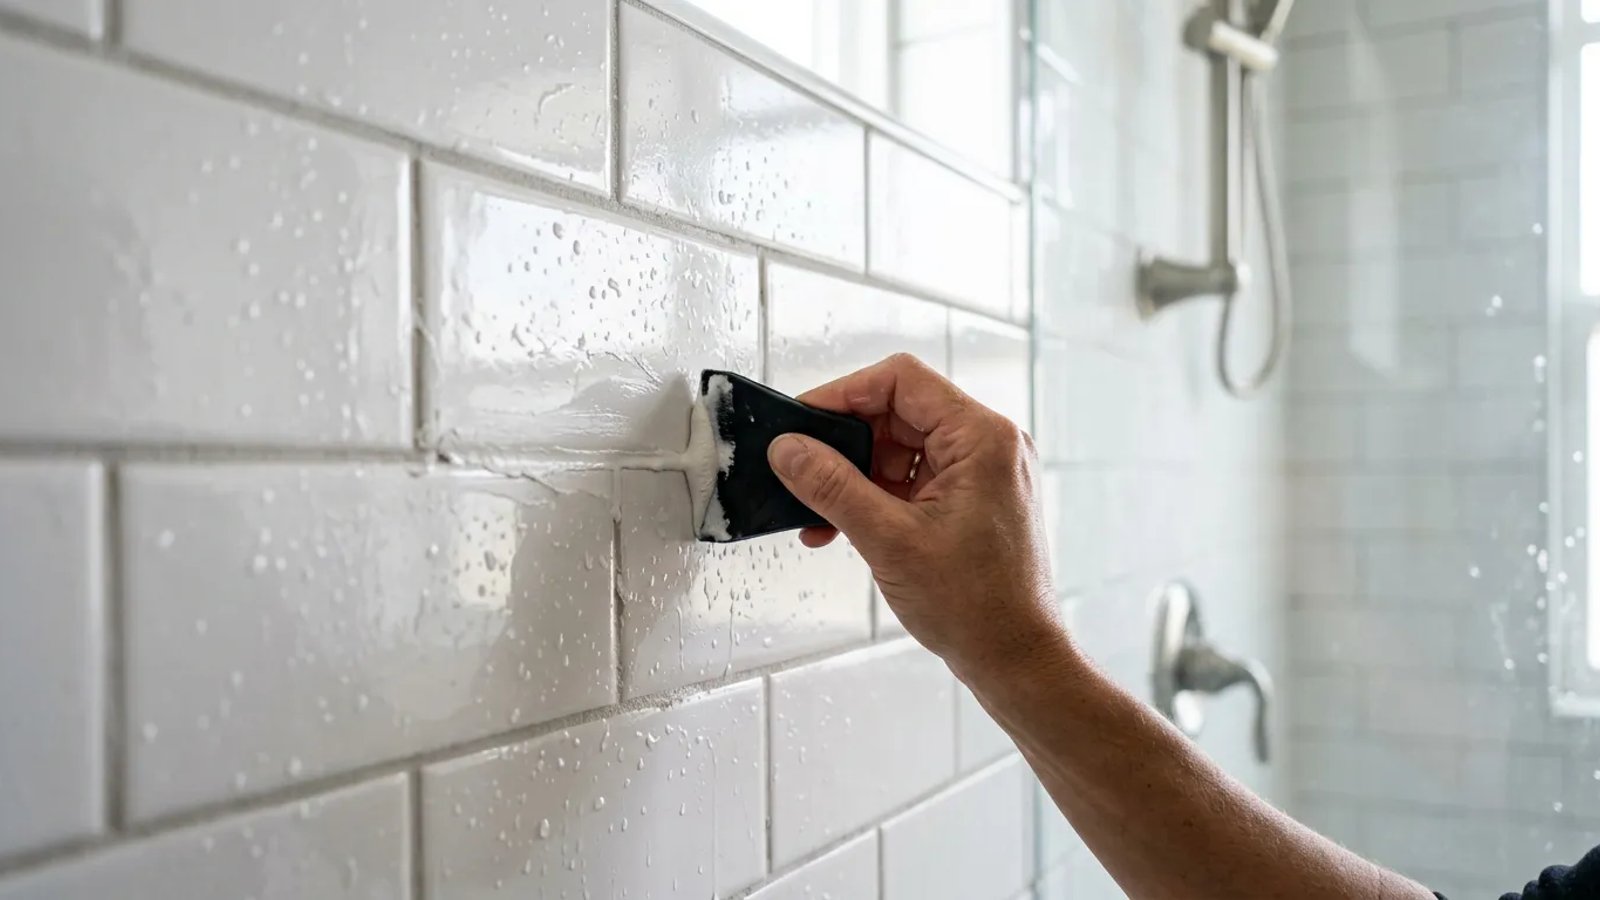
- Apply the grout. Scoop a small amount of the mixed grout onto your rubber float. Press it firmly into the empty joint, holding the float at a 45-degree angle to the wall. Smear it diagonally across the joint to pack the material in deeply. Don't worry about making a mess on the face of the tiles; we will clean that up shortly.
- Sponge off the excess. Wait 15 to 20 minutes for the grout to firm up slightly in the joint. Dip your grout sponge in clean water and wring it out until it is barely damp. Lightly wipe diagonally across the tiles to remove the excess grout. Rinse the sponge frequently.
Managing the Grout Haze
After you finish sponging, the tiles will likely look cloudy as they dry. This is called grout haze, and it is completely normal. Resist the urge to keep wiping it with a damp sponge, as you risk pulling the fresh grout out of the joints.
Patience is your best tool when dealing with grout haze. Let the wall dry completely before doing your final polish.
Wait about two to three hours until the grout is hard to the touch. Then, take a dry, clean microfiber cloth and buff the face of the tiles. The cloudy haze will dust right off, leaving you with crisp, clean tiles and beautifully filled grout lines.
The Crucial Final Step: Sealing
Your repair is not finished just because the grout looks good. Standard cement-based grout is highly porous. If you leave it unsealed, it will absorb water, trap soap scum, and quickly become a breeding ground for mildew.
You must wait for the grout to fully cure before sealing it. Check the packaging on your specific grout, but this generally takes 48 to 72 hours. During this time, do not use the shower.
Once the curing time has passed, apply a high-quality penetrating grout sealer. You can buy sealer in a small bottle with a brush-tip applicator for about $15. Simply paint the sealer onto the new grout lines, let it soak in for 5 to 10 minutes, and wipe any excess off the surrounding tiles with a dry rag. The sealer sinks into the pores of the grout, creating an invisible, waterproof barrier.
Taking an hour on a weekend to scrape, patch, and seal a failing grout line is one of the highest-return maintenance tasks you can do. By catching the problem early and addressing it with the right tools and techniques, you keep the water exactly where it belongs: going down the drain, not into your walls.