How to Clean Refrigerator Coils and Prevent Breakdowns
Cleaning your refrigerator coils is a 15-minute task that can save you hundreds on energy bills and prevent a costly compressor failure. Here is how to do it safely.
A refrigerator is usually the hardest-working appliance in your home, running 24 hours a day, 365 days a year. It is also one of the most expensive to replace, with new models easily ranging from $1,000 to well over $3,000. Yet, the vast majority of homeowners never perform the single most critical routine maintenance task required to keep it running: cleaning the condenser coils.
When you take the time to clean refrigerator coils, you are doing more than just basic housekeeping. You are actively lowering your monthly electricity bill and protecting a major financial investment from premature failure. It takes about 15 minutes, requires zero technical expertise, and demands only a few basic tools.
Why Dirty Coils Cause Breakdowns
To understand why this matters, it helps to know how a refrigerator actually works. Your fridge does not technically "make" cold air; rather, it removes heat from the inside of the food compartments and releases it into the kitchen. The condenser coils—a winding series of metal tubes—are responsible for dissipating that heat.
Because the condenser fan constantly pulls room air across these coils to cool them down, the coils act like a magnet for airborne dust, dirt, cooking grease, and pet hair. Over time, this debris builds up and forms a thick, felt-like blanket over the metal. This blanket acts as heavy insulation, trapping the heat inside the coils.
Think of dirty condenser coils like forcing your refrigerator to run a marathon while wearing a winter coat.
When the coils cannot release heat, the compressor has to work overtime to maintain the target temperature of 37°F inside the fridge. This continuous running draws significantly more electricity, driving up your utility bills. Worse, the excess heat and constant strain will eventually cause the compressor to burn out. Replacing a failed compressor is a major repair that typically costs between $300 and $600—often prompting homeowners to just scrap the fridge entirely.
Tools You Need for the Job
You do not need an arsenal of expensive tools for this job, but having the right type of brush is non-negotiable. A standard vacuum attachment simply cannot reach deep enough into the narrow gaps between the coils.
How to Clean Refrigerator Coils: Step-by-Step
Once you have your tools gathered, the actual cleaning process is straightforward. Set aside 15 to 30 minutes, especially if this is your first time performing the maintenance.
- Unplug the refrigerator. Never skip this step. You will be poking a wire brush near live electrical components and a fan blade. Pull the plug from the wall to ensure total safety.
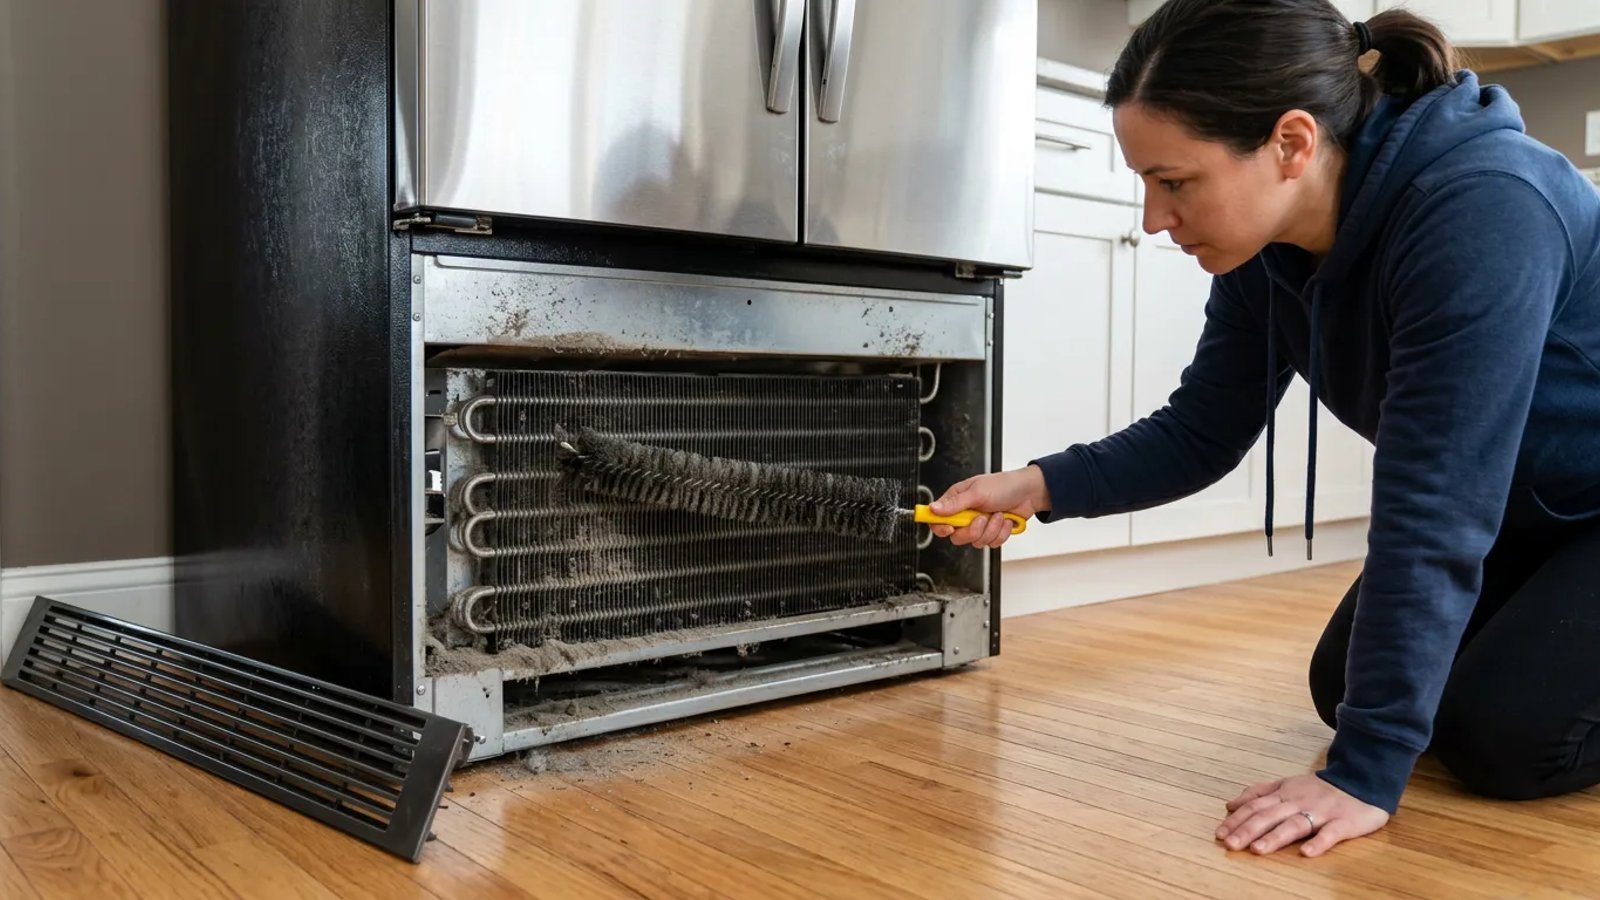
- Locate and expose the coils. Depending on your model, remove the front toe-kick grille (which usually pulls straight off or requires removing two screws) or pull the fridge away from the wall to access the rear panel.
- Vacuum the loose debris. Before using the brush, use your vacuum's crevice tool to suck up the easy-to-reach dust webs on the outer edges of the coils and the surrounding floor.
- Brush and vacuum simultaneously. Hold the vacuum nozzle near the coils with one hand. With your other hand, insert the coil brush deep into the gaps between the metal tubes. Twist and push the brush back and forth to dislodge the caked-on dust. The vacuum will catch most of the debris as you knock it loose.
- Clean the condenser fan. If you can see and reach the condenser fan (usually located near the compressor at the back), gently wipe the dust off the fan blades. A dirty, unbalanced fan blade will wear out its motor bearings prematurely.
- Reassemble and restore power. Sweep up any remaining dust on the floor, snap the front grille back into place or reattach the rear panel, push the fridge back into position, and plug it back in.
Where Are My Coils Located?
If you are staring at your appliance and wondering where to start, the location of your coils depends largely on the age and style of your refrigerator.
Bottom-Mounted Coils: The vast majority of modern refrigerators have the coils located underneath the unit. You can access the front of them by removing the vented toe-kick plate at floor level. To thoroughly clean bottom-mounted coils, it is often best to clean from the front, then pull the fridge out, remove the lower cardboard or metal access panel on the back, and clean from the rear as well.
Back-Mounted Coils: Older refrigerators, as well as many deep freezers and budget-friendly models, feature a large, black, grid-like structure mounted directly to the entire back exterior of the box. These are incredibly easy to clean. You simply pull the fridge away from the wall and brush them down. Because they are exposed to the open air, they cool efficiently but still require regular dusting.
Top-Mounted Coils: High-end, built-in refrigerators (such as Sub-Zero models) typically house the compressor and coils at the very top of the unit, hidden behind a flip-up louvered panel. You will need a small step ladder to access and clean these.
How Often Should You Do This?
For a standard household, cleaning your refrigerator coils every six months is a perfect baseline. Making it a biannual habit ensures the dust never gets thick enough to cause thermal insulation issues.
However, if you have pets that shed, you need to increase that frequency. Dog and cat hair gets pulled across the floor by the condenser fan's draft and weaves itself into the coils remarkably fast. I have a golden retriever at home, and the first time I cleaned my fridge coils after moving in, I pulled out what looked like an entire spare dog from behind the toe-kick panel. If you have heavy shedders in the house, aim to clean the coils every three to four months.
Signs Your Compressor Is Already Struggling
If you have never cleaned your coils, your refrigerator might already be showing symptoms of heat stress. Pay attention to how your appliance sounds and feels on a daily basis. If the refrigerator seems to run constantly without cycling off, that is a primary indicator that it is struggling to dissipate heat.
You might also notice that the sides of the refrigerator cabinet feel unusually hot to the touch, or that your ice cream is slightly soft because the freezer cannot maintain a crisp 0°F.
Taking a few minutes to clean your refrigerator coils is one of the highest-return DIY tasks you can perform. Grab a flashlight, buy a coil brush, and spend a quarter of an hour protecting your appliance. Your wallet, and your groceries, will thank you.