How to Clean Window Wells and Prevent Basement Flooding
Don't let heavy rains turn your basement window wells into aquariums. Learn how to clear debris, restore gravel drainage, and install protective covers to keep your foundation dry.
Mid-spring is notorious for unpredictable weather. One afternoon you are enjoying a mild breeze, and the next, a torrential downpour is testing every inch of your home's exterior water management. Homeowners with basements often obsess over their gutters and downspouts, but they completely forget about the deep metal half-moons sitting right at ground level. If you do not clean window wells regularly, a heavy rainstorm can quickly turn them into muddy aquariums. Once the water level rises above the window sill, it is only a matter of time before the pressure forces water through the seals, sending a waterfall down your basement walls and across your finished floors.
Ignoring this simple maintenance task is a gamble with high stakes. Water damage remediation, replacing drywall, and tearing out ruined flooring can cost thousands of dollars. The good news is that preventing this specific type of basement flooding requires no specialized skills and only a few basic garden tools. By understanding how the drainage is supposed to function and taking a proactive approach to clearing out the muck, you can keep your basement dry and secure.
How Window Well Drainage Actually Works
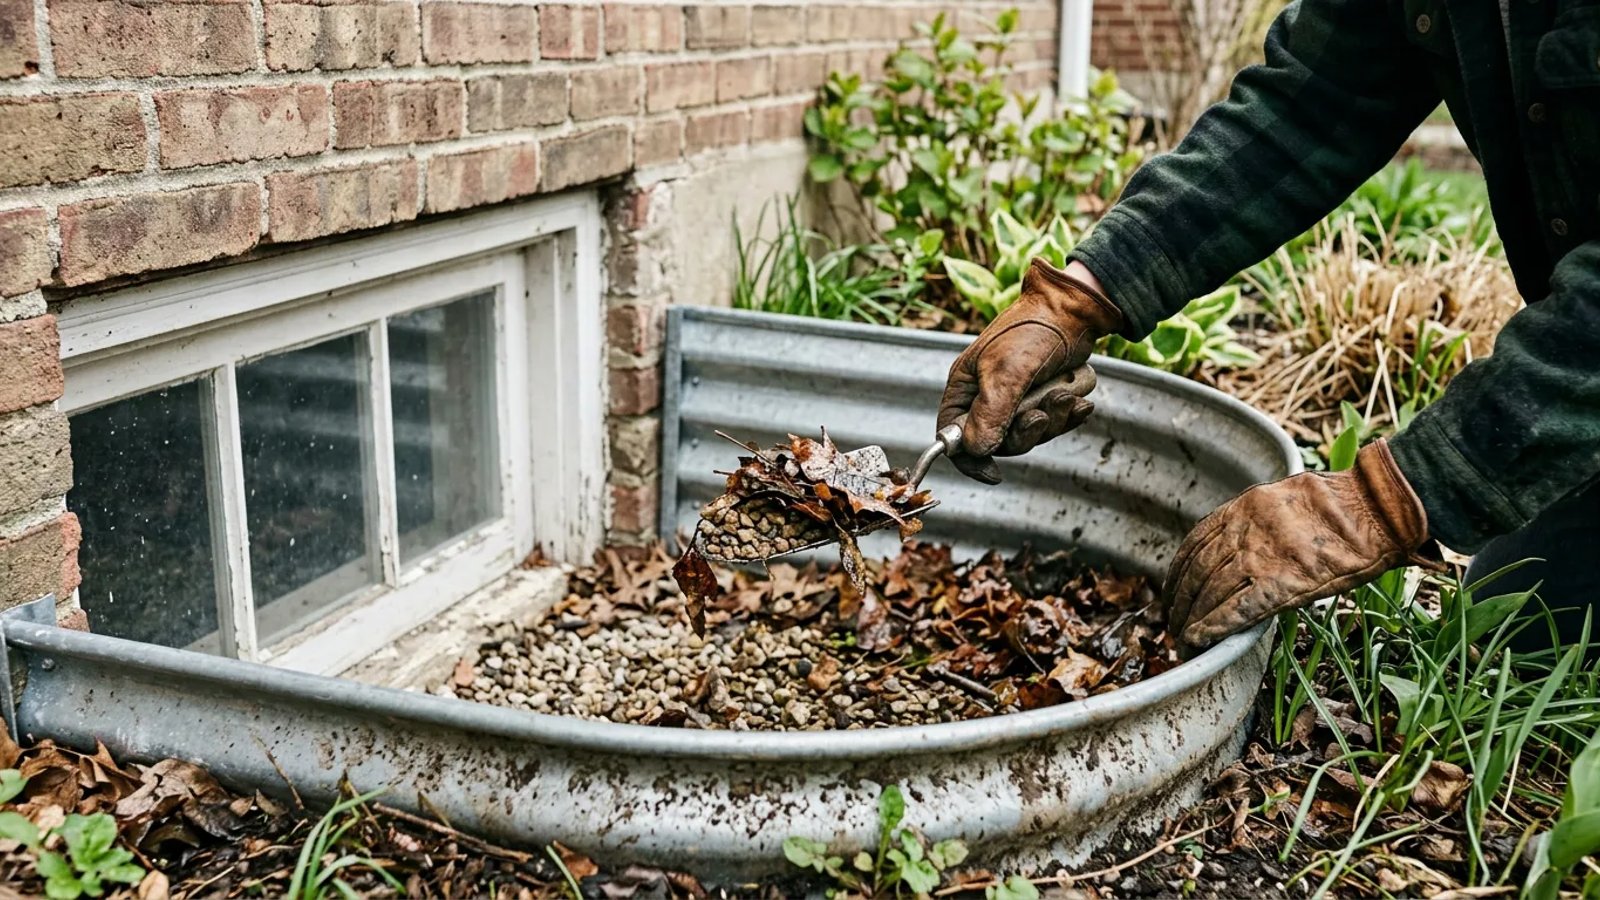
Before you can properly clean window wells, it helps to understand what is happening beneath the surface. A window well is not just a hole dug into the dirt to let light in; it is an engineered drainage zone. The visible part usually consists of a corrugated galvanized steel or rigid plastic retaining wall that holds back the surrounding soil. Inside that semi-circle is a bed of gravel, typically 4 to 6 inches deep.
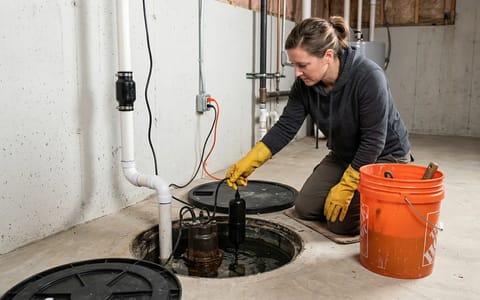
This gravel is not there for decoration. It acts as a highly porous filter. When rain falls into the well, the water is supposed to drop instantly through the 3/4-inch washed stone. Beneath the gravel, there is usually a vertical drain pipe that connects down to your home's perimeter foundation drain—often called a weeping tile. This pipe carries the water away from the foundation, either directing it to a sump pump inside the house or out to daylight somewhere lower on your property.
When the system works, water never has a chance to rise against the glass. But when the system fails, the window well acts exactly like a plugged bathtub.
Why Window Wells Turn Into Aquariums
The primary enemy of a functioning window well is organic debris. Throughout the fall and winter, leaves, twigs, grass clippings, and trash blow across your yard and get trapped in the recessed wells. If left untouched, this debris begins to decompose. As the organic matter breaks down, it turns into a thick, heavy silt.
This silt washes down into the gaps between the gravel stones. Over a few seasons, the once-porous gravel bed becomes packed tight with heavy, water-retaining soil. To make matters worse, this new layer of soil creates the perfect environment for airborne seeds to take root. Before long, you have large weeds growing directly out of the gravel. The root systems of these weeds further bind the gravel together, creating an impenetrable plug.
When a window well clogs, it acts exactly like a plugged bathtub, trapping water directly against your foundation.
I learned this the hard way in my first house. I ignored a minor weed problem in a basement window well for two years. During a massive spring thunderstorm, I woke up at 2 AM to the sound of rushing water. The well had filled completely, the pressure snapped the window latch, and hundreds of gallons of muddy water poured over my newly installed laminate flooring. It was a costly, exhausting mistake that could have been prevented with fifteen minutes of basic yard work.
The Tools You Need for the Job
You do not need a truck full of professional equipment to get this job done. Grab the following items before you start:
- Heavy-duty leather work gloves: Window wells are notorious hiding spots for sharp twigs, broken glass, rusty nails, and spiders.
- A small metal hand trowel: Perfect for scraping compacted dirt away from the corrugated metal edges.
- A 3-prong hand cultivator: This small hand rake is essential for turning and loosening the gravel.
- Heavy-duty trash bags or a wheelbarrow: For hauling away the wet, heavy debris.
- A 5-gallon bucket: You will need this for the drainage test at the end.
- A wet/dry shop vacuum (optional): If the leaves are dry and brittle, a shop vac makes very quick work of the surface layer.
How to Clean Window Wells: A Step-by-Step Guide
Pick a dry day when the soil in your yard is not completely saturated. If you have multiple window wells around your foundation, tackle them one by one.
- Remove the surface debris. Put on your heavy-duty gloves and manually scoop out the large piles of leaves, trash, and dead vegetation. If the debris is dry, use a wet/dry vacuum to suck out the loose material. Be sure to clear the corners where the retaining wall meets the house foundation.
- Pull out deep-rooted weeds. Do not just snap the weeds off at the surface. Grab them as close to the gravel as possible and pull slowly to extract the entire root system. If the roots break off, use your hand trowel to dig down a few inches and pry them out.
- Scrape the silt layer. Once the large debris is gone, you will likely find a layer of decomposed dirt sitting on top of the stones. Use your trowel to scoop this dirt out. You want to expose the clean gravel underneath.
- Turn and rake the gravel. Take your 3-prong hand cultivator and vigorously rake the gravel bed. Dig down 3 to 4 inches and churn the stones. This breaks up any remaining compacted dirt and restores the open air pockets between the rocks, which is necessary for rapid water flow.
- Check the drain pipe (if visible). If your window well has a visible drain pipe extending above the gravel, check the grate or cap. Ensure it is not blocked by a mat of wet leaves or a bird's nest.
The 5-Gallon Bucket Drainage Test
Cleaning the surface is only half the job; you must verify that the underlying plumbing is actually working. Fill your 5-gallon bucket with water from an outdoor spigot.
Pour the entire bucket of water directly into the center of the gravel bed as quickly as you can without splashing it against the window glass. Watch how the water behaves. In a properly functioning window well, the water should disappear into the stones almost immediately. It might pool for three or four seconds, but it should drain rapidly and steadily.
If the water sits on top of the gravel for more than a minute, or if it drains incredibly slowly, you have a deeper problem. This indicates that either the gravel bed is completely packed with clay and silt all the way down, or the vertical drain pipe connecting to your weeping tile is clogged with roots or mud.
The Best Defense: Installing Window Well Covers
The absolute best way to minimize this maintenance chore and protect your basement is to install window well covers. A good cover acts as a shield, deflecting rain, snow, leaves, and wandering wildlife away from the deep recess.
Avoid cheap, flimsy plastic covers that crack after one season in the sun. Look for covers made from heavy-duty, UV-resistant clear polycarbonate. These covers allow natural sunlight to enter your basement while supporting the weight of heavy snow or a small animal. You can find high-quality, sloped covers at most big-box hardware stores for $20 to $50, depending on the size of your well.
When installing a cover, ensure it slopes slightly away from the foundation wall. This pitch forces rainwater to run off the front edge and onto the surrounding lawn, rather than pooling against the house. Some covers come with metal clips that snap onto the lip of the corrugated retaining wall, keeping them secure during high winds while remaining easy to lift from below.
Taking a few minutes each spring to inspect and clear your window wells is a small investment of time that yields massive returns. It keeps your foundation secure, prevents the nightmare of a flooded basement, and ensures that the heavy rains of the coming months stay exactly where they belong—outside your home.