How to Fix a Wobbling Ceiling Fan (And Stop the Clicking)
Stop the annoying clicking and scary wobbling before the summer heat hits. Learn how to diagnose, tighten, and balance your ceiling fan in under 30 minutes.
You flip the switch, hoping for a cool, quiet breeze, but instead, you get a rhythmic clicking and a fixture that looks like it is about to tear itself out of the drywall. A wobbling ceiling fan is one of the most common—and highly annoying—household nuisances. Beyond driving you crazy while you try to sleep or watch television, that excessive vibration causes premature wear on the motor bearings and puts dangerous stress on your ceiling mounting hardware.
Fortunately, you do not have to live with the noise or the anxiety of a falling fixture. Learning how to fix a wobbling ceiling fan takes about 30 minutes, requires zero specialized electrical knowledge, and rarely costs more than a few dollars. We are going to walk through the exact steps to diagnose the wobble, stop the clicking, and get your fan spinning smoothly before the heavy heat sets in.
Why Your Ceiling Fan is Wobbling (and Clicking)
Ceiling fans operate on a delicate balance of physics. The motor spins a heavy mass at high speeds, relying on perfectly distributed weight to maintain a smooth rotation. When that balance is disrupted, the fan begins to sway.
The root causes of a wobble usually fall into three categories: loose hardware, unequal blade weight, or warped components. The clicking sound you hear is a direct symptom of the wobble. As the fan sways, loose metal components—such as the blade irons, the light fixture housing, or the canopy at the ceiling—rub and tap against each other. To fix the noise, you have to fix the sway.
Before you run out to buy a replacement fan, go through the following diagnostic steps. In most cases, a simple tightening and a quick cleaning will solve the problem entirely.
Step 1: Safety First (Kill the Power)
Working on a ceiling fan requires getting up close to the electrical housing. Even though you are mostly dealing with mechanical screws, you will be touching metal parts near live wires. Safety is not optional here.
- Locate your breaker panel. Find the breaker that corresponds to the room where you are working.
- Flip the breaker to the OFF position. Ensure it clicks fully into the off state.
- Verify the power is dead. Try turning on the fan and the light at the wall switch and using the pull chains. If you have a non-contact voltage tester, hold it near the fan's canopy to confirm there is no current.
Step 2: Tighten the Mounting Bracket and Downrod
The foundation of a stable fan is its connection to the ceiling. If the mounting bracket is loose, the entire unit will sway, regardless of how perfectly balanced the blades are.
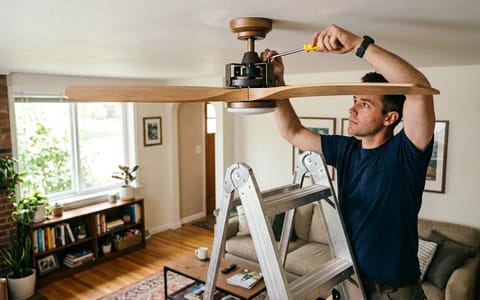
Set up a sturdy fiberglass or aluminum step ladder. Loosen the screws holding the decorative canopy against the ceiling and slide it down the downrod. This will expose the mounting bracket and the electrical box.
First, inspect the electrical box itself. It should be firmly attached to a ceiling joist. Give the bracket a firm wiggle with your hand. If the box moves, you have a major structural issue. If it is solid, take your Phillips head screwdriver and aggressively tighten the two long screws holding the metal mounting bracket to the electrical box. Next, check the downrod—the metal pipe connecting the motor to the ceiling. There is usually a set screw or a pin at the base of the downrod where it meets the motor housing. Ensure this set screw is locked down tight.
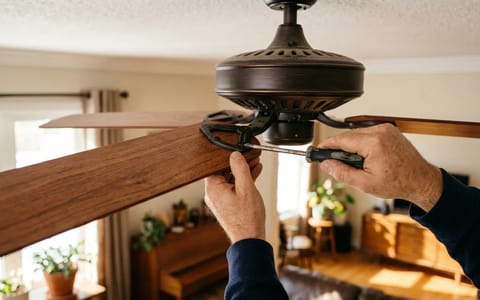
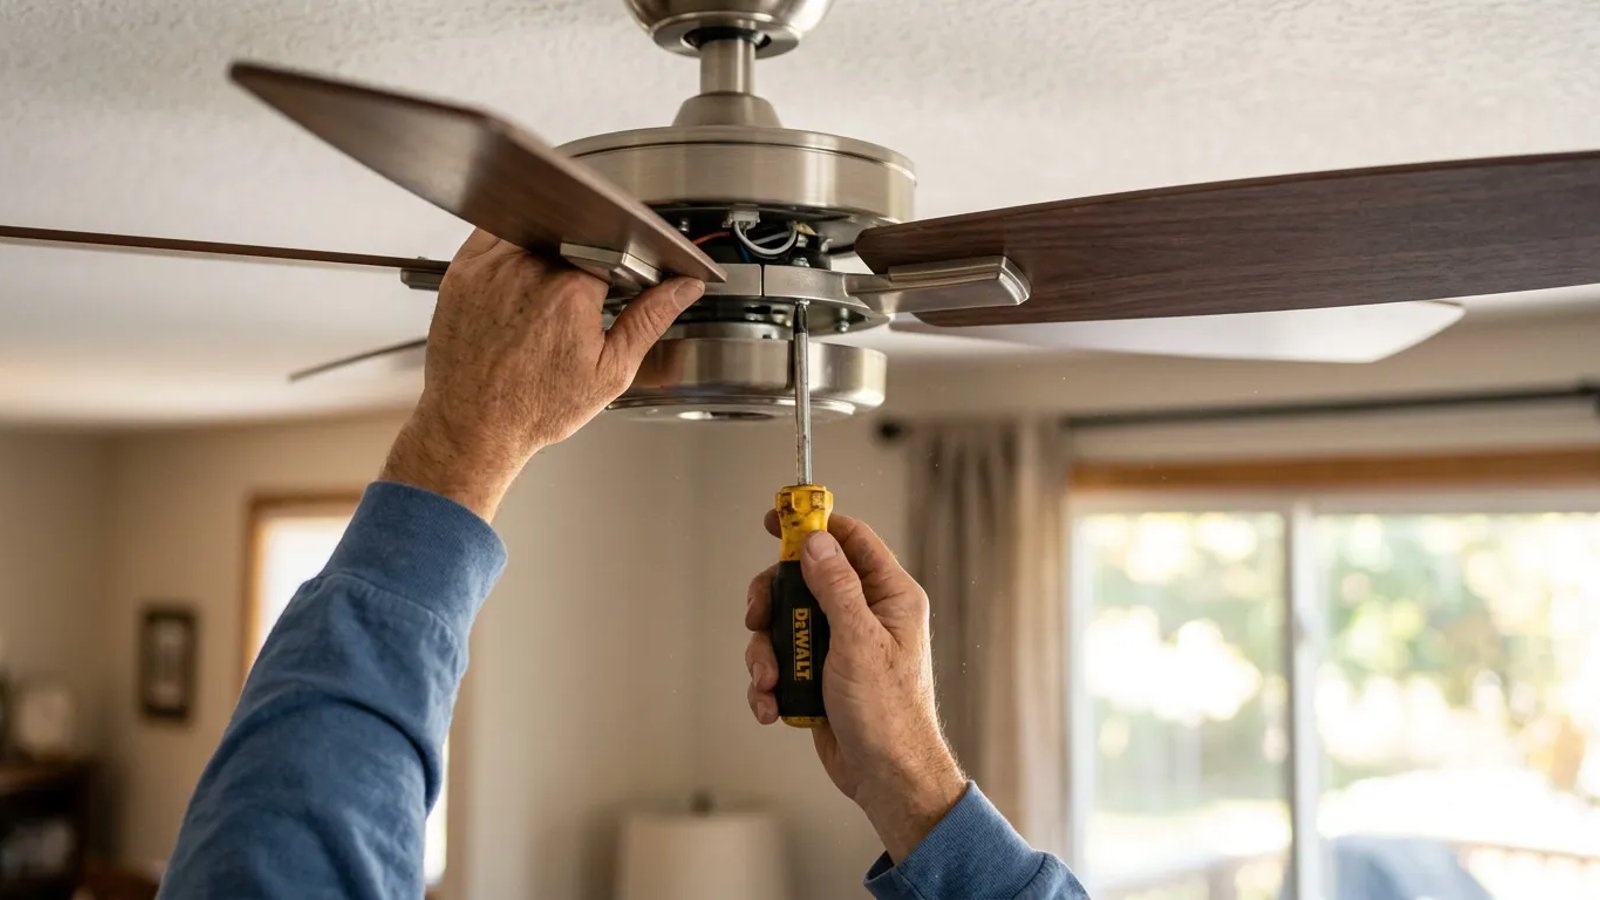
Step 3: Clean the Blades and Tighten the Blade Irons
This is the step most homeowners skip, yet it is frequently the main culprit of a wobble. Over the winter, the tops of your fan blades collect a thick layer of dust. Because dust does not settle perfectly evenly, one blade often ends up carrying more weight than the others.
A ceiling fan spinning at high speed magnifies the weight of a single gram of dust.
Take a microfiber cloth and an all-purpose cleaner, and thoroughly wipe down the top, bottom, and leading edges of every blade.
Once the blades are clean, it is time to address the clicking. The blade irons are the metal brackets that connect the wooden blades to the spinning motor hub. Use your screwdriver to tighten the screws connecting the iron to the motor, and then tighten the screws connecting the wood blade to the iron. These vibrate loose over time, creating that distinct metal-on-metal tapping sound.
Step 4: Measure Blade Height (The Yardstick Trick)
If the hardware is tight and the blades are clean, but the fan still wobbles, the blades might be out of alignment. Humidity and temperature changes can cause wooden or MDF blades to warp, or a blade iron might have been accidentally bent during moving or cleaning.
Grab a standard wooden yardstick or a stiff tape measure. Hold the yardstick vertically against the ceiling, positioning it so the bottom hangs down past the fan blades. Manually rotate the fan so the tip of the first blade touches the yardstick. Note the exact measurement (for example, 14 and 1/4 inches from the ceiling).
Rotate the fan to the next blade and check its measurement against the yardstick. Repeat this for all blades. Every blade tip should be within 1/8 to 1/4 inch of the same measurement. If one blade is sitting significantly higher or lower than the rest, gently press up or pull down on the metal blade iron to bend it back into alignment. Be careful not to apply pressure directly to the wooden blade, as it can snap.
Step 5: How to Fix a Wobbling Ceiling Fan with a Balancing Kit
If you have completed all previous steps and the fan still shakes on high speed, one of the blades is inherently lighter than the others. Manufacturing tolerances aren't perfect, and variations in wood density are common. You will need a ceiling fan balancing kit, which you can pick up at any local hardware store for about $5.
The kit contains a plastic U-shaped clip and several small adhesive lead weights (usually 3 grams each). Here is how to use it:
- Place the test clip. Slide the plastic clip onto the trailing edge of any blade, positioning it halfway between the motor and the tip of the blade.
- Run the fan. Turn the power back on and run the fan on high speed. Observe the wobble. Is it better or worse?
- Test the next blade. Turn the fan off, move the clip to the exact same position on the next blade, and test again. Repeat this until you find the blade that, when clipped, significantly reduces the wobble.
- Find the sweet spot. Once you identify the "light" blade, slide the clip closer to the motor, test, then slide it closer to the tip, and test. Find the exact spot on that specific blade where the fan runs smoothest.
- Apply the permanent weight. Peel the backing off one of the adhesive lead weights. Stick it firmly to the top center of the blade, directly parallel to where the test clip is positioned. Remove the test clip.
Test the fan one last time. If there is still a minor wobble, you may need to add a second weight adjacent to the first one.
When It Is Time to Replace the Unit
Sometimes, a wobble cannot be fixed with a screwdriver and a balancing kit. If your fan has suffered severe water damage, the blades may be too warped to salvage. Similarly, if the fan took a hard physical impact, the motor shaft itself might be bent. A bent motor shaft is impossible to straighten perfectly and requires a full unit replacement.
Taking the time to properly maintain your ceiling fan extends its lifespan by years. By running through this checklist—tightening the bracket, cleaning the blades, checking the alignment, and applying a balancing weight—you can eliminate the clicking and the shaking entirely. You will be left with a smooth, quiet fixture that moves air efficiently, letting you actually enjoy the cooling breeze when the summer temperatures finally arrive.