How to Fix Dog Scratches on Hardwood (Without Sanding)
Don't panic over those white, shallow scuffs. Learn how to assess the damage and use simple DIY methods to fix dog scratches on hardwood floors without sanding.
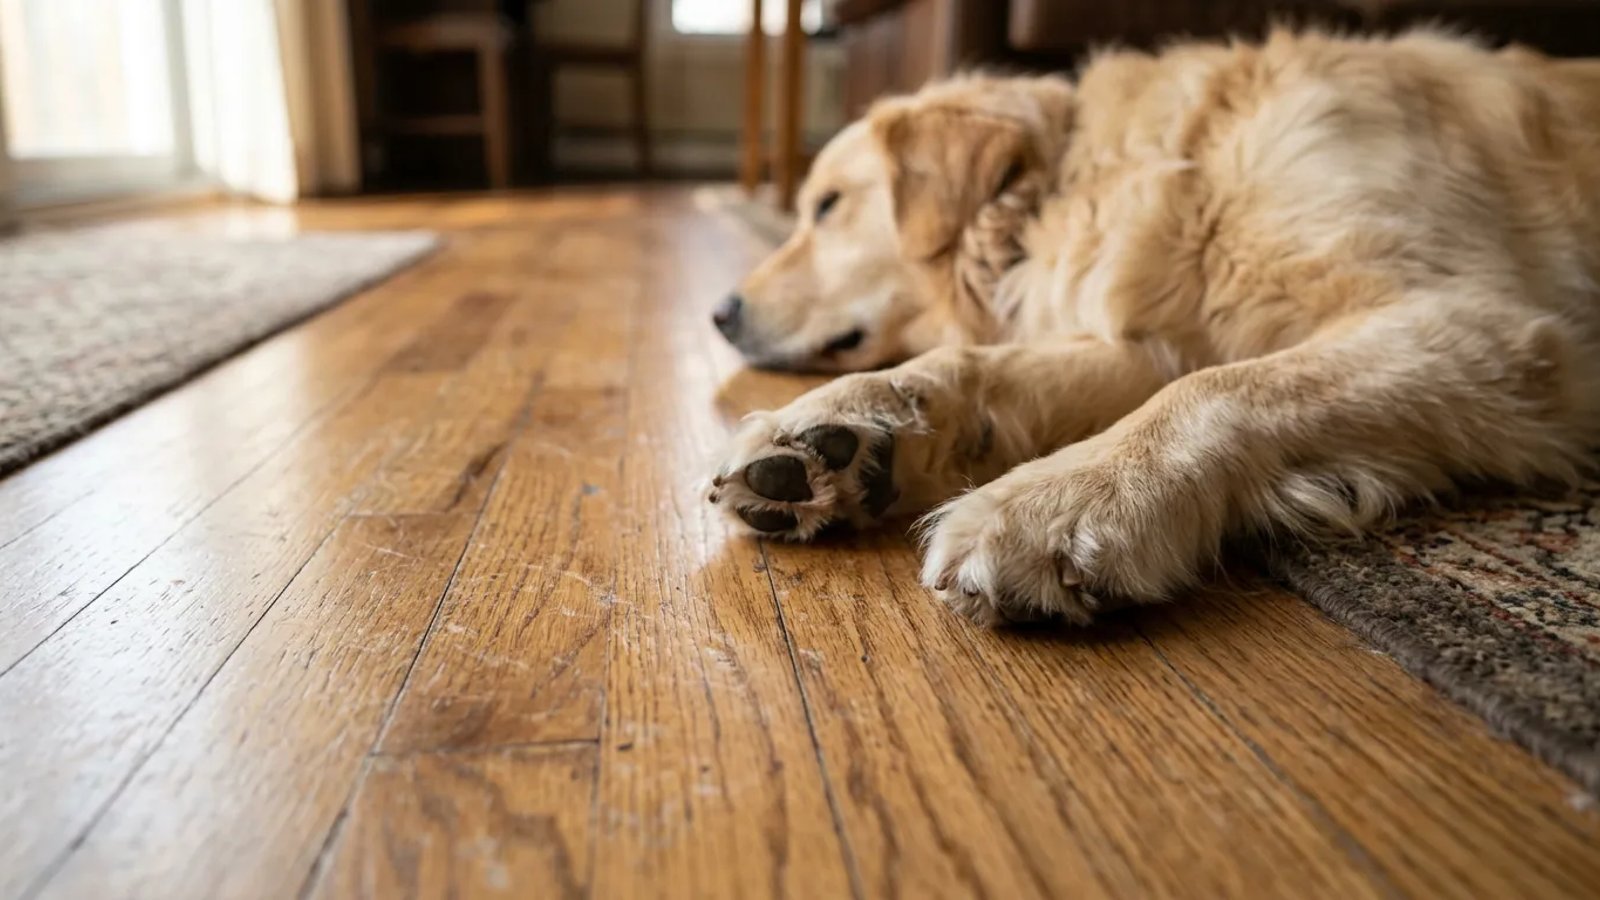
We love our dogs, and we love our hardwood floors. Unfortunately, those two passions often clash the moment the doorbell rings. If you share your home with a four-legged friend, you have likely experienced the slow-motion horror of watching them peel out across your living room, leaving a trail of white, hazy scuff marks in their wake.
When we brought home our 60-pound rescue mutt, I watched him skid across our newly finished red oak hallway like he was on an ice rink. I was convinced the floors were ruined. But once my heart rate returned to normal and I inspected the damage, I realized a crucial fact about pet wear and tear: most of it is entirely superficial.
Homeowners often assume that the only way to fix dog scratches on hardwood floors is to empty the room, rent a heavy drum sander, and pay a professional thousands of dollars for a complete refinishing. Fortunately, that is rarely the case. With a few budget-friendly supplies from your local hardware store and an afternoon of elbow grease, you can disguise and repair the vast majority of claw marks without ever touching a piece of sandpaper.
The Water Drop Test: Assessing the Damage
Before you buy any repair products, you need to understand exactly what you are trying to fix. Hardwood floors consist of two main layers: the actual wood (which gives the floor its color and grain) and the protective clear coat on top (usually polyurethane or an aluminum oxide finish).
When a dog's nail drags across the floor, it almost always just fractures that clear topcoat. This micro-fracturing scatters light, which is why the scratch looks like a bright white line, especially on dark floors. To figure out if the damage is just in the clear coat or if it has actually gouged the wood fibers below, use the simple water drop test.
- Clean the area. Wipe the scratch with a damp microfiber cloth to remove any surface dust or loose pet hair.
- Apply a drop of water. Place a single drop of room-temperature water directly onto the center of the scratch.
- Observe the color change. Watch the scratch closely for about 10 to 15 seconds.
If the white scratch instantly disappears and blends into the color of the floor while the water is sitting on it, you are in luck. The scratch is only in the clear coat. The water is temporarily filling the micro-fractures and restoring the optical clarity of the finish. When the water dries, the white scratch will return.
If the scratch turns significantly darker than the surrounding floor, or if you can feel a deep, physical ridge when you run your fingernail across it, the dog's claw has penetrated the finish and exposed the raw wood beneath.
How to Fix Dog Scratches on Hardwood (Superficial Scuffs)
If your water drop test revealed that the damage is confined to the clear coat, put away the heavy machinery. You do not need wood filler or sandpaper. Your goal is simply to fill the micro-abrasions to restore the color and shine. Here are three highly effective ways to do exactly that.
The Classic Walnut Trick
It sounds like an old wives' tale, but it genuinely works for minor, hairline scuffs. The meat of a raw walnut is packed with natural oils, and it is soft enough that it won't further damage your floor's finish.
Take a shelled, raw walnut (not roasted or salted) and rub it diagonally across the scratch. The friction will warm the nut, releasing its oils into the micro-fractures of the floor's clear coat. Once you have rubbed the scratch for about 10 seconds, let the oil sit for five minutes to penetrate, then buff the area vigorously with a clean microfiber cloth. The white line will darken and blend seamlessly into the floor. Keep in mind, this is a temporary cosmetic fix and may need to be reapplied after you mop the floor a few times.
Color-Matched Stain Markers
For slightly deeper clear-coat scratches that a walnut can't handle, a wood stain marker is your best friend. You can pick up a pack of these at any hardware store for about $5 to $10. They look exactly like standard felt-tip markers, but they are filled with wood stain.
The secret to using a stain marker is speed. If you draw on the floor and let it dry, you will be left with a very obvious, dark, marker-like streak. Instead, dab the marker lightly along the scratch, and then immediately wipe the area with a dry cloth. You want the stain to settle into the depression of the scratch while wiping it completely off the surrounding intact finish. If the color is too light, wait 30 seconds and repeat the process. Always start with a marker shade that is slightly lighter than your floor; you can always add more color, but it's hard to take it away.
Tinted Floor Polish and Restorers
If your dog has created a widespread "skating rink" of hundreds of tiny, overlapping scratches near the front door or at the bottom of the stairs, coloring each one with a marker will take you until next Tuesday. In this scenario, a tinted floor restorer is the way to go.
Products like Minwax Hardwood Floor Reviver or Rejuvenate cost between $15 and $25 a bottle. You simply squirt the liquid onto a clean floor and spread it evenly with a microfiber mop pad. These restorers contain liquid polymers that fill in widespread micro-scratches and leave behind a fresh, hardened layer of acrylic. They are available in high-gloss or satin finishes, so be sure to check the sheen of your current floor before applying.
Repairing Medium Grooves (When the Wood is Gouged)
If your dog is a larger breed with thick nails, or if they dug into the floor while trying to gain traction, they may have actually gouged out a tiny channel of wood. You will know this is the case if your fingernail aggressively catches in the groove. Markers and polish won't fix this; you need to replace the missing physical material.
The secret to living with dogs and hardwood floors isn't achieving absolute perfection—it's mastering the art of the quick disguise.
Blending Wax Sticks
Blending wax sticks (often sold as floor repair crayons) are the absolute best DIY solution for medium-depth dog scratches. They cost around $8 each and come in dozens of wood tones.
- Warm the wax. Hold the tip of the wax stick in your hands for a minute, or hit it briefly with a hair dryer on low heat. This softens the wax, making it easier to press into the floor.
- Fill the groove. Rub the wax stick back and forth across the scratch, moving perpendicular to the groove. Press firmly so the wax is forced down into the cavity.
- Level it out. Take a plastic putty knife (never metal, which will cause more scratches) or the edge of an old credit card, and scrape it flat across the floor to remove the excess wax.
- Buff the finish. Take a dry cloth and buff the area until the wax shines like the rest of the floor.
Wax is incredibly durable and won't wash away when you clean your floors. If you have a floor with a lot of color variation, you can even buy two different colored wax sticks and knead them together in your fingers to create a custom, marbled tone.
Wood Putty for Deeper Damage
If a heavy piece of furniture was dragged, or your dog managed to dig a significant hole, you may need to step up to wood putty. Unlike wax, wood putty actually hardens as it dries.
Apply a small amount of color-matched wood putty into the gouge using your finger or a plastic scraper. Leave it slightly mounded, as putty shrinks as it dries. Let it dry completely (usually 30 to 60 minutes, depending on the brand). Once dry, take a very fine piece of sandpaper—320-grit is ideal—and lightly sand only the putty until it is flush with the floor. Finally, seal the small repair with a dab of clear polyurethane using a cotton swab.
Long-Term Prevention: Protecting Your Floors
Fixing scratches is satisfying, but preventing them from happening in the first place is much easier on your back and your wallet. You don't have to banish your dog to the carpeted rooms, but a few strategic adjustments will save your hardwood finish.
Strategic Area Rugs
Dogs don't scratch the floor evenly. The damage is almost always concentrated in high-action zones: the front door where they greet guests, the bottom of the stairs, and the sharp corners they drift around when playing fetch.
Identify these "runways" and put down area rugs or long runner rugs. Make sure you use a high-quality, non-slip rug pad underneath. If the rug slides when the dog hits it, the friction of the rug pad sliding against the hardwood can actually dull the finish over time.
Routine Nail Grinding
This is the most critical step in floor preservation. A dog's nails should not touch the ground when they are standing still. If you hear the familiar "click-click-click" when they walk into the kitchen, their nails are too long.
Instead of using traditional guillotine clippers, which leave sharp, jagged edges, switch to a rotary nail grinder (like a Dremel tool specifically made for pets). Grinding allows you to round off the sharp edges of the nail, leaving a smooth, blunt tip that is far less likely to scratch the polyurethane. Aim to grind your dog's nails every two to three weeks.
Applying Protective Topcoats
If you have large dogs and you know your floors take a beating, plan on applying a fresh coat of polyurethane every three to five years. This process, known as a "screen and recoat," doesn't involve sanding down to bare wood. Instead, a professional lightly buffs the existing finish to create a bonding surface, and then rolls on a fresh layer of commercial-grade polyurethane. This builds up the protective barrier, ensuring the dog's claws never reach the actual wood.
When to Throw in the Towel and Call a Pro
While DIY methods are fantastic for the daily wear and tear of pet ownership, they have their limits. If your floor has deep, splintering gouges that span across multiple boards, or if the finish has completely worn away leaving raw, graying wood exposed in large patches, markers and wax won't save you.
Living with dogs means accepting a little bit of chaos, and yes, a few inevitable imperfections on your floors. But by keeping their nails trimmed, utilizing runners in heavy traffic zones, and keeping a trusty stain marker in your utility drawer, you can keep your hardwood looking beautiful for years to come. Grab a microfiber cloth, test out that walnut trick, and get those floors looking fresh again.