How to Install a Baby Gate Without Drilling Any Holes
Protect your crawling baby and your woodwork. Learn how to securely install baby gates on stairs and doorways without drilling holes in banisters or drywall.
When your baby finally figures out how to crawl, that beautiful open staircase suddenly looks like a multi-story hazard. Renters and homeowners alike face the same frustrating dilemma: you need to block off the stairs immediately, but you absolutely cannot drill permanent holes into a custom oak banister or your landlord's pristine drywall. The good news is that modern baby-proofing hardware has evolved significantly.
You do not have to choose between your child's safety and your home's resale value. By utilizing the right adapters, straps, and tension distributors, you can achieve a perfectly secure setup that leaves zero trace behind. This guide will show you exactly how to install baby gate without drilling, ensuring both your toddler and your woodwork survive the early years unscathed.
The Golden Rule: Top vs. Bottom of the Stairs
Before buying any hardware, you must understand the critical difference between the top and the bottom of your staircase. The location entirely dictates the type of gate you can safely use.
Pressure-mounted gates are incredibly popular because they require no tools to install. You simply twist the tension rods until the gate wedges tightly between two walls or posts. However, pressure gates feature a fixed U-shaped metal frame that remains on the floor even when the gate door is open. If you place this at the top of the stairs, that 1.5-inch metal bar becomes a severe trip hazard. Catching your toe on it while carrying a baby is a recipe for disaster.
For the top of the stairs, you must use a hardware-mounted gate. These gates have no bottom threshold and swing entirely open. They are designed to be screwed directly into wood studs or banister posts. The challenge, of course, is figuring out how to mount these heavy-duty gates without actually drilling into your expensive staircase.
How to Install Baby Gate Without Drilling at the Bottom
If you are blocking off a hallway, a standard doorway, or the bottom of the staircase, a pressure-mounted gate is your best friend. But even pressure gates can cause damage if installed carelessly. The small, hard rubber stoppers on the end of the tension bolts apply massive force to a tiny surface area—often enough to dent drywall or peel off latex paint.
To protect your rental property drywall or freshly painted doorframes, invest in a set of silicone wall-saver pads. These inexpensive disks (usually around $10 to $15 for a four-pack) slip over the ends of the gate's tension bolts.
A standard tension bolt has a surface area of about one square inch. A wall-saver pad expands that footprint to over ten square inches. By distributing the pressure across a wider area, the pad prevents the bolt from punching through the drywall while simultaneously providing superior grip so the gate won't slide.
Drill-Free Solutions for the Top of the Stairs
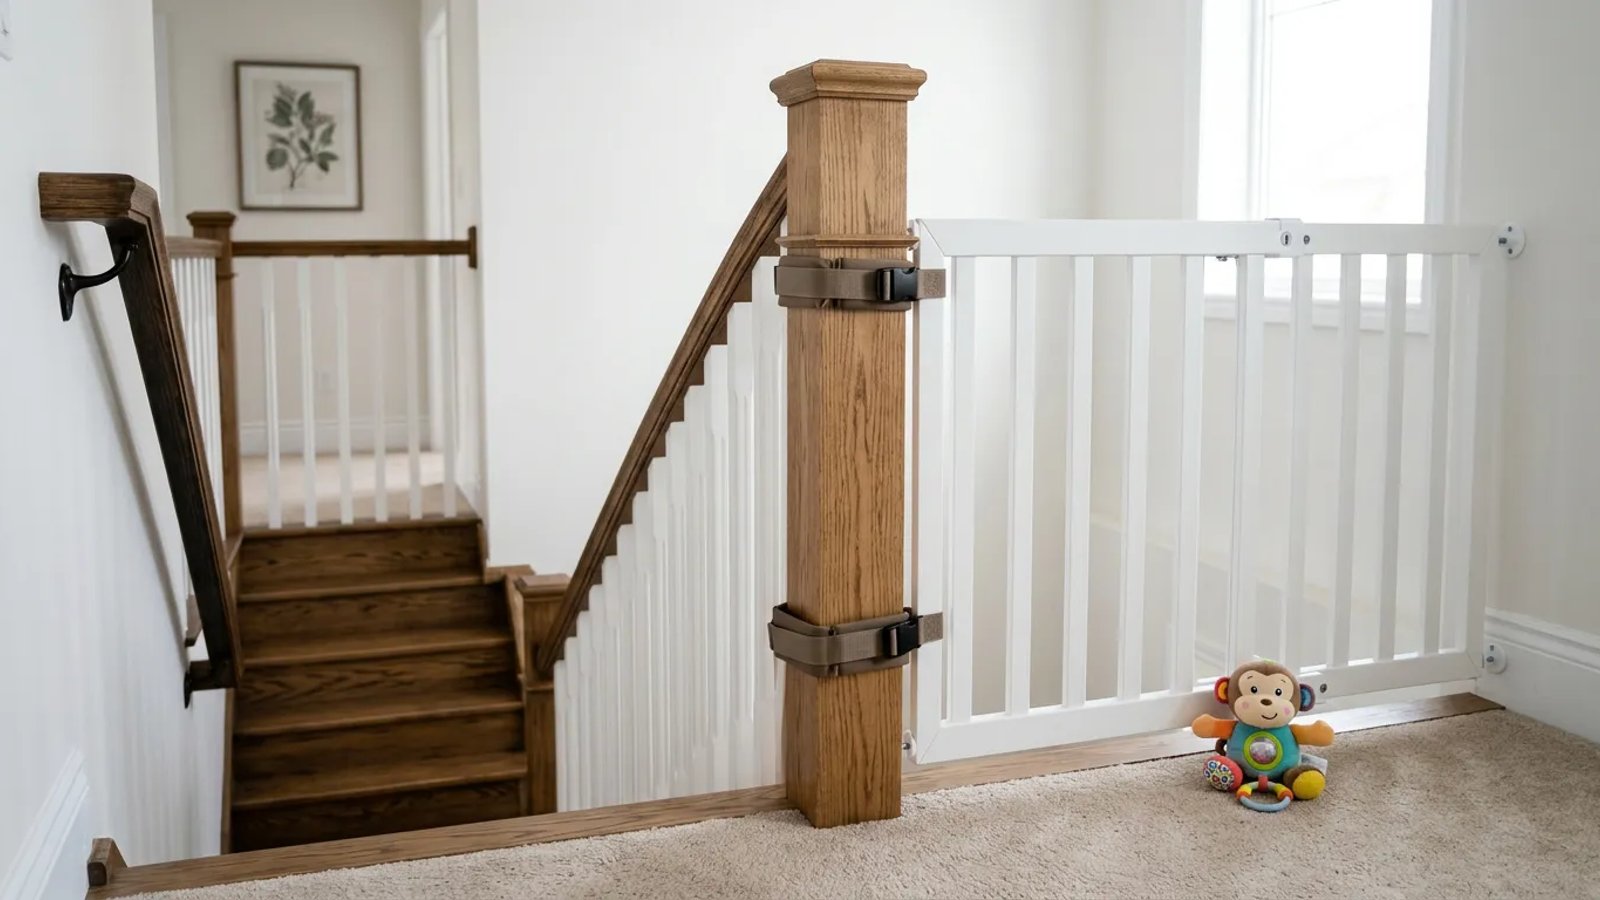
When I was baby-proofing my first house, I spent three days agonizing over drilling into our antique mahogany newel post. I finally discovered banister adapters, and it saved both the wood and my sanity. You can absolutely achieve a rock-solid, hardware-mounted gate setup at the top of your stairs without putting a single hole in your expensive woodwork.
The secret to a drill-free hardware mount is simple: you don't drill the banister, you drill a sacrificial piece of wood that is strapped to the banister.
Banister adapter kits are designed specifically for square or thick wooden newel posts. These kits typically include a finished piece of 1x2 or 2x4 wood, thick rubber padding, and heavy-duty nylon webbing straps or industrial zip ties. The rubber padding sits against your banister to protect the finish, the wood strip goes over the padding, and the straps bind the entire assembly tightly to the post.
Using Y-Spindles for Round Metal Balusters
If your staircase features thin, round metal balusters (spindles) rather than thick square posts, a flat piece of wood will slide right off. In this scenario, you need Y-spindle adapters.
These adapters replace the standard flat tension bolts on one side of your gate. The end of the bolt features a hard rubber "Y" or "V" shape. When you tighten the gate, the Y-shape cradles the curve of the metal round bar, locking it in place. The rubberized coating ensures the metal-on-metal contact won't scratch the paint off your wrought iron.
Step-by-Step: Installing a Banister Adapter Kit
Setting up a banister adapter kit usually takes about 30 to 45 minutes. You will need the adapter kit, a pair of heavy scissors, a level, and a screwdriver for attaching the gate hardware.
- Measure and cut the padding. Hold the sacrificial wood strip against your post and mark where the straps will wrap around. Cut the supplied rubber or felt padding to match these contact points so the wood never touches your banister directly.
- Position the wood strip. Place the wood strip vertically against the post, ensuring it rests flush on the floor or the bottom stair tread for maximum downward support. Use your level to ensure it is perfectly plumb.
- Secure the straps. Thread the heavy-duty nylon straps or zip ties through the routed holes in the wood strip and wrap them around the banister. Cinch them down as tightly as humanly possible. The wood strip should not wiggle even a millimeter.
- Trim the excess. Use your scissors to cut off the trailing ends of the straps so curious little hands can't pull on them.
- Mount the gate hardware. Now that you have a rock-solid, sacrificial wood surface, follow your baby gate's instructions to screw the hinges and latches directly into the adapter wood.
If you have banisters on both sides of your stairs, you simply buy two adapter kits and repeat the process. Your gate will be suspended entirely by the strapped-on wood, leaving the underlying architecture pristine.
Protecting Your Drywall on the Wall Side
Many staircases have a banister on one side and a plain drywall surface on the other. If you are installing a hardware-mounted gate at the top of the stairs, you face a tough choice on the wall side.
While adhesive mounting blocks exist for drywall, they are generally not rated for the extreme sheer force of a top-of-stairs gate holding back a falling toddler. Safety standards strongly dictate that the wall side of a top-stair gate must be screwed directly into a wooden wall stud.
If you are renting and strictly forbidden from drilling, you need to weigh the risks. Repairing two small screw holes in drywall with a $5 tub of spackle takes five minutes when you move out. Replacing a drilled oak newel post costs hundreds of dollars. Always protect the banister with an adapter, but when it comes to the top-of-stairs wall side, drilling into a stud is the only way to guarantee your child's safety. Patching drywall is a small price to pay for peace of mind.
Baby-proofing your home shouldn't mean destroying its character. By utilizing modern banister adapters, Y-spindles, and wall-saver pads, you can create a fortress for your toddler while keeping your landlord or your inner interior designer perfectly happy. Take your time during installation, tighten those straps until they sing, and enjoy the relief of a safely secured staircase.