How to Prevent Ice Dams on Your Roof (The Real Fix)

Tired of massive icicles and water leaking through your ceiling? Learn the science behind ice dams and the permanent attic fixes that stop them for good.
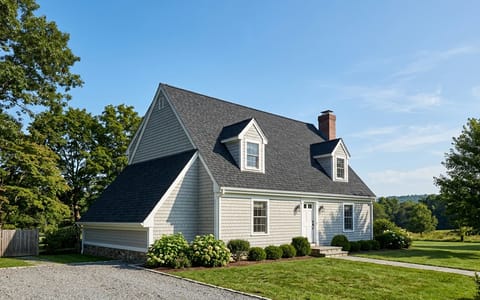
Homeowners often panic when they look outside and see massive, jagged icicles hanging from their gutters, accompanied by a thick ridge of solid ice along the roof edge. The panic turns to outright dread once that trapped water finds its way under the shingles, soaking through the roof decking, and dripping steadily through the living room ceiling. The immediate reaction is usually to blame the roof, the shingles, or the gutters. However, fixing the roof will not solve the underlying issue.
If you want to know how to prevent ice dams, you have to look lower down—specifically, inside your attic. Ice dams are fundamentally an attic ventilation and insulation problem. By understanding the mechanics of how they form and taking specific, targeted steps to control your home's internal temperature, you can permanently banish ice dams and protect your drywall from costly water damage.
The Science of an Ice Dam
To defeat an ice dam, you first need to understand the freeze-thaw cycle that creates it. It all starts inside your heated living space. Because warm air naturally rises, the heat from your home presses upward against your ceilings. If your attic lacks proper air sealing and insulation, that heat escapes into the attic space.
Once inside the attic, this rogue warm air heats up the underside of your roof deck. If there is snow on your roof, the warmed shingles will cause the bottom layer of that snow to melt, even if the outside temperature is well below freezing (32°F or 0°C). This snowmelt turns into liquid water and begins running down the slope of your roof, beneath the insulating blanket of the remaining snow.
The problem occurs when that liquid water reaches the eaves—the part of the roof that extends past the exterior walls of your house. Because the eaves overhang the cold outside air and are not positioned above the warm attic, they remain freezing cold. The moment the snowmelt hits this cold section of the roof, it refreezes.
Over several days or weeks, this continuous cycle of melting and refreezing builds up a solid wall of ice: the ice dam. As more water runs down the roof, it hits the dam and pools up behind it. Roof shingles are designed to shed water running downward, not to hold standing water. Eventually, the pooled water backs up under the shingles, seeps through the roof underlayment, and leaks into your home.
Ice dams aren't a roofing problem—they are an attic ventilation and insulation problem.
Immediate Triage: Stopping Active Leaks
If you currently have water dripping into your house, you cannot wait for an attic insulation project. You need to relieve the pressure immediately. Your goal is not to remove the entire block of ice, but to create vertical channels through the dam so the pooled water can drain off the roof.
A few winters back, I walked next door to find my neighbor violently hacking at his frozen gutters with a claw hammer. He was desperate to stop a leak over his kitchen, but he was doing massive damage to his aluminum gutters and asphalt shingles. I told him to put the hammer down, and we went to the hardware store for a much safer solution.
The safest DIY method for active triage is the pantyhose trick. Take a pair of standard pantyhose and fill the legs with calcium chloride ice melt. Tie off the ends, and carefully lay the filled tubes vertically across the ice dam, so they overhang the gutter. The calcium chloride will safely melt a channel through the ice, giving the trapped water an escape route.
Do not use standard rock salt (sodium chloride) for this. Rock salt is highly corrosive; it will damage your shingles, rust your metal flashing, and burn the grass and shrubs below your roof when it washes down.
How to Prevent Ice Dams: The Permanent Fix
Once the immediate danger has passed and the roof is clear, it is time to address the root cause. The permanent fix involves three crucial steps: sealing air leaks, upgrading insulation, and ensuring proper ventilation. The goal is to keep the roof deck as cold as the outside air.
Step 1: Find and Seal Attic Air Bypasses
Adding more insulation will not stop ice dams if warm air is still actively blowing past it. You must seal the air bypasses first. These are the gaps, cracks, and holes in your ceiling where warm air escapes from your living space into the attic.
Head up to your attic on a cool day, bringing a flashlight, a caulk gun, and a few cans of expanding polyurethane foam (like Great Stuff Fireblock, which costs about $10 to $15 per can). Pull back the existing insulation and look for the telltale sign of air leaks: dirty, blackened patches of fiberglass. The insulation acts as a filter, trapping dust as warm air rushes past it.
- Seal the plumbing stacks. Find where PVC vent pipes come up through the attic floor. Use expanding foam to fill the oversized holes cut around these pipes.
- Check around chimneys and flues. Building codes require a gap between wood framing and hot flues. Seal this gap using specialized high-temperature silicone caulk and metal flashing, not standard expanding foam.
- Address recessed lighting. Older recessed lights are notorious heat leakers. If your fixtures are rated "IC" (Insulation Contact), you can build airtight boxes over them or seal them. If not, consider upgrading to sealed LED retrofit baffles from below.
- Weatherstrip the attic hatch. Treat your attic door or pull-down stairs like an exterior door. Apply heavy-duty adhesive weatherstripping around the perimeter and add a rigid foam box over the top to keep heat from rushing up the stairs.
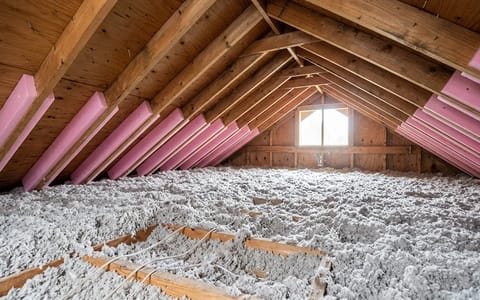
Step 2: Check and Upgrade Attic Insulation
With the air leaks sealed, your next line of defense is thermal resistance (R-value). Most older homes are chronically under-insulated. If you can see the wooden floor joists in your attic, you do not have enough insulation.
Take a tape measure and check the depth of your current insulation. For most cold-weather climates where ice dams are a risk, the Department of Energy recommends an attic insulation value of R-49 to R-60. In practical terms, this means you need about 16 to 20 inches of blown-in cellulose or fiberglass batts covering the entire attic floor.
Blowing in new cellulose insulation over your existing batts is a highly effective, weekend-friendly DIY project. Most big-box hardware stores will let you rent the blower machine for free if you buy a certain number of insulation bags. Just be sure to wear a respirator, long sleeves, and goggles.
Step 3: Clear the Soffit and Ridge Vents
The final piece of the puzzle is ventilation. Even with perfect air sealing and thick insulation, a small amount of heat will still make its way into the attic. You need outside air to sweep that heat away before it can warm the roof deck.
Most homes use a passive ventilation system: cold air enters through the soffit vents (under the eaves) and warm air exhausts out the ridge vent (at the very peak of the roof). This continuous flow of cold air keeps the underside of the roof freezing cold, preventing the snowmelt cycle entirely.
The most common failure point here is blocked soffit vents. Often, well-meaning homeowners or sloppy contractors will cram insulation all the way to the edge of the roof, completely suffocating the soffit vents. To fix this, you need to install rafter baffles (also called vent chutes). These are inexpensive plastic or foam channels that staple to the underside of the roof decking, creating a permanent pathway for air to flow past the insulation.
Why Roof Heating Cables Are a Last Resort
If you wander down the winter aisle at the hardware store, you will inevitably see boxes of roof heating cables. These zig-zagging wires are marketed as a quick fix for ice dams, but they should only be used as an absolute last resort.
Heating cables do not solve the problem of your home losing heat. They treat the symptom by using electricity to melt small, localized paths through the ice. They are expensive to run constantly throughout the winter, and they often create secondary problems. When the melted water runs down past the heated cable, it frequently refreezes inside the cold gutter or further down the downspout, creating massive ice blocks that can tear your gutters right off the fascia board.
Taking the time to air-seal and insulate your attic requires a bit of dirty work, but it pays off permanently. Not only will you stop ice dams from destroying your roof and interior ceilings, but you will also notice a significant drop in your winter heating bills. A well-sealed house is a comfortable, dry house.