How to Prevent Frozen Pipes in Unheated Spaces
Don't let a sudden freeze cause catastrophic water damage. Learn how to identify vulnerable pipes in unheated spaces and protect them with insulation, heat tape, and proper air sealing.
The temperature drops, the wind howls, and somewhere in the dark corners of your house, a water line is turning into a ticking time bomb. Most of us keep our living spaces perfectly warm during the winter months, adjusting the thermostat and throwing on an extra sweater. But the plumbing running through unheated spaces faces the full, brutal force of winter, making it crucial to prevent frozen pipes and avoid costly damage.
Garages, crawl spaces, attics, and unfinished basements are the weak links in your home's defense against the cold. When temperatures plummet, the water inside these exposed lines can freeze solid. As water freezes, it expands by about nine percent. This expansion pushes water toward the closed faucet, causing immense pressure buildup that can easily rupture copper, PVC, and even PEX lines. You need a proactive strategy that targets these vulnerable zones before the first deep freeze hits.
Identifying Highest-Risk Plumbing Lines to Prevent Frozen Pipes
Before you buy any materials, you need to know exactly where your vulnerabilities lie. Grab a flashlight and take a walk through the unheated areas of your property. You are looking for any water supply lines that run through spaces without climate control.
Start in the garage. If your water heater is located here, or if you have an exposed utility sink, these lines are at immediate risk. Next, inspect your crawl space or unfinished basement. Pay special attention to pipes located near foundation vents or windows. Finally, check the attic if you have plumbing routed through the ceiling. Any pipe that feels cold to the touch on a brisk day is a prime candidate for winterization.
A few years ago, we replaced a section of burst copper in a 1950s crawl space. The culprit wasn't just the ambient cold; it was a missing foundation vent cover that funneled freezing wind directly onto an unprotected elbow joint. In my experience, identifying the exact source of cold air is just as critical as locating the pipes themselves.
The First Line of Defense: Foam Pipe Insulation
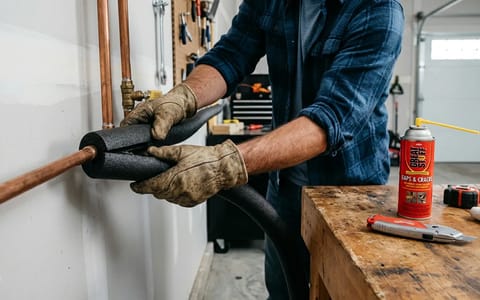
For most homes in moderate winter climates, passive insulation is enough to keep water flowing safely. Foam pipe insulation sleeves are inexpensive, widely available at any local hardware store, and incredibly easy to install.
You will typically find two materials: standard polyethylene foam and flexible elastomeric rubber. Rubber offers a slightly higher R-value (insulating power) and bends easily around corners, but standard foam is perfectly adequate for straight runs. You can expect to spend about $15 to $25 to insulate the critical pipes in an average-sized basement.
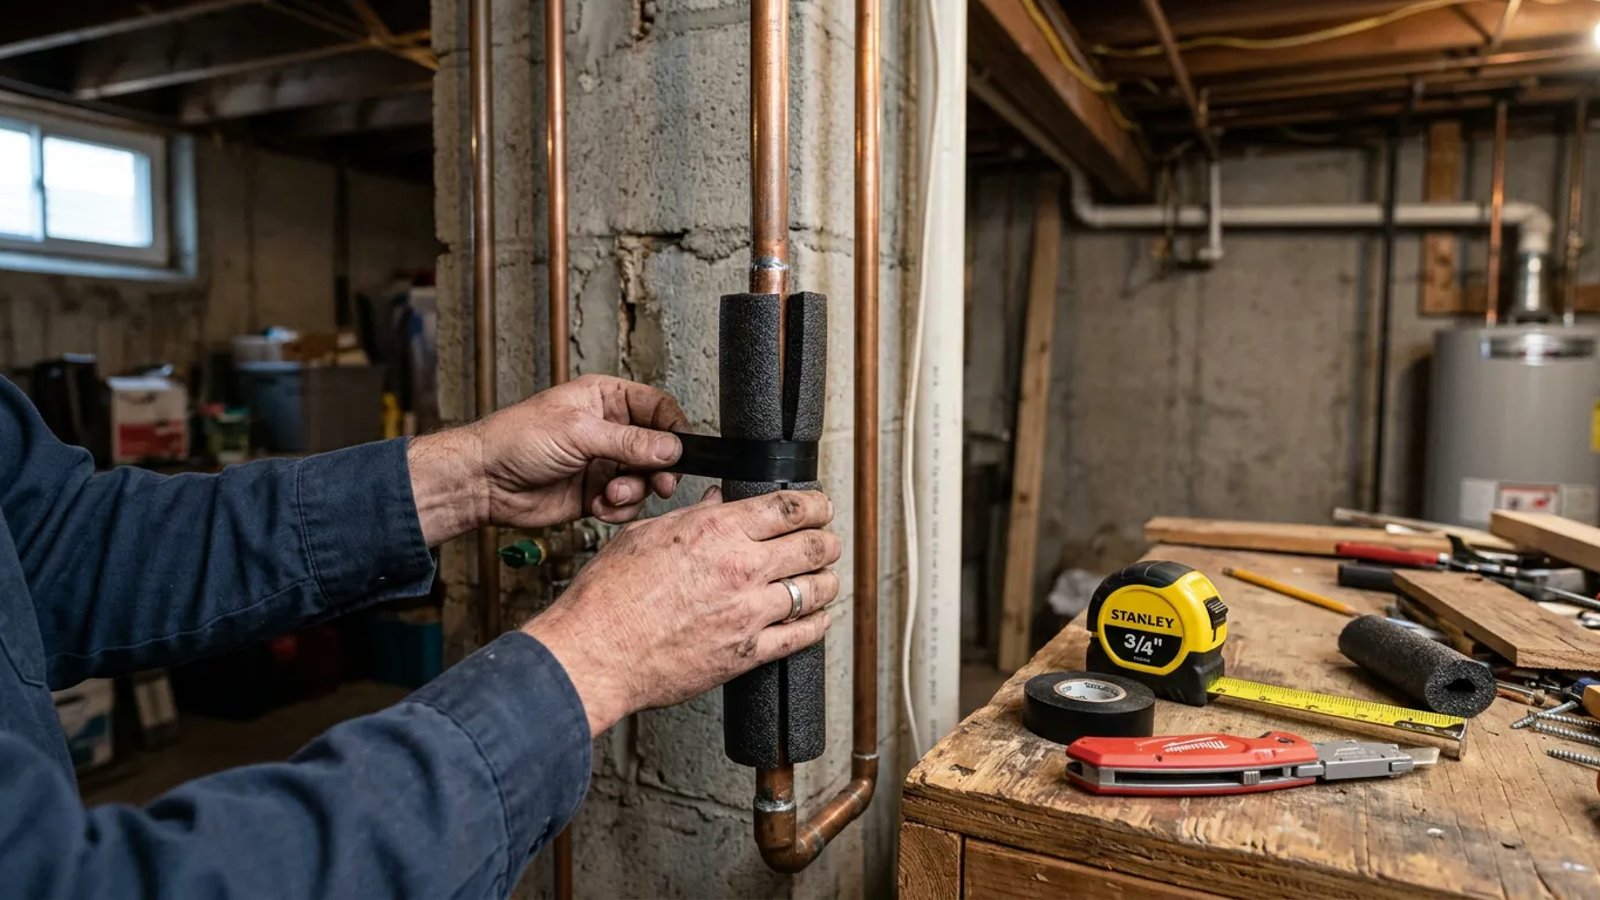
- Measure your pipes. Foam sleeves are sized by the outer diameter of the pipe. Standard residential supply lines are usually 1/2-inch or 3/4-inch. Buy sleeves that match exactly for a snug fit.
- Clean the surface. Use a damp rag to wipe away dust, cobwebs, and grease. If the pipe is heavily oxidized, a quick pass with 120-grit sandpaper ensures the adhesive will stick properly.
- Cut and fit the foam. Measure the length of the run and cut the foam sleeve with a sharp utility knife. Pry open the pre-slit seam and slip it over the pipe.
- Seal the seams completely. Many sleeves come with self-sealing adhesive edges. Peel the backing and press firmly. For unglued sleeves, or at the joints where two sleeves meet, wrap the connections tightly with aluminum foil tape or secure them with heavy-duty zip ties.
Do not leave any gaps. Even a half-inch of exposed copper can freeze and cause a blockage.
Upgrading to Heat Tape for Deep Freezes
If you live in a northern climate where sub-zero temperatures are the norm, passive foam insulation might only delay the inevitable. For total protection, you need active heating. This is where thermostatically controlled heat tape (also known as heat cable) comes into play.
Heat tape is an electrical cable that generates a low level of heat. Modern versions include a built-in thermostat that rests against the pipe. When the pipe temperature drops near freezing, the cable automatically turns on, warming the water inside. When the temperature rises, it shuts off to save electricity.
Passive insulation slows down heat loss, but only heat tape can actively replace the heat stolen by a deep freeze.
Installation requires a bit more care than foam sleeves. You run the cable straight along the bottom of the horizontal pipe, securing it every few inches with electrical tape or specialized fiberglass tape. Once the cable is attached, you cover the entire assembly with fiberglass pipe wrap to trap the heat against the metal.
The Overlooked Step: Air Sealing Exterior Drafts
You can wrap a pipe in three layers of premium insulation, but if a freezing draft blows directly onto it through a crack in your foundation, it can still freeze. Air sealing is the unsung hero of winter plumbing prep.
Inspect the perimeter of your unheated spaces from both the inside and the outside. Look for daylight around sill plates, gaps where utility lines exit the house, and cracks in the mortar. According to guidelines from the Energy Star program, sealing these penetrations is one of the most cost-effective ways to improve your home's thermal envelope.
Pick up a can of expanding polyurethane foam (often sold under the brand name Great Stuff) and a tube of exterior-grade silicone caulk. Use the caulk for gaps smaller than a quarter-inch. For larger holes around hose bibs or main water inlets, inject the expanding foam. The foam will expand to fill the void, creating a waterproof, airtight seal that stops freezing wind in its tracks.
Emergency Action: What to Do If a Pipe Freezes
Despite your best efforts, extreme weather can sometimes outmatch your defenses. If you turn on a faucet on a frigid morning and only a trickle comes out, you likely have a frozen pipe. Immediate action is required to prevent it from bursting.
First, leave the affected faucet open. As the ice melts, water needs a place to escape. Next, locate the frozen section. It will often have a light layer of frost on the outside. Use a hair dryer, a portable space heater, or towels soaked in hot water to gently warm the area. Start from the faucet end and work your way back toward the blockage. Never use a blowtorch, propane heater, or any open flame, as this damages the pipe and poses a massive fire risk.
Spending a Saturday afternoon armed with a tape measure, some foam sleeves, and a can of expanding sealant is a small investment of time and money. By identifying your high-risk lines and applying the right combination of insulation and air sealing, you secure your home against the worst winter weather. Stay warm, stay proactive, and keep that water flowing exactly where it belongs.
- Unheated spaces are the most common source of frozen and burst pipes during sudden temperature drops.
- Foam pipe insulation is an easy, affordable DIY project that provides immediate passive protection.
- Heat tape is essential for homes in deep-freeze zones, actively warming the pipe when temperatures plummet.
- Air sealing is just as critical as insulation; a cold draft blowing directly on a pipe will freeze it regardless of foam wrapping.