Water at Bottom of Dishwasher? How to Fix the Check Valve
Finding a puddle of dirty water in your dishwasher is frustrating, but it rarely means a broken pump. Learn how to diagnose, locate, and clean the check valve to fix the issue yourself.
You open the dishwasher door expecting to unload a rack of sparkling clean plates, only to find a murky puddle of water sitting at the bottom of the tub. Seeing water at bottom of dishwasher units is a highly frustrating experience that immediately brings up fears of expensive pump replacements, flooded kitchen floors, and massive repair bills.
However, standing water after a cycle completes is rarely a catastrophic mechanical failure. In most cases, the machine washed the dishes and the motor pumped the water out perfectly fine. The issue is that the dirty water simply flowed right back in.
A dishwasher relies on a very specific plumbing setup to push water up and out into your kitchen sink drain or garbage disposal. Because the appliance connects directly to your home's wastewater plumbing, gravity naturally wants to pull that water back down into the tub. Two specific barriers prevent this from happening: the physical routing of the drain hose, and a small mechanical part called the check valve. When either of these fails, you get a swampy mess.
Why Is There Water at Bottom of Dishwasher?
Before taking any tools out, it helps to understand how the drainage system works. During the final minutes of a wash cycle, the main circulation pump stops and the drain pump kicks on. This secondary pump forces the dirty water out of the sump basin, up through a corrugated plastic hose, and into your sink's plumbing.
Once the drain pump shuts off, the water remaining inside that long corrugated hose drops back down toward the dishwasher. To stop this water from re-entering the clean tub, dishwashers use a check valve. This is a simple, one-way rubber flapper, typically about 1-2 inches in diameter, located right at the drain pump outlet. When the pump pushes water out, the water pressure forces the rubber flap open. The moment the pump stops, the flap snaps tightly shut, sealing the drain line completely.
If that rubber check valve gets blocked by a piece of food, or if the rubber degrades over time, the seal breaks. The water in the drain hose—and potentially water from your kitchen sink—flows in reverse, filling the bottom of your appliance.
Ruling Out the Filter and Drain Hose
Before you begin dismantling the inside of your appliance, you must eliminate the easiest targets. Often, the cause of standing water is not a broken part, but a simple blockage that you can clear in two minutes.
First, check the main filter assembly. The filter sits at the very bottom of the tub and catches large food particles before they can reach the delicate drain pump. If this mesh screen is caked in grease, wet paper labels from jars, or heavy food debris, water cannot physically drain out of the tub fast enough before the cycle ends. Pull the filter out, wash it under warm water with dish soap, and scrub the fine mesh with an old toothbrush.
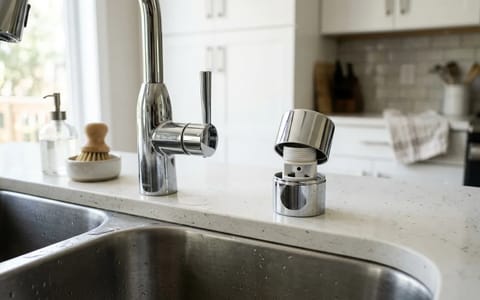
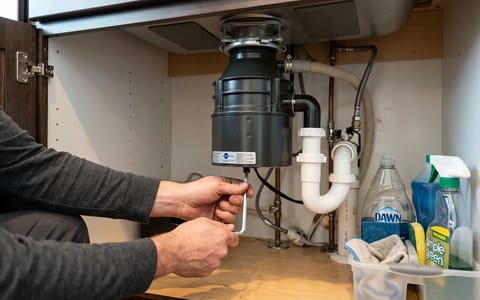
Next, check the drain hose under your kitchen sink. This corrugated hose must route up as high as possible under the countertop before dropping back down to connect to the sink drain or garbage disposal. This high routing is called a "high loop." It creates a physical gravity barrier. If the hose lays flat on the cabinet floor, sink water will easily backwash into the dishwasher tub every time you run the kitchen faucet.
If you recently installed a new garbage disposal, ensure the knockout plug inside the disposal's dishwasher port was actually removed. Forgetting to punch out this small plastic plug is the number one cause of brand-new dishwashers failing to drain.
The Hidden Culprit: Your Dishwasher Check Valve
If the filter is completely clean and the under-sink hose is routed correctly with a high loop, the check valve is your primary suspect. Because it sits at the lowest point of the system, it is highly vulnerable to small, hard debris that manages to slip past the main filter screen.
A few months ago, I noticed my own dishwasher leaving a solid inch of cloudy water after every wash. I pulled the drain hose, checked the air gap on the counter, and even used a wet/dry vacuum to clear the sump. The actual problem? A tiny, sharp piece of a broken glass had wedged itself perfectly into the rubber check valve hinge, holding it open just enough to let dirty sink water flow right back in.
Common items that block check valves include popcorn kernels, fruit pits, pistachio shells, broken glass shards, and hard pieces of plastic packaging. When these items get stuck in the flapper door, the valve cannot close.
How to Access and Clean the Check Valve
Accessing the check valve requires getting your hands dirty, but it is a straightforward process that requires only basic tools. You will need a wet/dry vacuum or a large sponge, a bucket, a pair of pliers, and a screwdriver (usually a Torx or Phillips head, depending on your brand).
- Shut off the power. Safety always comes first. Go to your home's electrical panel and flip the breaker for the dishwasher to the off position.
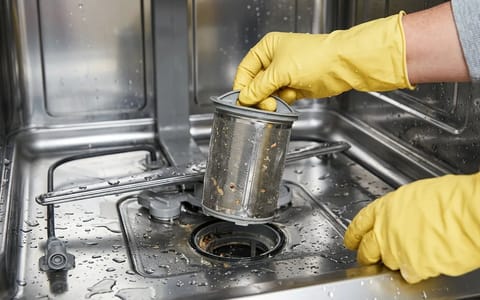
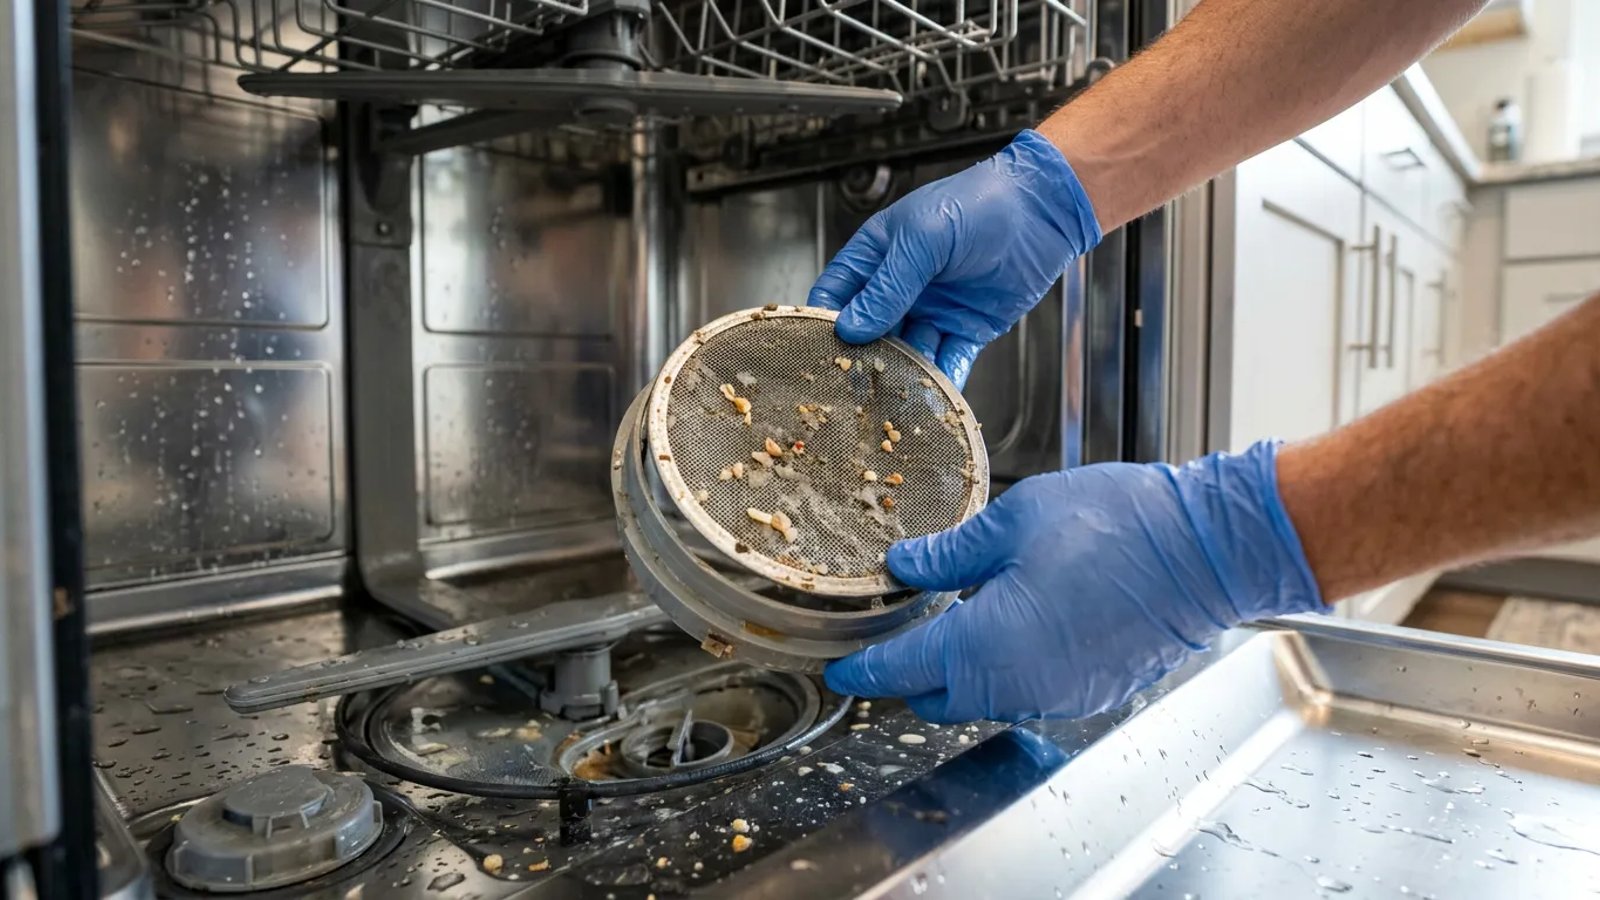
- Remove the racks and filter. Pull the bottom dish rack completely out of the machine and set it aside. Twist and unlock the main cylindrical filter and the flat metal mesh plate at the bottom of the tub.
- Bail out the standing water. Use a wet/dry vacuum to suck out all the standing water in the sump basin. If you do not have a vacuum, use a large sponge and a bucket to soak up and remove as much water as possible so you can see what you are doing.
- Remove the pump cover. Look for a small plastic cover over the drain pump inlet. Depending on the brand, this may snap off with a plastic tab, or it may be held in place by one or two small screws. Carefully remove this cover.
- Locate and pull the check valve. The check valve is usually a small black or clear rubber piece pushed into a circular hole near the pump impeller. Grab the edge of the rubber valve with your fingers or a pair of needle-nose pliers and pull it straight out.
- Clean and inspect the area. Wash the rubber valve in the sink. Shine a flashlight down into the hole where the valve sits and use tweezers to remove any trapped seeds, glass, or food debris.
When Should You Replace the Valve?
Rubber degrades over time, especially when constantly exposed to harsh alkaline dish detergents, boiling hot water, and hard water minerals. While cleaning out a trapped piece of food usually solves the drainage problem, sometimes the valve itself is the actual failure point.
A $15 rubber flapper is often the only thing standing between clean dishes and a swampy appliance.
Inspect the valve you just pulled out. If the rubber feels stiff, brittle, or has a permanently warped or wavy edge, it will no longer form a watertight seal against the plastic housing. Cleaning it will not help; it must be replaced. Replacement valves cost between $10 and $25 at most hardware stores or online appliance parts retailers. Just make sure to look up your specific dishwasher model number on the manufacturer's website to get the exact fit.
If you want to reduce the amount of abrasive debris reaching this valve in the future, Energy Star guidelines recommend scraping large food scraps solidly into the trash rather than heavily pre-rinsing dishes. Scraping removes the hard items that block valves, while leaving enough soft food residue for modern enzyme-based detergents to work properly.
Running a Test Cycle and Final Checks
Once your old valve is cleaned, or your new valve arrives, press it firmly back into the circular slot. It should seat flush against the plastic housing. Reattach the pump cover, screw it down securely, and lock the main filter assembly back into place.
Restore power to the unit at the breaker panel. To test your work, run a quick "Rinse Only" cycle. Stand in the kitchen and listen closely. You should hear the water fill, wash for a few minutes, and then hear the distinct sound of water aggressively draining into the sink plumbing. Once the cycle completely finishes, open the door. You should see a clean, empty tub with no standing water above the filter.
Taking a few minutes to check this small rubber part can save you the cost of a service call and keep your kitchen running smoothly. Make it a habit to check your main filter monthly, and you will rarely have to dig down to the check valve again.
- A pool of water above the filter housing means your dishwasher is either failing to drain completely or allowing wastewater to backwash into the tub.
- The check valve acts as a one-way door; if debris props it open, sink water will flow back into the dishwasher.
- A missing high loop in your under-sink drain hose can cause the exact same symptoms as a failed check valve.
- If the rubber on your check valve is stiff, cracked, or warped, cleaning will not fix the seal and it must be replaced.