Lights Flickering in One Room? How to Find the Cause Fast

Don't panic over a strobe-light effect. Learn how to safely diagnose isolated flickering lights, from simple LED mismatches to worn-out switches, before calling an electrician.
Sitting in a living room that suddenly feels like a 1990s dance club is unnerving. Most homeowners immediately picture sparks behind the drywall and an imminent electrical fire. But before you panic, take note of exactly where the issue is happening. If you have lights flickering in one room while the rest of the house remains perfectly illuminated, you have just been handed a massive diagnostic clue.
An isolated flicker points to a localized problem. It rules out major grid issues from your utility provider and typically rules out a catastrophic failure of your main electrical service drop. Instead, it means the issue is confined to a single branch circuit, a specific switch, or even just the fixtures themselves. You can often track down the culprit with a few safe, systematic checks before paying a professional call-out fee.
1. The Easiest Fix: Check for Loose Bulbs and Sockets
Always start with the simplest explanation. Light bulbs can vibrate loose over time, especially in ceiling fixtures located beneath high-traffic areas like upstairs hallways or children's bedrooms. Thermal expansion and contraction—the natural heating up and cooling down of the bulb and socket metal—also contributes to bulbs backing out of their threads.
When a bulb is loose, the metal base barely touches the contact point inside the socket. As electricity tries to bridge that microscopic gap, it arcs, causing the light to flicker or buzz. Turn off the light switch, let the bulbs cool for ten minutes, and gently tighten them. If you are dealing with recessed can lights, make sure the entire trim baffle hasn't slipped down, pulling the socket connection away from the housing.
2. The LED and Dimmer Mismatch
If you recently upgraded your home to energy-efficient lighting, you might have inadvertently created your own problem. The number one cause of lights flickering in one room is a mismatch between modern LED bulbs and older dimmer switches.
Standard rotary or slide dimmers installed before 2010 were designed for incandescent bulbs. They work by rapidly chopping off parts of the alternating current (AC) voltage wave—essentially turning the power on and off 120 times per second. Incandescent filaments glow hot and retain heat, so they smooth out this rapid switching, appearing to simply dim. LEDs, however, contain micro-electronic drivers that react instantly. When an old dimmer chops the power, the LED driver gets confused, resulting in a visible, highly irritating strobe effect.
To test this, temporarily swap the LED bulb with a traditional incandescent bulb. If the flickering stops instantly, your wiring is perfectly fine. You simply need to replace the wall switch with a modern, LED-compatible dimmer (often labeled as a CL dimmer or trailing-edge dimmer), which typically costs between $20 and $35 at a hardware store.
3. The Shared Circuit Power Draw
Sometimes the lighting in a room is perfectly fine, but it is being bullied by something else on the same electrical circuit. Standard residential lighting circuits are usually rated for 15 amps, providing roughly 1,800 watts of available power. If a high-draw appliance kicks on, it can momentarily starve the lights of voltage.
This is commonly known as the vacuum cleaner effect, but it happens with window air conditioners, space heaters, and even laser printers. A laser printer, for example, draws a massive surge of electricity to heat its internal fuser roller right before printing. If your home office lights dim or flicker every time you print a document, you have found the culprit.
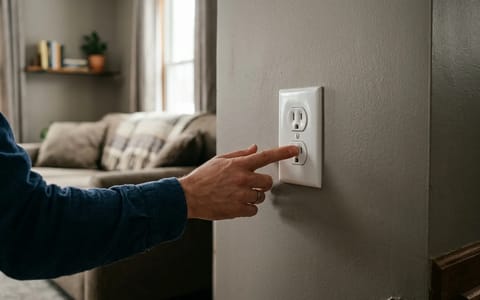
4. Worn-Out Light Switches and Loose Wiring
Light switches are mechanical devices, and they do not last forever. Inside that little plastic toggle are metal contacts that snap together to complete the circuit. Over thousands of flips, these contacts become pitted, carbonized, and worn down. When they fail to make a clean, solid connection, the electricity stutters.
A flickering light is your home's electrical system trying to tell you a secret—your job is to listen before it stops talking entirely.
I once spent three hours tracing wires in a 1970s split-level, only to find the hallway switch's internal spring had simply given up the ghost. The contacts were barely touching, creating a tiny, invisible arc that made the hallway look like a haunted house. If you hear a faint crackling or buzzing sound when you put your ear near the switch plate, or if the switch toggle feels mushy rather than delivering a crisp "snap," the switch is failing.
Replacing a switch is an approachable DIY task for many homeowners, provided you follow strict safety protocols:
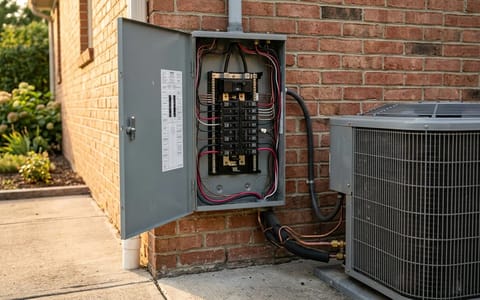
- Kill the power. Locate your main electrical panel and flip the breaker for the affected room to the OFF position.
- Verify the power is off. Remove the plastic switch plate cover. Use a non-contact voltage tester pen (an essential $15 tool) near the wires to confirm the circuit is completely dead.
- Inspect the connections. Unscrew the switch from the box and pull it out gently. Look for loose wires under the terminal screws or wires pushed into the quick-connect holes in the back (which are notorious for coming loose over time).
- Replace if necessary. If the wires were tight but the switch is old, replace it with a new single-pole switch, ensuring you wrap the wires clockwise around the terminal screws and tighten them securely.
5. The Pro Zone: Loose Neutrals and Breaker Issues
If you have checked the bulbs, verified your dimmers, unplugged heavy appliances, and confirmed the switch is sound, you have reached the edge of safe DIY territory. An isolated flicker that survives all these basic checks is usually a symptom of a loose connection deeper in the system.
The most common hidden culprit is a loose neutral wire. The neutral wire (typically white) is the return path for the electricity. If a wire nut has vibrated loose inside a ceiling junction box, the return path is compromised. This creates severe voltage fluctuations. The lights might flicker, or you might notice them getting unusually bright before dimming down again. This is incredibly dangerous, as loose connections generate intense heat and are a primary cause of electrical fires.
The other possibility is a degrading connection at the breaker panel itself. The breaker controlling that specific room may be failing, or its connection to the panel's bus bar might be pitted and arcing.
Dealing with electrical anomalies can be stressful, but methodical troubleshooting is your best defense. By working through the easiest fixes first—tightening bulbs and checking dimmer compatibility—you can often solve the problem in minutes for just a few dollars. And if the issue does require an electrician, you will save them valuable diagnostic time by clearly explaining exactly which steps you have already ruled out.