Plug Gets Hot in Outlet? The Hidden Cause and Quick Fix
When an appliance plug gets hot in the outlet, it is usually a sign of worn-out internal contacts causing electrical arcing. Learn how to diagnose the issue and replace the receptacle safely.
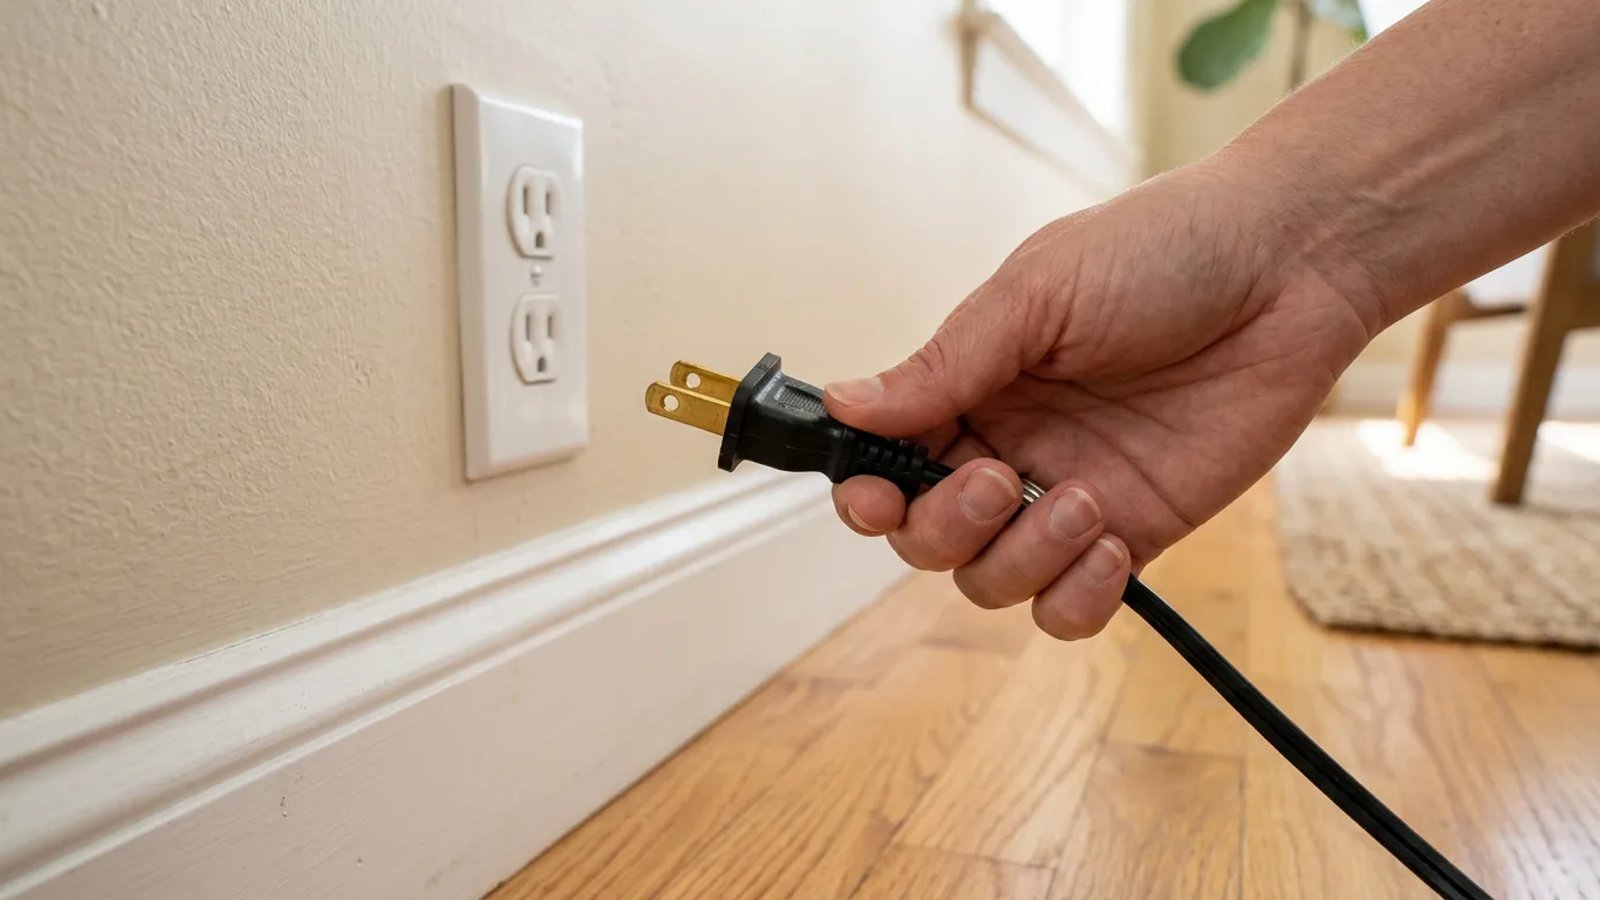
You just finished vacuuming the hallway or drying your hair. You reach down to unplug the machine, and the metal prongs are hot enough to make you yank your hand back. It is a startling moment that immediately raises a red flag. When a plug gets hot in the outlet, it is not just a quirky trait of an old house or a heavy-duty appliance. It is a clear, physical warning of electrical resistance happening right behind your drywall.
Many homeowners immediately assume their vacuum or space heater is broken, drawing too much power and overloading the system. While a failing appliance motor can occasionally cause cord heating, the most common culprit is actually hiding inside the wall. The receptacle itself has worn out, and it is actively creating a serious fire hazard every time you use it. Understanding why this happens and how to fix it is a fundamental part of keeping your home safe.
The Hidden Cause: Anatomy of a Failing Outlet
To understand why your plug gets hot in the outlet, you have to look at how a standard household receptacle is built. Behind the plastic faceplate, an outlet contains a series of brass contact blades. When you push a plug into the wall, these internal brass blades are forced apart slightly, gripping the metal prongs of your plug with spring-like tension. This tight grip is what allows electricity to flow seamlessly from your home's wiring into your appliance.
Over time—typically 10 to 15 years of regular use—the constant insertion and removal of plugs causes those brass contacts to lose their spring tension. The metal fatigues, bends slightly, and fails to grip the prongs tightly. When the connection between the wall contacts and the plug prongs becomes loose, electrical resistance increases dramatically.
Electricity wants an uninterrupted path. When it encounters the microscopic air gaps caused by a loose connection, the current actually jumps—or arcs—across the gap. This microscopic arcing generates intense, localized heat. The longer the appliance runs, the hotter those metal prongs get. Because high-draw appliances like hair dryers, space heaters, and vacuums pull a continuous 1,500 watts or more, they exacerbate this resistance, causing the temperature to spike rapidly.
Diagnosing the Issue: Appliance or Outlet?
Before you turn off the power and start unscrewing wall plates, you need to confirm whether the problem lies with the wall receptacle or the appliance itself. A frayed cord or a failing motor can also cause a plug to overheat. Fortunately, isolating the problem takes only a few minutes and requires no special tools.
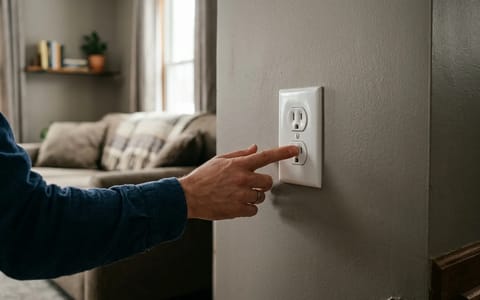
Start with the simplest diagnostic: the "fall out" test. Plug a standard device into the suspect outlet. Does it feel loose? If you plug your vacuum in and the weight of the cord causes the plug to sag downward, or if it pulls out of the wall with almost zero effort, the internal brass contacts are completely shot. A healthy outlet should require a firm, deliberate pull to remove a plug.
Next, inspect the wall outlet visually. Turn off the lamp or appliance, unplug it, and look at the plastic faceplate. Do you see any yellowing, brown scorch marks, or warped plastic around the rectangular slots? If you see any physical deformation or discoloration, the heat has already reached dangerous levels. The outlet must be replaced immediately.
Why You Cannot Ignore a Hot Plug
It is tempting to simply unplug the appliance, let it cool down, and promise yourself you'll only use that outlet for low-power things like a bedside lamp. This is a dangerous gamble. A worn-out outlet does not heal itself, and the degradation accelerates once arcing begins. The heat generated by a loose connection doesn't just warm up the metal prongs; it bakes the surrounding materials.
A standard replacement receptacle costs about three dollars, but ignoring a worn-out one can cost you your home.
As the outlet repeatedly heats up and cools down, the plastic housing of the receptacle becomes brittle and begins to crack. More importantly, the heat travels backward along the copper wires inside your wall. This bakes the protective plastic insulation right off the wires. Once that insulation crumbles away, you are left with bare, energized copper wires sitting inside a wall box. If those bare wires touch each other or the metal box, they create a dead short, which is a primary cause of electrical house fires.
DIY vs. Pro: Making the Safe Choice
Replacing a standard 15-amp or 20-amp wall receptacle is widely considered a beginner-friendly DIY project. It requires only basic hand tools, a $3 replacement part, and about 30 to 45 minutes of your time. However, electricity is unforgiving. If you are going to tackle this project, you must adhere strictly to safety protocols, starting with completely severing the power at the breaker panel.
That said, not every electrical box holds a simple DIY fix. Depending on the age of your home and the history of its renovations, you might open the wall and find a situation that requires professional intervention.
Gathering Your Tools and Materials
If your home has standard copper wiring and you feel confident proceeding, you will need to gather a few specific items before turning off the power. Having everything within arm's reach ensures you won't be wandering around a dark house looking for a screwdriver.
You will need a new residential-grade receptacle. Check the face of the old outlet before buying: if it has two vertical slots, it is a 15-amp outlet. If one of the vertical slots has a horizontal T-shaped notch, it is a 20-amp outlet. Buy the exact matching amperage. You will also need a Phillips screwdriver, a flathead screwdriver, needle-nose pliers, wire strippers, and electrical tape.
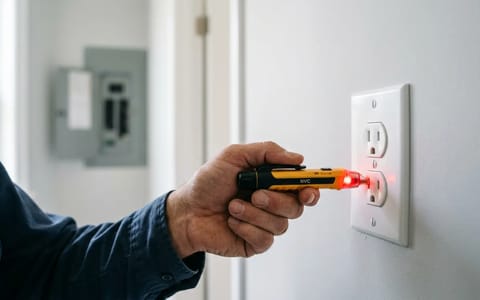
Most importantly, you need a non-contact voltage tester. This is a pen-like tool that beeps and flashes red when placed near a live electrical current. You can pick one up for $15 to $25 at any hardware store. Never rely solely on flipping the breaker and assuming the power is off; breaker labels are notoriously inaccurate.
Step-by-Step: Replacing the Worn Receptacle
With your tools gathered and your new outlet ready, it is time to remove the fire hazard from your wall. Work slowly, pay attention to how the original wires were configured, and never touch bare metal wires until the voltage tester has confirmed the circuit is dead.
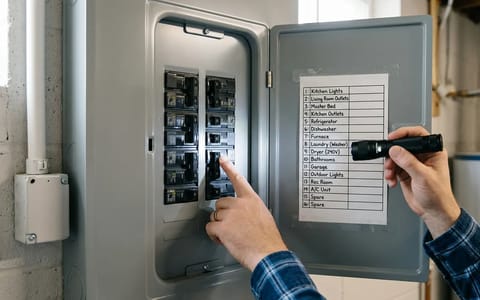
- Kill the power at the breaker. Locate your main electrical panel and flip the breaker corresponding to the room you are working in. If the panel is poorly labeled, plug a loud radio into the bad outlet, turn it up, and flip breakers until the music stops.
- Verify the power is off. Take your non-contact voltage tester and insert the tip into both the left and right slots of the outlet. It should remain silent and unlit. Then, remove the plastic faceplate and touch the tester to the screw terminals on the sides of the outlet.
- Remove the old receptacle. Unscrew the two long mounting screws holding the outlet to the wall box. Gently pull the outlet straight out toward you. Take a clear photo of the wiring with your phone before disconnecting anything.
- Disconnect and prep the wires. Loosen the side screws and remove the wires. If the wires were pushed into the back of the outlet (back-stabbed), cut them off close to the outlet and use your wire strippers to expose 3/4-inch of fresh, clean copper.
- Connect the new receptacle. Using your needle-nose pliers, bend the end of each wire into a small shepherd's crook or J-hook. Connect the black (hot) wire to the brass screw. Connect the white (neutral) wire to the silver screw. Connect the bare copper (ground) wire to the green screw.
- Secure the connections. Always hook the wire around the screw in a clockwise direction. This ensures that as you tighten the screw down, it pulls the wire tighter into the connection rather than squeezing it out. Tighten the screws firmly.
- Wrap and remount. For an extra layer of safety, wrap a strip of black electrical tape entirely around the perimeter of the outlet, covering all the exposed screw terminals. Gently fold the wires back into the box like an accordion and screw the new outlet into place.
Testing Your Work and Moving Forward
Once the new outlet is firmly screwed into the wall and the faceplate is reattached, you can head back to the basement or garage to flip the breaker back on. Return to the room with your voltage tester to confirm power has been restored to the receptacle.
Finally, perform a real-world test. Plug in the vacuum or hair dryer that initially alerted you to the problem. Turn it on and let it run for a solid 5 to 10 minutes. Turn off the appliance and immediately pull the plug. The metal prongs should be room temperature or, at most, very faintly warm. They should absolutely not be hot to the touch.
By taking a hot plug seriously, you have just eliminated a major fire hazard from your home. Make it a habit to occasionally check the plugs of your high-draw appliances after use, especially in high-traffic areas like hallways, bathrooms, and the kitchen. Catching a worn-out outlet early keeps your appliances running smoothly and your home safe.