Roof Leaking Around Chimney? How to Fix Bad Flashing
A brown ceiling stain near the fireplace usually points to failed chimney flashing. Learn how to inspect the damage, apply an emergency patch, and plan a permanent fix.
It is late spring, the heavy rains have rolled in, and suddenly you notice a dreaded brown water stain spreading on the ceiling right near your fireplace. When you have a roof leaking around chimney structures, the culprit is almost always the metal flashing. Over time, seasonal temperature shifts, high winds, and settling can crack the sealant or pry the metal away from the masonry. This gives rainwater a direct path under your shingles and right into your attic.
Catching a leak early saves you from dealing with ruined drywall, soaked insulation, and costly structural rot. We will walk through exactly how to safely inspect your chimney, identify where the water is getting in, and apply a temporary emergency fix to get you through the next storm. We will also look at what a permanent repair involves so you can decide whether to tackle it yourself or call in a professional.
Why is My Roof Leaking Around the Chimney?
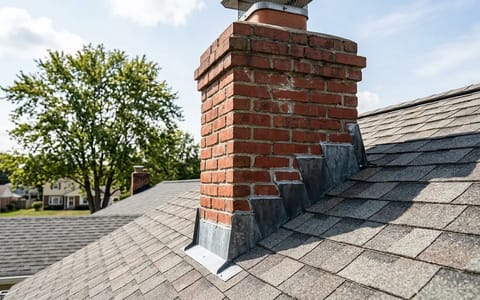
To understand why your chimney is leaking, you need to know how it is built. A chimney is basically a giant hole in your roof. To keep water out of that hole, roofers use a system of layered sheet metal called flashing. This system relies on gravity to shed water downward.
The flashing system usually consists of three parts. First is the base flashing, which sits at the bottom of the chimney. Second is the step flashing, which consists of L-shaped metal pieces woven directly into the roof shingles along the sides of the chimney. Finally, there is the counter-flashing. This piece is typically embedded about 1 inch deep into the mortar joints of the brickwork and folds down over the step flashing.
Leaks happen when this system fails. The house settles, the roof deck expands and contracts with the weather, and the rigid brick chimney stays put. This movement tears the sealant. Once the polyurethane caulk cracks or the metal bends away from the brick, water sneaks behind the counter-flashing and runs straight down the side of the chimney into your home.
How to Safely Inspect for Roof Leaking Around Chimney
Before you climb onto your roof, prioritize safety. Only inspect your roof if the pitch is walkable, the shingles are completely dry, and you have a sturdy extension ladder secured at the base. Wear soft-soled shoes for traction. If your roof is steep, two stories high, or made of fragile materials like slate or clay tile, stay on the ground and use binoculars.
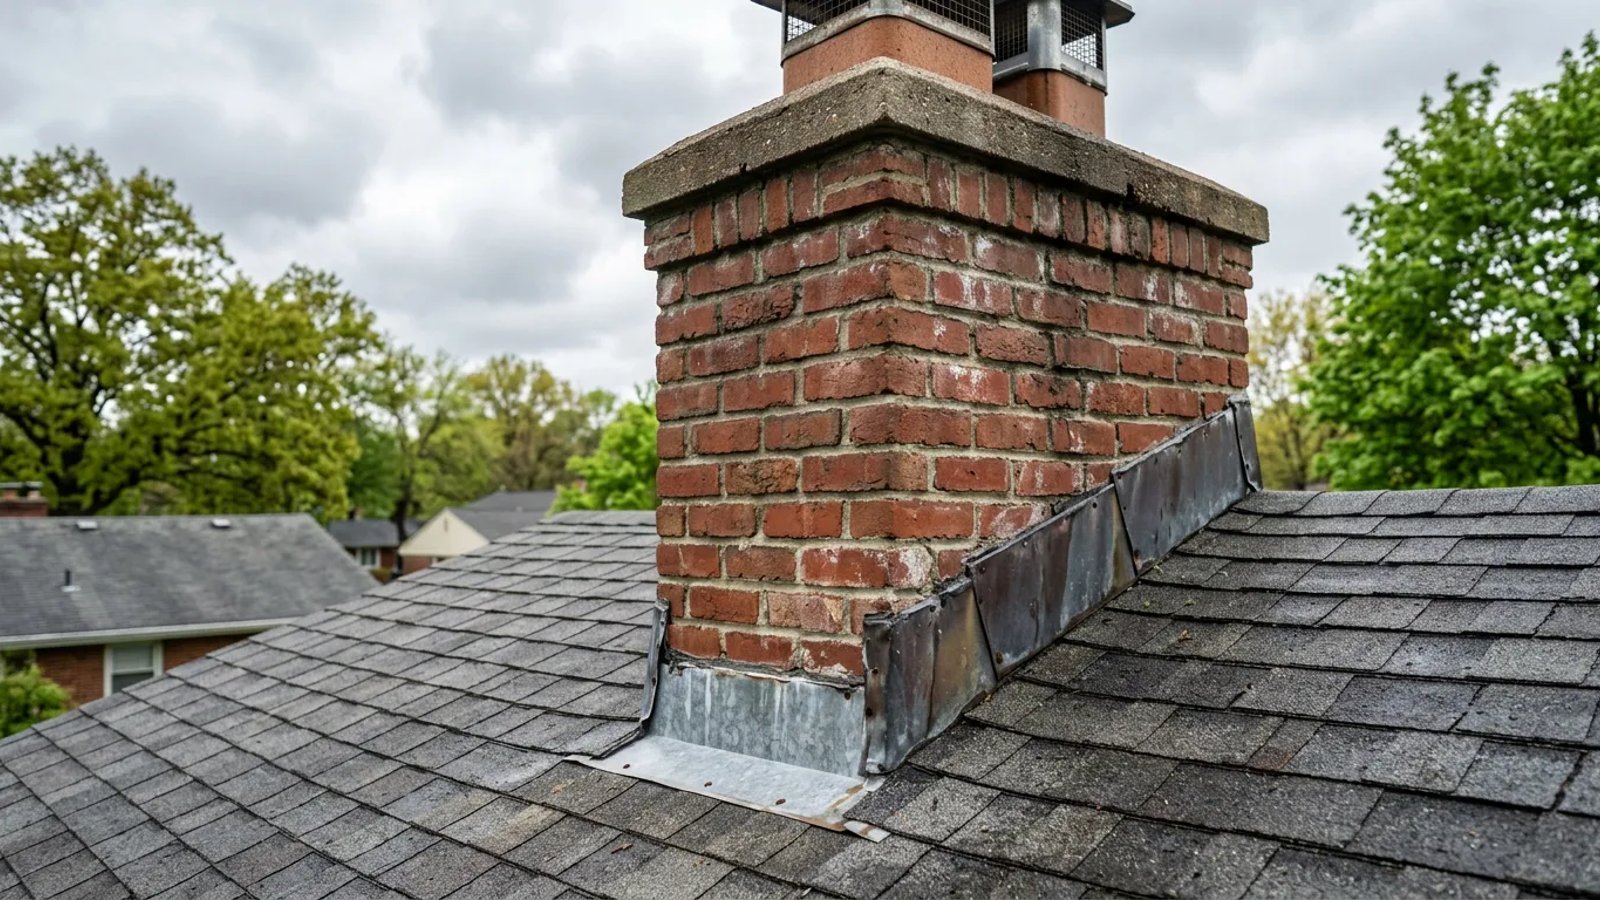
Last spring, I helped a neighbor track down a stubborn leak on a 1990s brick chimney. From the ground, everything looked fine. But once we got up close, we found that the counter-flashing had completely pulled away from the mortar joint on the weather-facing side. It left a half-inch gap that was acting like a funnel for rainwater.
When you inspect your chimney, look for these specific failure points:
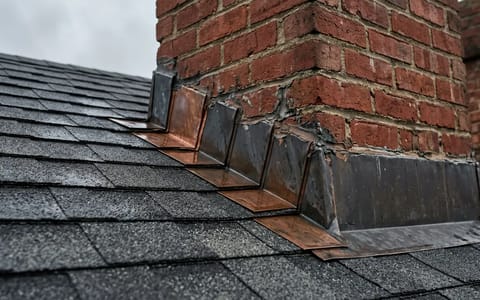
- Cracked or missing sealant: Check the top edge of the counter-flashing where it meets the brick. The caulk should be smooth and rubbery. If it is dry, brittle, or missing, water is getting in.
- Rusted metal: Older galvanized steel flashing rusts over time. Look for orange streaks or holes eaten completely through the metal.
- Loose or missing step flashing: Lift the edges of the shingles nearest the chimney slightly. You should see metal underneath. If the shingles are bare or the metal has slipped out of place, you have found your problem.
- Spalling brick or cracked mortar: Sometimes the leak is not the flashing at all. If the mortar joints are crumbling (spalling) or the brick faces are flaking off, the masonry itself is absorbing water and passing it into the attic.
Temporary Emergency Fix for a Leaking Chimney
If you spot a gap in the flashing and rain is in the forecast, you need to act fast. You can apply a temporary patch using asphalt-based roofing cement. This thick, tar-like substance is designed to stop water immediately and can even be applied to wet surfaces in an emergency.
You will need a wire brush, a tub of wet-patch roofing cement (which usually costs around $15 to $25 at hardware stores), a disposable putty knife, and heavy-duty work gloves.
- Clean the area. Use the wire brush to scrub away peeling caulk, loose mortar, dirt, and moss from the gap. Roofing cement needs a clean surface to adhere properly.
- Apply the roofing cement. Scoop a generous amount of cement onto your putty knife. Press it firmly into the gap between the brick and the metal flashing.
- Smooth the patch. Trowel the cement flat so it slopes downward away from the brick. You want to create a ramp that forces water to run down over the metal rather than pooling against the chimney.
- Check the corners. Pay special attention to the corners of the chimney, as these are the most common spots for step flashing to separate. Smear extra cement over any exposed seams.
Roofing cement is a messy, ugly fix, but it is incredibly effective at stopping active water damage while you plan a permanent repair.
Permanent Flashing Repair: DIY vs. Hiring a Pro
While roofing cement will get you through the season, it will eventually dry out, crack, and fail again. A permanent fix involves replacing the damaged metal and establishing a new, watertight seal.
Properly replacing counter-flashing is a demanding DIY project. It requires an angle grinder fitted with a diamond tuckpointing blade to cut a 1-inch deep groove into the mortar joints. You then bend new aluminum or copper flashing, insert it into the freshly cut groove, secure it with lead wedges, and seal the joint with high-grade polyurethane masonry sealant.
According to the International Residential Code (IRC), proper roof assemblies require flashing to be installed at all wall and roof intersections, and the metal must be corrosion-resistant. Doing this wrong guarantees a worse leak down the road.
Preventing Future Chimney Leaks
Once your flashing is secure, shift your focus to preventative maintenance. Flashing is just one part of the chimney's defense against water.
Check your chimney crown—the concrete pad at the very top. If it is cracked, water will seep down through the center of the brick column, bypassing the flashing entirely. You can seal small crown cracks with a specialized elastomeric crown sealer.
Additionally, consider treating the brick exterior with a breathable siloxane water repellent. Bricks are like hard sponges; they absorb moisture. A siloxane treatment causes water to bead up and roll off without trapping internal moisture, extending the life of your mortar joints and your flashing sealant.
Taking an hour each spring to inspect your chimney from the ground and the attic will keep you ahead of the weather. Spotting a hairline crack in your sealant today is much cheaper than replacing a water-logged living room ceiling next month.
- Inspect your chimney flashing annually, especially after heavy spring storms or high winds.
- Never use standard silicone caulk on roofs; always use polyurethane masonry sealant or asphalt-based roofing cement.
- If you see brown ceiling stains, the leak has likely been active for weeks, so act immediately to prevent mold.