Shower Cold in 5 Minutes? Check Your Water Heater Dip Tube
Running out of hot water after just 5 minutes? Before you buy a whole new tank, learn how to diagnose and replace a broken water heater dip tube for under $20.
You step into the shower, adjust the temperature to the perfect steamy setting, and exactly five minutes later, you are shivering under a blast of ice-cold water. If your tank is full, your thermostat is set correctly, and you are still running out of hot water rapidly, the problem is likely a broken water heater dip tube. Before you panic and start pricing out a brand-new appliance, let us look at how you can diagnose and fix this surprisingly simple issue yourself.
What is a Water Heater Dip Tube?
To understand why this single piece of plastic dictates your morning shower experience, you have to look at the basic physics of your water heater. Cold water is dense and heavy, while hot water is lighter and naturally rises to the top of an enclosed space. Your home's plumbing system takes advantage of this natural thermal stratification.
The hot water exit pipe is located at the very top of the tank, drawing off the hottest water available to send to your showers and sinks. But what happens to the incoming cold water? If the cold water simply dumped into the top of the tank, it would immediately mix with the hot water, instantly cooling it down before it ever reached your plumbing lines.
This is where the water heater dip tube comes into play. The dip tube is a long, rigid plastic pipe that connects to the cold water inlet at the top of the tank and runs almost all the way to the bottom. Its job is to route incoming cold water straight down to the heating element or gas burner. As the cold water heats up, it rises to the top, ready to be used. When a dip tube breaks or snaps off near the top, that cold water dumps directly into the upper hot water supply, effectively ruining the temperature of your shower in minutes.
Why Do Dip Tubes Break?
It seems counterintuitive that a critical component inside a heavy-duty metal appliance would be made of plastic. However, plastic is highly resistant to the corrosive environment inside a water heater tank. While a metal tube would rust and degrade rapidly, plastic can withstand constant submersion. The problem lies in the specific type of plastic used and the extreme temperature fluctuations it endures over its lifespan.
During the mid-1990s, specifically between 1993 and 1997, nearly all major water heater manufacturers purchased dip tubes from a single supplier. This supplier used a defective plastic formula that became incredibly brittle when exposed to hot water over long periods. If your water heater dates back to this era, the dip tube was practically guaranteed to fail.
Modern water heaters utilize cross-linked polyethylene, commonly known as PEX. PEX is vastly superior and highly resistant to thermal expansion and contraction. However, even PEX is not invincible. After a decade of sitting in 120-degree to 140-degree water, surrounded by mineral deposits and shifting water pressures, the plastic can eventually fatigue and snap. In areas with highly chlorinated municipal water or extremely hard well water, the chemical breakdown of the plastic can accelerate, leading to premature failure.
3 Telltale Signs Your Dip Tube is Broken
Diagnosing a broken dip tube is straightforward if you know what to look for. Because the tank itself isn't leaking and the heating elements are still functioning, the symptoms are very specific.
1. A Sudden Drop in Hot Water Duration
The most obvious symptom is the one you likely already experienced. Your standard 40-gallon or 50-gallon tank should provide roughly 30 to 45 minutes of continuous hot water. If that duration drops to 5 or 10 minutes almost overnight, the dip tube has failed. The burner is still heating the water, but the incoming cold water is diluting the supply right at the exit point.
2. White Plastic Bits in Faucet Aerators
When a dip tube disintegrates, the water pressure pushes the broken plastic fragments through your home's plumbing pipes. These pieces eventually get caught in the small mesh aerators at the end of your bathroom and kitchen faucets.
3. Lukewarm Water Despite High Thermostat Settings
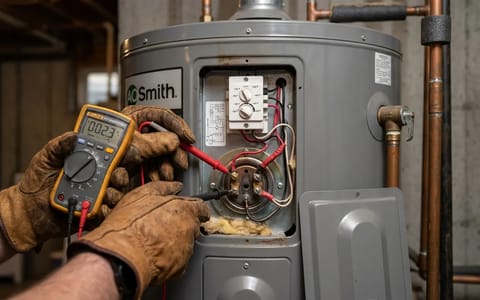
If you have tried turning up the temperature dial on your gas valve or electric thermostats and the water still feels lukewarm, the dip tube is the likely culprit. The tank is physically incapable of delivering undiluted hot water to the house, no matter how hard the heating elements work.
Tools and Materials Needed for the Fix
Replacing this part is an accessible project for most DIY-capable homeowners. You will not need to solder any copper pipes or perform complex electrical work. The replacement tube itself is incredibly inexpensive, making this a highly cost-effective repair.
To complete the job successfully, gather the following tools before you begin:
- A heavy-duty pipe wrench (14-inch or 18-inch works best)
- Channel-lock pliers
- A flathead screwdriver
- Teflon tape (plumber's tape)
- A standard garden hose
- A replacement dip tube (typically 3/4-inch diameter and 40 inches long)
- A hacksaw or PVC cutters (to trim the new tube to size)
Step-by-Step Replacement Instructions
Set aside roughly 60 to 90 minutes for this project. The most difficult part of the job is often loosening the old cold water inlet, which may have been tightened down years ago. Take your time and follow these steps carefully.
- Shut off the power or gas. For an electric water heater, flip the dedicated breaker in your electrical panel to the "Off" position. For a gas water heater, turn the control valve dial on the front of the tank to the "Pilot" or "Off" position. Never drain a tank with the heating elements active, as they will burn out instantly if exposed to air.
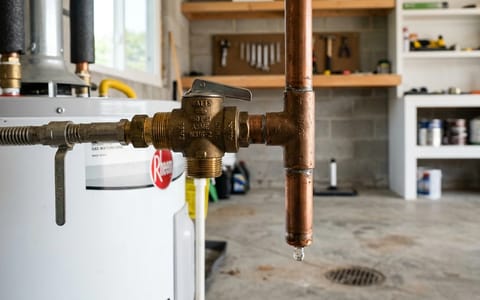
- Turn off the cold water supply. Locate the shutoff valve on the cold water pipe directly above the water heater. Turn it clockwise until it stops to prevent new water from entering the tank.
- Drain the top of the tank. Connect a garden hose to the drain valve at the bottom of the water heater. Route the other end to a floor drain or outside. Open a hot water faucet somewhere in the house to break the vacuum, then open the water heater drain valve. Let about 3 to 5 gallons of water drain out, then close the valve. You only need the water level to drop below the top of the tank to prevent spilling.
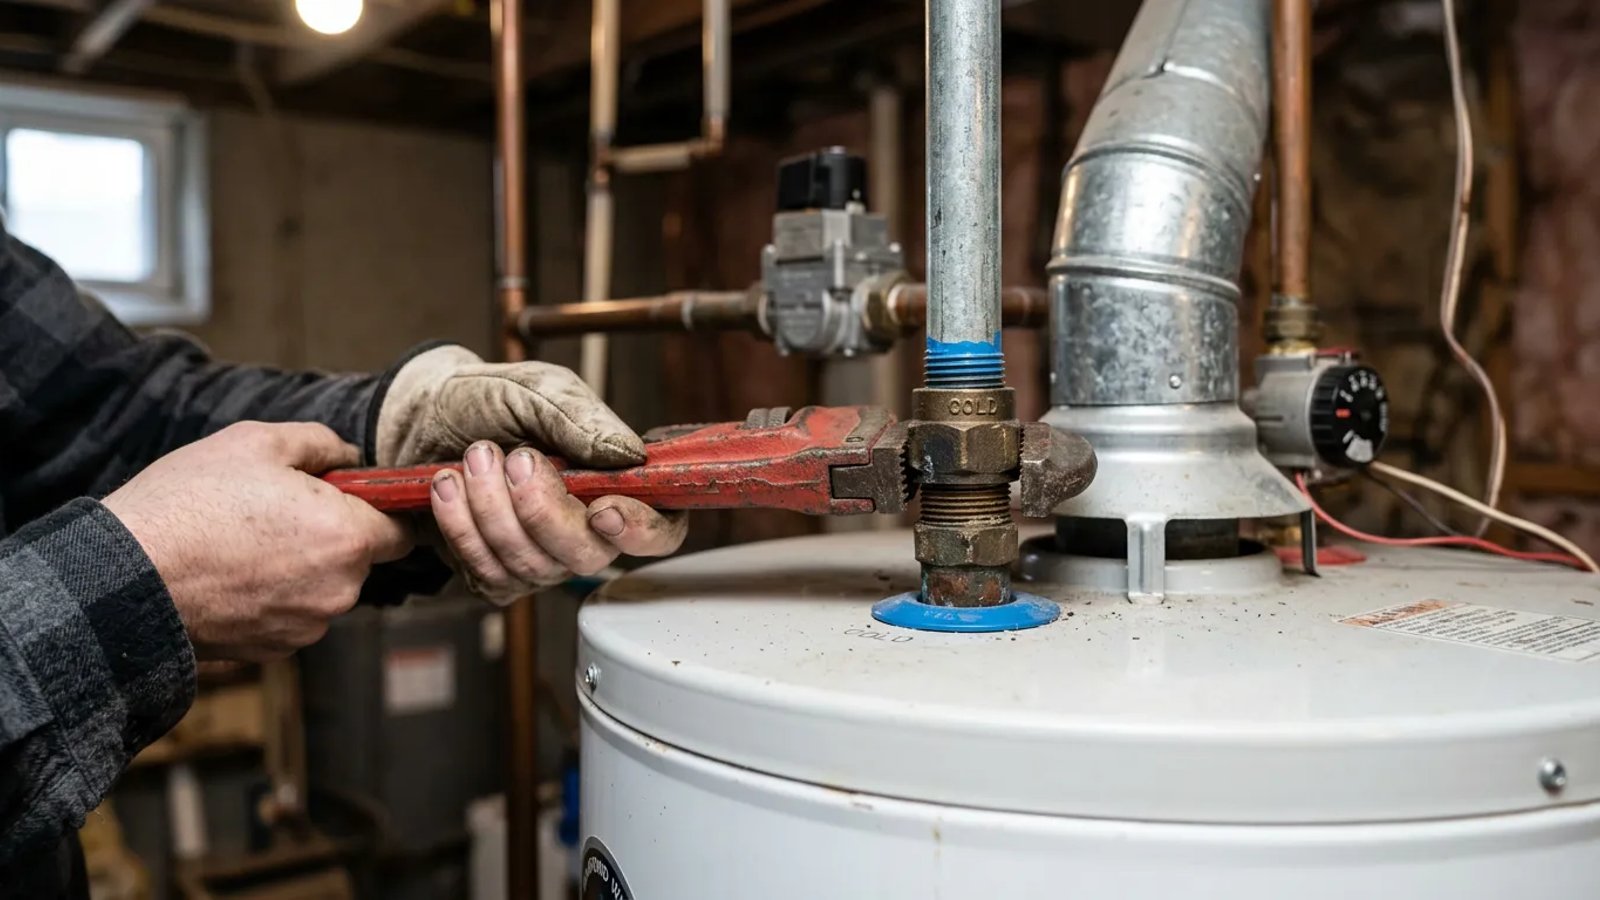
- Disconnect the cold water inlet. Using your pipe wrench or channel locks, loosen the nut connecting the cold water supply line to the tank. Once disconnected, push the flexible supply line slightly out of the way.
- Extract the old dip tube. Look down into the cold water port. You should see the top of the old dip tube (often attached to a metal nipple). Use your heavy pipe wrench to grip the nipple and unthread it counter-clockwise. If the plastic rim is stuck inside the port, gently pry it upward with your flathead screwdriver.
The most satisfying part of this repair is pulling out that jagged, broken piece of plastic and knowing exactly why your showers have been freezing cold.
Now that the old, broken piece is out, it is time to prepare the new one. Most universal replacement tubes come at a standard length of 40 inches. You want the bottom of the tube to sit roughly 6 to 8 inches above the bottom of your tank. Measure the height of your tank, subtract 8 inches, and use a hacksaw to cut the plastic tube to the correct length. Do not cut the end with the flared rim or metal nipple.
Wrap the threads of the new dip tube nipple tightly with three to four passes of Teflon tape. Wrap in a clockwise direction so the tape does not unravel when you screw it into the tank. Drop the long plastic end into the cold water port and thread the nipple in by hand. Use your pipe wrench to tighten it down securely, being careful not to overtighten and strip the threads.
Reconnect the cold water supply line to the new nipple. Double-check that all connections are tight. Now, close the hot water faucet you opened earlier, leaving just one hot water faucet open on the highest floor of your home. Turn the cold water supply valve back on. You will hear water rushing into the tank. Wait until a steady stream of water—without sputtering air—comes out of the open faucet upstairs. This purges all the air from the system. Finally, turn the breaker back on or turn the gas valve back to the "On" position.
How to Flush Out the Broken Plastic Pieces
Replacing the top portion of the tube solves your immediate hot water problem, but what about the rest of the plastic that fell to the bottom of the tank? Leaving those pieces inside can cause them to melt against heating elements or clog your drain valve.
To remove them, you need to perform a vigorous tank flush. With the cold water supply turned on, hook your garden hose back up to the bottom drain valve. Open the drain valve fully. The rush of incoming cold water will stir up the sediment and plastic bits at the bottom of the tank and force them out through the hose. Let it run for about 5 to 10 minutes, or until the water coming out of the hose runs completely clear and free of debris.
When to Skip the DIY and Call a Plumber
While this is generally a straightforward task, plumbing systems can sometimes throw curveballs. Older homes might have rigid copper pipes soldered directly to the water heater nipple, making it impossible to remove the dip tube without cutting pipe and sweating new joints.
Additionally, if your water heater is more than 12 to 15 years old and shows signs of heavy rust around the base, investing time and money into a new dip tube might be a losing battle. A professional can help you weigh the cost of a repair against the inevitable need for a full tank replacement.
Fixing a broken dip tube is a highly rewarding weekend project. By identifying the problem early, gathering the right tools, and following the proper safety steps, you can restore your home's hot water supply for the cost of a takeout lunch. Enjoy your next long, hot shower—you earned it.