Low Pressure? How to Adjust a Water Pressure Reducing Valve
Sudden drop in water pressure? Before calling a plumber, learn how to test and adjust your home's water pressure reducing valve (PRV) to restore flow safely.
You turn on the shower expecting a strong, refreshing spray, but instead, you are greeted by a sad, sputtering trickle. When this happens, it is easy to assume the worst, but often, the solution is simpler: you might need to adjust water pressure reducing valve. This common home maintenance task can resolve whole-house flow issues before you panic and brace yourself for a massive plumbing bill.
City water mains carry water at extremely high pressures—often between 100 and 150 PSI—to ensure it reaches fire hydrants and tall buildings. If that raw pressure hit your home's internal pipes directly, it would blow out your appliance seals and cause your pipes to bang violently. The PRV acts as the gatekeeper, stepping that massive force down to a safe, manageable level for daily use.
What Is a Pressure Reducing Valve and Where Is It?
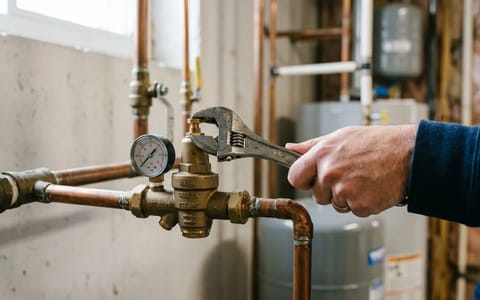
A pressure reducing valve is a bell-shaped brass plumbing fixture installed on your main water supply line. Inside the brass housing, a heavy-duty spring pushes against a rubber diaphragm. As water flows through the valve, this spring-and-diaphragm mechanism constricts the flow, dropping the pressure down to a safe residential level.
You will almost always find this valve located right next to your main water shut-off valve. If you have a basement, look near the front foundation wall where the water meter sits. If your home is built on a slab, check the utility closet, the garage, or even an exterior wall near the garden hose connection. Look for a brass fixture shaped like a bell with a threaded bolt sticking out of the top.
A few years ago, I noticed the water flow in my own guest bathroom dropping significantly over a few weeks. The shower was weak, and the toilet took ages to fill. I feared a major pipe issue, but after hooking up a gauge, I found the house was running at a mere 35 PSI. My PRV's internal spring had simply lost a bit of tension over the years, and a quick adjustment solved the problem completely.
How to Test Your Current Water Pressure
Before you even touch the valve, you need to know your starting point. You cannot accurately gauge water pressure just by looking at how fast water comes out of a faucet. You need a dedicated tool, but thankfully, it is incredibly cheap and easy to use.
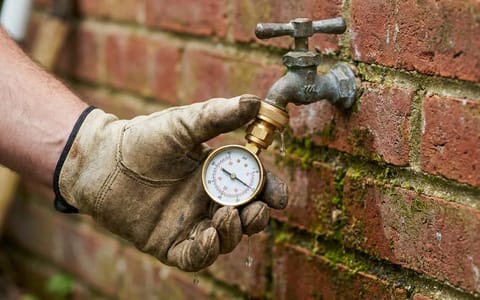
Head to your local hardware store and pick up a screw-on water pressure gauge. These cost about $15 to $20 and look like a small dial attached to a female garden hose fitting. They are usually found in the lawn irrigation aisle or near the rough plumbing supplies.
To test your pressure, ensure all water inside the house is turned off—no washing machines running, no dishwashers, and no flushing toilets. Take the gauge outside and screw it tightly onto a standard hose bib (outdoor faucet). Open the faucet all the way. The needle on the dial will jump up and settle on a number. This is your home's "static" water pressure.
If the needle reads below 50 PSI, your pressure is too low, and you are a prime candidate for a PRV adjustment. If the needle reads above 80 PSI, your pressure is dangerously high, and you need to adjust the valve down immediately to protect your plumbing.
A $15 pressure gauge can save you from a $500 emergency plumber visit.
Step-by-Step: Adjust Water Pressure Reducing Valve
If your test reveals low pressure, adjusting the valve is a straightforward process that requires only an adjustable wrench and a few minutes of your time. Here is exactly how to safely adjust your water pressure reducing valve.
- Turn off all water fixtures. Ensure no water is running anywhere in the house. Leave the pressure gauge attached to the outdoor hose bib with the faucet turned on so you can read the active pressure.
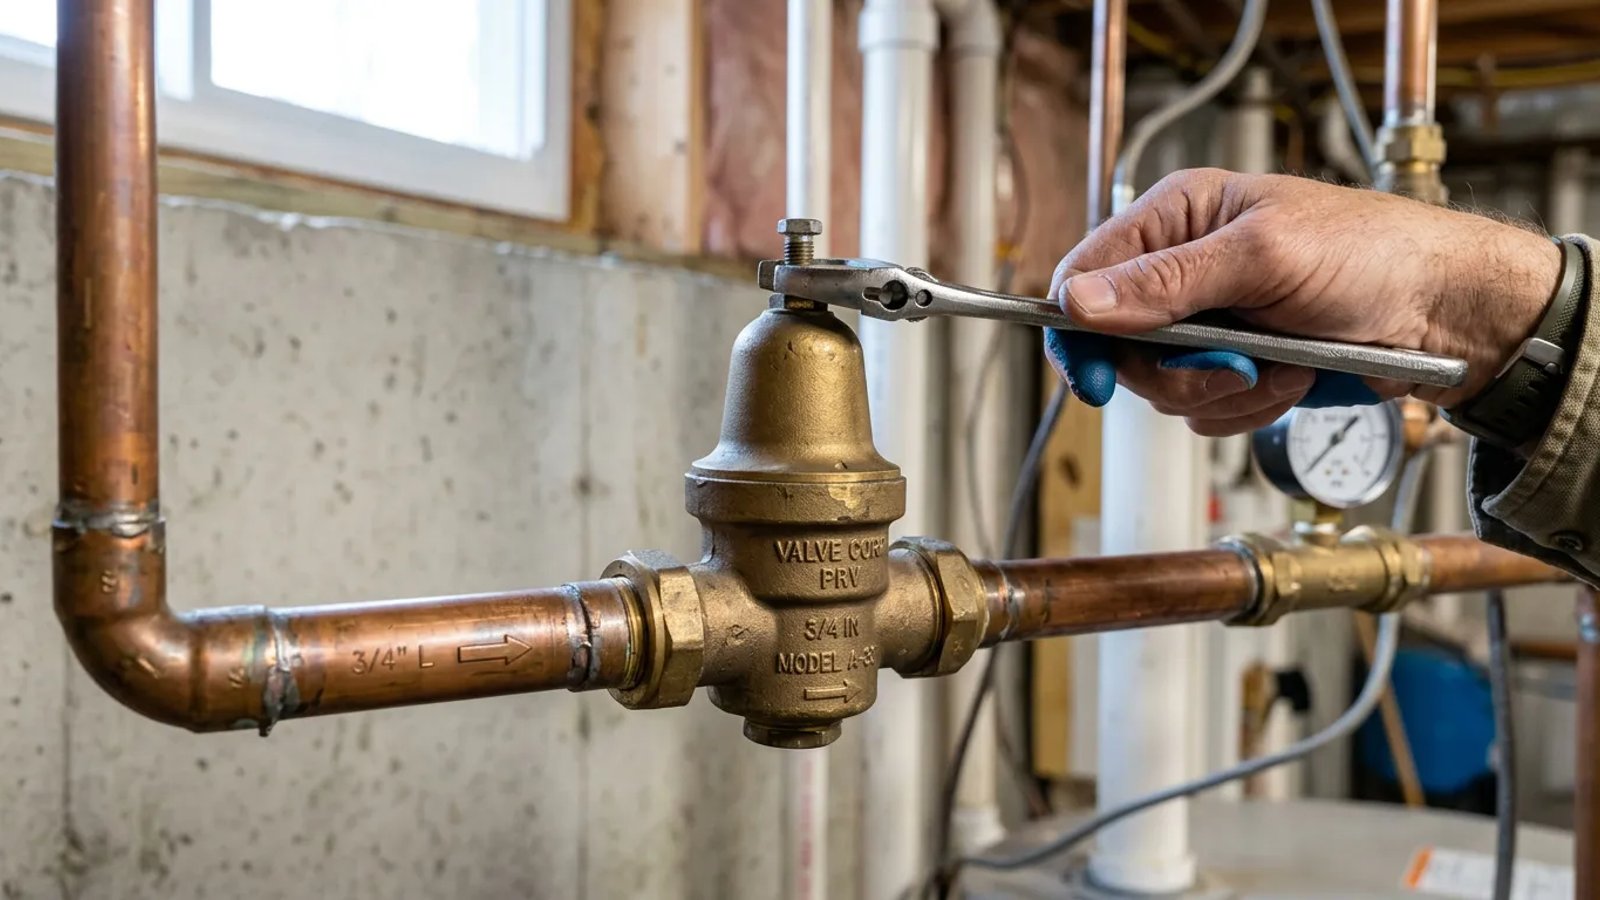
- Locate the adjustment bolt and locknut. Look at the top of the bell-shaped PRV. You will see a threaded bolt sticking out, and at the base of that bolt, sitting flush against the brass housing, is a locking nut. The locknut keeps the bolt from vibrating loose over time.
- Loosen the locknut. Take your adjustable wrench, fit it securely around the locknut, and turn it counter-clockwise. You only need to back it off about a quarter-inch to free up the adjustment bolt. Do not remove the nut entirely.
- Turn the adjustment bolt. Fit your wrench over the top of the adjustment bolt. To increase water pressure, turn the bolt clockwise (driving it further down into the valve). To decrease water pressure, turn the bolt counter-clockwise (backing it out). Turn the bolt exactly one full revolution.
- Check the gauge. Walk outside and look at the pressure gauge on your hose bib. A single full turn of the bolt usually changes the pressure by about 5 to 10 PSI.
- Fine-tune and secure. Continue adjusting the bolt in half-turn increments until your gauge reads exactly where you want it (ideally 60 PSI). Once you hit your target, hold the adjustment bolt steady with one wrench, and use another wrench to tighten the locknut back down firmly against the brass housing.
What is the Safe Pressure Range for a House?
When you discover how easy it is to adjust a water pressure reducing valve, it is tempting to crank the bolt down and enjoy fire-hose-level water pressure in your morning shower. Do not do this. High water pressure is highly destructive to residential plumbing.
The sweet spot for home water pressure is between 50 and 70 PSI. At this range, showers feel strong, dishwashers fill quickly, and lawn sprinklers have excellent reach. However, according to the International Residential Code (IRC), residential water pressure must never exceed 80 PSI.
If you push the pressure too high, the weakest points in your plumbing system will fail. Washing machine hoses can burst, causing catastrophic flooding while you are away at work. The temperature and pressure relief (TPR) valve on your water heater may start leaking constantly as it tries to vent the excess force. Keep your gauge reading at a sensible 60 PSI for the best balance of performance and safety.
Signs Your PRV is Completely Broken
Sometimes, no matter how much you turn the adjustment bolt, the pressure refuses to change. If you drive the bolt all the way down and the gauge still reads 35 PSI, the valve has failed internally. The rubber diaphragm inside the brass bell degrades over time, eventually stiffening, tearing, or becoming coated in hard water mineral scale.
Another common sign of failure is "pressure creep." This happens when the valve works fine while water is flowing, but fails to hold the pressure back when the pipes are closed. To test for this, attach your gauge, run a sink for a minute, and then shut it off. Watch the gauge. It should jump up to your set pressure (e.g., 60 PSI) and stop dead. If you watch the needle slowly creep upward to 80, 90, or 100 PSI over a few minutes, the PRV is failing to seal and must be replaced.
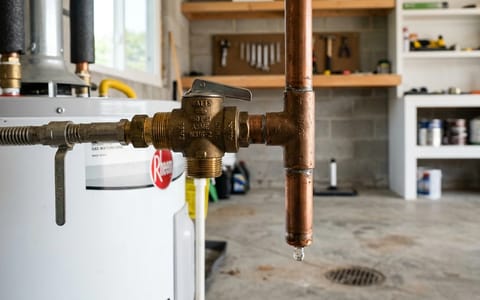
You should also inspect the exterior of the valve. If you see water weeping from the threads of the adjustment bolt, or heavy green corrosion around the bell housing, the internal seals have ruptured. The average lifespan of a PRV is roughly 10 to 15 years, depending on your local water hardness and the incoming municipal pressure.
Taking a few minutes to diagnose your plumbing system can save you immense frustration. By picking up a simple gauge and learning how to adjust a water pressure reducing valve, you take direct control over how your home operates. Keep that pressure gauge in your toolbox, check your exterior hose bib once a year, and you will always know exactly what is happening inside your pipes.
- Always test your pressure with a gauge before making adjustments—never guess by looking at the flow.
- Locate your PRV near your main water shut-off valve, usually in the basement, garage, or a utility closet where the main line enters the house.
- Make adjustments in small increments (a half-turn at a time) and re-check the gauge.
- If turning the adjustment bolt does not change the pressure reading, the internal diaphragm is likely torn and the valve requires replacement.