Spring Deck Prep: How to Seal a Wood Deck Like a Pro

Winter weather can leave your wood deck with hidden rot and degraded sealant. Learn how to inspect, prep, and seal your deck like a pro before summer BBQ season begins.
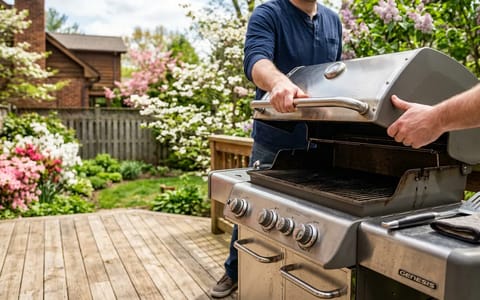
As the spring weather warms up, it is natural to want to drag the patio furniture outside and fire up the grill. But before you invite the neighborhood over for that first seasonal BBQ, you need to take a close look at what winter left behind. Months of freezing temperatures, heavy snow, and lingering moisture take a massive toll on exterior wood. Learning how to seal a wood deck properly isn't just about making it look beautiful—it is about protecting a major investment and preventing structural failure.
Sunlight and water are the natural enemies of lumber. Without a protective barrier, UV rays break down the wood's cellular structure, turning it a dull, splintery gray. Meanwhile, unsealed wood acts like a giant sponge, soaking up rain and morning dew, which leads to swelling, warping, and eventually, rot. Taking a weekend right now to inspect, clean, and reseal your deck will save you hundreds, if not thousands, of dollars in premature board replacement costs over the next few years.
The Post-Winter Deck Inspection: Safety First
Before you even think about buying a gallon of stain, you have to ensure the structure standing underneath you is safe. Cosmetic fixes cannot hide structural dangers. Start your spring maintenance by putting on a pair of work gloves and grabbing a standard flathead screwdriver.
Your first stop should be the ledger board—the critical piece of framing that attaches the deck to your house. Look closely at the metal flashing above it to ensure water isn't getting trapped behind the siding. Check the 1/2-inch lag screws or bolts holding the ledger in place; they should be tight and free of heavy rust. If this connection fails, the entire deck can collapse.
Next, take your screwdriver and gently poke at the joists, posts, and the undersides of the deck boards, paying special attention to areas where wood meets wood or where water tends to puddle. If the tip of the screwdriver sinks easily into the wood with little resistance, you have found wood rot. Any rotted boards or joists must be replaced entirely before you proceed with sealing.
Finally, walk the perimeter and give your railings a firm shake. Winter freeze-thaw cycles often cause the wood to expand and contract, which slowly backs out screws and nails. Tighten any wobbly balusters or handrails using 2.5-inch or 3-inch exterior-grade deck screws. If you find popped nails on the deck surface, pull them out with a pry bar and replace them with screws driven slightly below the surface of the wood.
Prepping the Surface: Cleaning Away Winter Grime
A few springs ago, I skipped the deep-cleaning step to save time before a Memorial Day party. I just swept the boards and slapped on a coat of expensive semi-transparent stain. By August, my brand-new finish was peeling up in sheets like a bad sunburn. Lesson learned: prep work is 90% of a successful deck sealing job.
Start by removing everything from the deck. Sweep away all leaves, pine needles, and organic debris, making sure to use a putty knife to clear out the gaps between the boards. Those 1/4-inch gaps are essential for drainage and airflow; if they are clogged with mud, the edges of your boards will rot.
Next, you need to wash the wood. Avoid using household chlorine bleach, as it destroys the lignin (the natural glue that holds wood fibers together) and leaves the wood looking unnatural and washed out. Instead, use an oxygen bleach-based deck cleaner. Mix the powdered cleaner with warm water in a pump sprayer according to the manufacturer's instructions, apply it generously to the dry wood, and let it sit for 15 to 20 minutes to kill mold and mildew.
Once the cleaner has done its job, scrub the boards with a stiff, synthetic-bristle brush on an extension pole. This physical agitation is what lifts the gray, dead wood fibers and deeply embedded dirt. Rinse the deck thoroughly with a garden hose.
If you choose to use a pressure washer for the rinsing phase, proceed with extreme caution. Softwoods like cedar and pressure-treated pine are easily damaged by high water pressure. Equip your wand with a 40-degree fan tip, keep the nozzle at least 12 inches away from the surface, and never exceed 1500 PSI. Move in continuous, sweeping motions along the grain to avoid carving permanent gouges into the wood.
Sanding for a Flawless Finish
After washing, you must let the deck dry completely. This usually takes 48 to 72 hours of clear, sunny weather. Sealing damp wood is the number one reason deck stains fail. If you want to be absolutely certain, pick up a digital wood moisture meter from your local hardware store for about $25. The moisture content of the wood must be below 15% before you apply any finish.
Once the wood is bone dry, it is time to sand. Washing—especially power washing—raises the grain of the wood, leaving a fuzzy texture that will feel terrible on bare feet and will cause your stain to apply unevenly. Renting a vibrating floor sander (not a drum sander, which is too aggressive) will make quick work of the main deck area.
Use 80-grit sandpaper for the main deck boards. This grit is coarse enough to knock down splinters and remove stubborn patches of old stain, but porous enough to leave the wood open to absorb the new sealant. For the handrails and any areas where people will be touching the wood, switch to a finer 120-grit paper for a smoother feel. After sanding, use a shop vacuum or leaf blower to remove all the microscopic dust from the surface.
Choosing the Right Sealant or Stain
Walking down the paint aisle can be overwhelming, but deck finishes generally fall into four categories, each offering a different balance of protection and appearance.
- Clear Water Repellents: These contain no pigment and allow the natural wood to shine through. However, because they lack pigment, they offer zero UV protection. The wood will still turn gray underneath the sealer within a year.
- Toners / Tinted Sealers: These add a very slight hint of color and provide minimal UV protection. Expect to reapply these every 1 to 2 years.
- Semi-Transparent Stains: This is the sweet spot for most homeowners. They contain enough pigment to provide excellent UV protection while still allowing the natural wood grain to show through. A good oil-based or advanced water-based semi-transparent stain will last 2 to 3 years on horizontal surfaces.
- Solid Stains: These look and act much like paint, completely obscuring the wood grain but leaving the texture. They offer the highest level of UV protection (lasting 4 to 5 years) and are excellent for older, heavily weathered decks that need their flaws hidden.
Step-by-Step: How to Seal a Wood Deck Like a Pro
You have inspected, cleaned, and sanded. The weather forecast shows two days of dry weather, and the temperature is sitting comfortably at 65°F. It is finally time to apply the finish. Timing and technique are everything here.
Never apply deck stain in direct, hot sunlight; the heat will flash-dry the liquid before it can penetrate the wood pores, leading to peeling and flaking.
Plan to start your project in the early morning or late afternoon when the deck is shaded. If the wood is hot to the touch, wait. Stir your stain thoroughly with a wooden stir stick, making sure to scrape all the settled pigments off the bottom of the can. Never shake a can of stain, as this introduces air bubbles that will transfer to your deck surface.
- Protect your surroundings. Use blue painter's tape and plastic sheeting to protect your house siding, nearby concrete, and any landscaping directly beneath the deck.
- Cut in the edges. Using a 2-inch or 3-inch natural bristle brush (for oil) or synthetic brush (for water-based), carefully apply stain to the edges of the deck where it meets the house, as well as the intricate parts of the railings and balusters.
- Work the main boards in sections. Switch to a staining pad attached to an extension pole. Dip the pad into a paint tray and apply the stain to the main deck surface. The golden rule here is to work only 2 to 3 boards at a time, running the pad continuously from one end of the board to the other.
- Maintain a wet edge. Never stop halfway down a board to take a break. If the stain dries and you overlap it later, you will be left with dark, permanent "lap marks" that ruin the continuous look of the wood.
- Back-brush if necessary. If the stain is pooling in lower spots or not absorbing evenly, use a wide brush to push the liquid deep into the wood grain while it is still wet.
Follow the manufacturer's instructions regarding a second coat. Many semi-transparent stains are "one-coat only" products. Applying a second coat when the first one has already sealed the wood will result in a sticky, tacky mess that never fully dries.
Maintaining That Freshly Sealed Finish
Once you've put in the hard work to prep and seal your deck, keeping it looking great requires only minimal ongoing effort. Keep a broom handy and sweep off leaves and dirt weekly. Organic matter left sitting on the deck will trap moisture and accelerate the breakdown of your new stain.
If you drop greasy food from the grill or spill a sugary drink, clean it up immediately with mild dish soap and water. Twice a year—once in the spring and once in the fall—do a quick visual inspection of the high-traffic areas. When water stops beading up on the surface and begins soaking into the wood, you'll know it's time to start planning your next maintenance coat.
Tackling your deck prep while the spring weather is still mild guarantees that when the real summer heat arrives, your outdoor living space will be safe, barefoot-friendly, and ready for entertaining.