Sump Pump Keeps Running? How to Fix a Stuck Float Switch
If your sump pump keeps running even when the pit is dry, you risk burning out the motor. Learn how to quickly diagnose and fix a stuck float switch or broken check valve before the next heavy storm.
Hear that low, steady hum vibrating through your floorboards? It is the sound of your home’s first line of defense working hard. But if that mechanical drone never stops, you have a serious problem on your hands. A sump pump keeps running when its internal sensors tell it there is water to move, even if the concrete pit is completely bone dry. Letting a submersible pump run continuously without water is a guaranteed way to overheat and destroy the motor.
When that motor burns out, you lose your protection against groundwater. The next heavy spring rain that rolls through will quickly overwhelm the pit, leaving your basement vulnerable to catastrophic flooding. As of 2026, a replacement pump alone will run you anywhere from $175 to $350, not to mention the massive costs associated with drywall repair, flooring replacement, and mold remediation if the basement actually floods.
Fortunately, a pump that refuses to shut off is rarely a sign that the pump itself is dead. It is usually a mechanical misunderstanding, such as a physical blockage or a failed $20 part that you can easily fix yourself. In under an hour, armed with nothing more than a flashlight, a pair of rubber gloves, and a screwdriver, you can diagnose the issue, get the system cycling normally again, and save yourself the cost of an emergency plumbing visit.
The Big Three: Why Your Sump Pump Keeps Running
Before you start taking pipes apart, it helps to understand how the system is supposed to work. Your sump pump setup relies on three main components to move water effectively. When one of these fails, the pump either runs dry or pumps the exact same water in an endless loop.
First is the float switch. This is the buoyant plastic bulb attached to the side of the pump. As water fills the pit, the float rises. When it reaches a certain height, it triggers an internal switch that powers on the motor. As the water level drops, the float lowers, and the motor shuts off. If this float gets physically stuck in the raised position, the pump will run forever.
Second is the check valve. This is a one-way mechanical flap installed on the vertical PVC pipe above the pump. Its entire job is to let water push up and out, but snap shut so gravity cannot pull that water back down into the pit once the motor stops. If the flap breaks, the water simply falls back in, refilling the pit and triggering the float switch all over again.
Third is the discharge line. This is the exterior pipe that carries the water away from your foundation. If this pipe is clogged with dirt, roots, or late-winter ice, the pump will run continuously because the water has absolutely nowhere to go.
Step 1: Safety and Pit Preparation
Water and electricity are a notoriously dangerous combination. Before you reach your hands into a dark, damp hole in your basement floor, you must eliminate the risk of electric shock.
Locate the power cord for your sump pump. In most modern setups, the pump plugs into the back of a piggyback float switch plug, which then plugs into a standard GFCI wall outlet. Unplug the entire assembly from the wall. If your pump is hardwired directly into your home's electrical system, go to your main breaker box and flip the dedicated breaker to the off position.
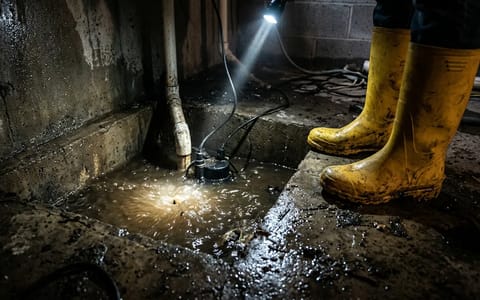
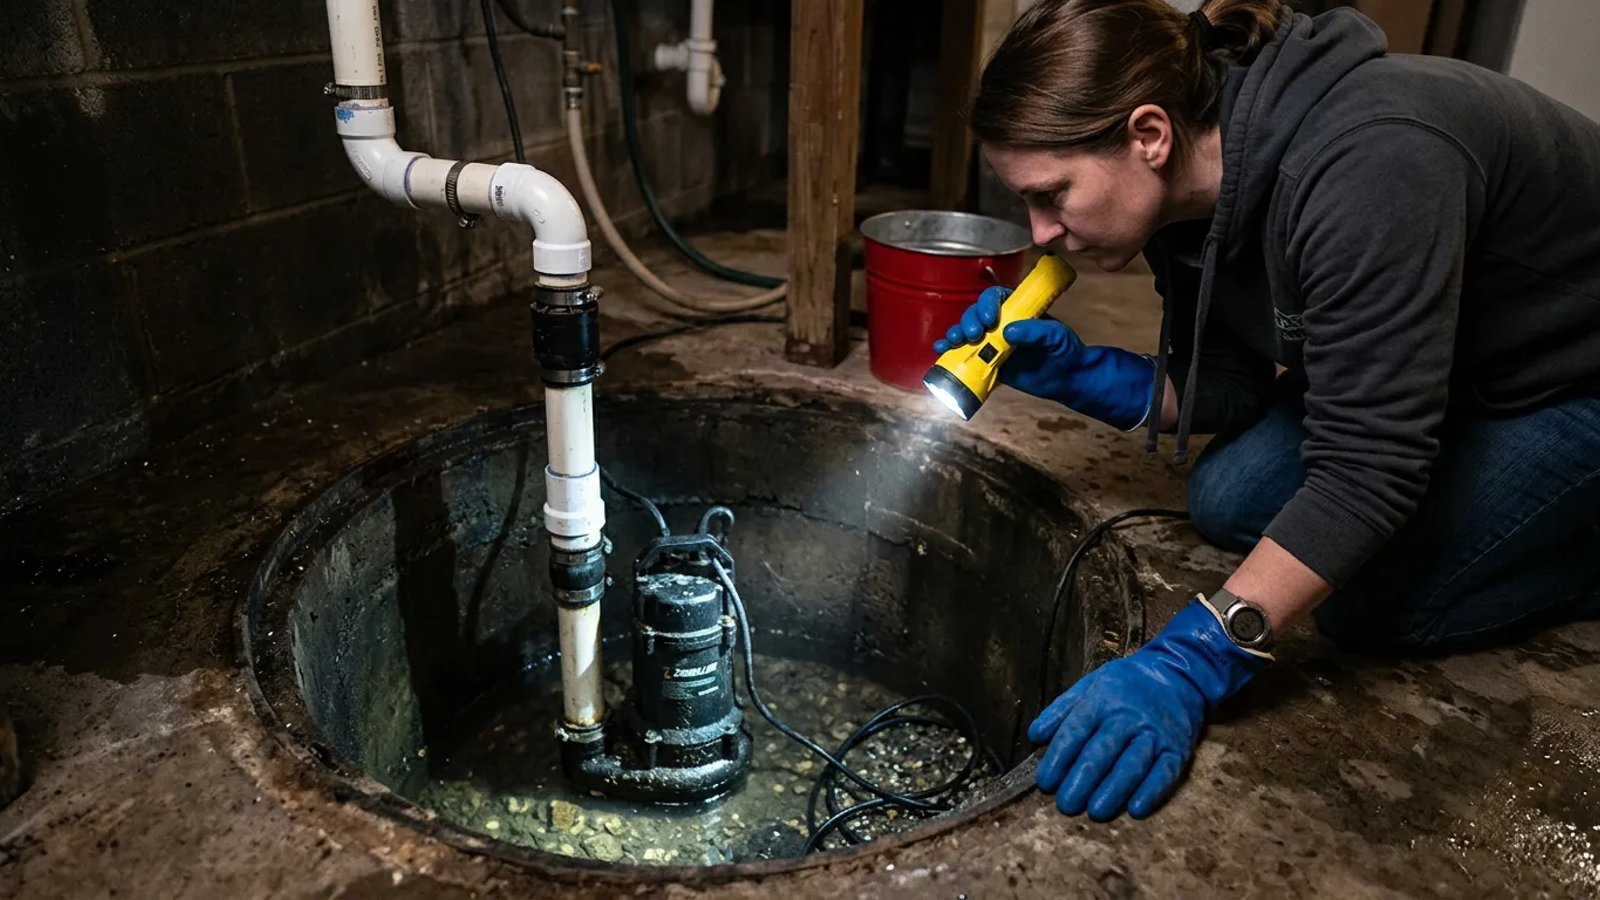
Once the power is confirmed off, put on a thick pair of rubber cleaning gloves and grab a bright LED flashlight. Sump pits are magnets for debris, sediment, and occasionally pests, so you want your hands protected while you work.
Step 2: Inspecting and Freeing a Stuck Float Switch
A stuck float switch is the single most common reason a sump pump refuses to shut down. Submersible pumps vibrate intensely when they run. Over months and years of use, these micro-vibrations can cause the heavy iron or plastic pump to literally "walk" across the floor of the pit.
Eventually, the pump shimmies itself right into the corner. If you have a tethered float switch (a bulb attached to a cord that floats freely), it can easily get pinned between the pump housing and the rough dirt or concrete wall of the basin. Because it is physically trapped in the elevated position, the pump's brain thinks the pit is flooded.
- Shine your flashlight into the pit. Locate the float switch. Is it pinned against the wall, tangled in the power cord, or resting on top of a piece of debris?
- Reposition the pump. Grab the pump by its heavy plastic lifting handle (never by the power cord or the PVC pipe) and carefully slide it back to the absolute center of the pit.
- Test the clearance. Lift the float switch up and down with your hand. It should move smoothly through its entire range of motion without touching the walls, the pump housing, or any cords.
- Secure the cables. If the float was tangled in the power cord, use a heavy-duty plastic zip tie to secure the power cord to the vertical PVC discharge pipe, keeping it tight and completely out of the float's path.
Not all sump pumps use a tethered float. Many modern units use a vertical float switch, which slides up and down on a fixed plastic rod. While these cannot get pinned against the wall, the rod can become heavily coated in slimy iron bacteria or hard calcium deposits. If you have a vertical float that is sticking, use an old toothbrush and a splash of white vinegar to scrub the rod clean so the float glides effortlessly.
I once spent an entire Saturday afternoon convinced my pump's internal relay was fried, pricing out $350 replacements on my phone. When I finally climbed down there with a flashlight, I realized the vibrations had simply wedged the float against a jagged rock sticking out of the dirt wall. A two-inch adjustment of the pump's position saved me hundreds of dollars.
Step 3: Replacing a Waterlogged or Broken Float Switch
If your float moves freely but the pump still will not turn off, the switch itself might be permanently damaged. Over time, the plastic casing on a float switch can crack, allowing water to seep in. When this happens, the internal mechanisms become waterlogged and fail to send the correct off-signal to the motor.
You do not necessarily have to replace the entire pump. Most residential setups use a "piggyback" plug system. If you look at your wall outlet, you will see two plugs stacked on top of each other. The float switch plugs directly into the wall, and the pump motor plugs into the back of the float switch plug. This brilliant design lets you bypass or replace a faulty switch in minutes.
- Unplug the system. Remove both the pump and the switch plugs from the GFCI wall outlet.
- Remove the old switch. Cut the zip ties holding the old float switch cord to the PVC pipe and pull the broken switch out of the pit.
- Attach the new switch. Secure your replacement tethered switch to the PVC pipe using fresh zip ties. Leave exactly 3 to 4 inches of tether between the zip tie and the float bulb. Too much slack allows it to hit the walls; too little prevents it from activating properly.
- Plug it back in. Plug the new switch into the wall, and plug the pump into the back of it. Fill the pit with a few buckets of water to test the cycle.
As of 2026, a universal piggyback float switch costs between $30 and $45 at any major hardware store. It is one of the highest-value DIY repairs a homeowner can make.
Step 4: Testing for a Failed Check Valve
If your float switch is functioning perfectly, but your pump runs for a minute, shuts off, and then immediately turns back on, you are dealing with a classic "short cycling" issue caused by a broken check valve.
When the pump pushes water up the 1.5-inch vertical PVC pipe, that water represents several gallons of heavy liquid. The check valve is the only thing stopping gravity from pulling it back down. If the rubber flap inside the valve tears or the hinge rusts away, all that water crashes back into the pit the second the motor stops. The pit fills up instantly, the float rises, and the pump kicks back on.
A failing check valve forces your sump pump to pump the exact same water over and over again until the motor dies of exhaustion.
To test this, plug the pump back in and lift the float switch manually to turn it on. Let it run for five seconds, then drop the float. Listen closely to the PVC pipe. You should hear a sharp, distinct "clunk" as the valve snaps shut. If you hear rushing water pouring back down into the pit instead, the valve is shot.
Replacing a check valve is highly approachable. Head to your local hardware store and buy a 1.5-inch rubber Fernco-style check valve (in the typical 2026 range, these cost between $15 and $25). Unplug the pump again. Use a 5/16-inch nut driver or a flathead screwdriver to loosen the metal hose clamps on the old valve. Have a 5-gallon bucket and a towel ready, because the water trapped in the pipe above the valve will spill out when you remove it. Slide the new valve into place, ensuring the printed arrow points UP toward the ceiling, and tighten the clamps firmly.
If you are tired of hearing that loud clunk every time the pump shuts off, consider upgrading to a spring-loaded "silent" check valve. As of 2026, these cost around $35 to $50 and use an internal spring to close the flap gently before gravity slams the water down.
Step 5: Checking the Discharge Line for Blockages
Sometimes the pump is running non-stop, the pit is full of water, but the water level simply isn't dropping. This means the pump is trying to push water, but the exit path is completely blocked.
This is incredibly common during the early spring thaw. The ground outside may still be frozen solid, causing ice dams to form inside the end of the exterior discharge pipe. Alternatively, landscaping mulch, mud, or a collapsed corrugated extension hose might be capping the pipe.
Walk outside to where your sump pump pipe exits your home. Inspect the opening. If it is buried under wet leaves or packed with mud, clear it out with a garden trowel. If the pipe is frozen solid, you can use a hair dryer or pour warm (not boiling) water over the exterior of the pipe to melt the blockage. Once the pipe is clear, you will usually hear a massive rush of water as the backed-up system finally drains.
What If the Pump Runs Constantly During Heavy Rain?
If you are reading this during a massive spring downpour, your pump might be running continuously simply because groundwater is entering the pit exactly as fast as the pump can remove it. If the water level is high but steady, and the pump is actively discharging water outside, the system is doing its job. Do not unplug it.
However, if your pump runs non-stop during every moderate rainstorm, it is likely underpowered for your home's local water table. A standard 1/3 horsepower (HP) pump can move about 2,000 gallons per hour. If your pit fills faster than that, the pump will never catch a break. Upgrading to a 1/2 HP or 3/4 HP unit will allow the system to clear the pit faster, cycle off, and give the motor a chance to cool down between cycles.
When to Stop Tinkering and Call a Professional
If you have centered the pump in the pit, verified the check valve holds water, and cleared the exterior discharge pipe, but the pump still runs endlessly the moment you plug it in, you likely have a fused internal switch.
Inside the waterproof housing of the pump, there is an electrical relay that physically connects the power to the motor when the float rises. Over thousands of cycles, the electrical contacts inside this relay can spark, melt, and fuse together. When they fuse shut, the motor receives constant power regardless of what the float switch is doing.
A constantly running sump pump is a loud, annoying cry for help, but it is one you should never ignore. By taking twenty minutes to inspect the pit, adjust the float clearance, and test the check valve, you can easily save your motor from an early grave. Make it a habit to shine a flashlight down into that pit a few times a year, adjust the pump's position if it has vibrated out of place, and ensure your basement stays dry through the heaviest storms.