Sweating Ducts in Crawl Space? How to Stop the Condensation
Condensation on your HVAC ducts can ruin subfloors and cause serious mold issues. Learn how to diagnose the cause, seal air leaks, and insulate your way to a dry crawl space.
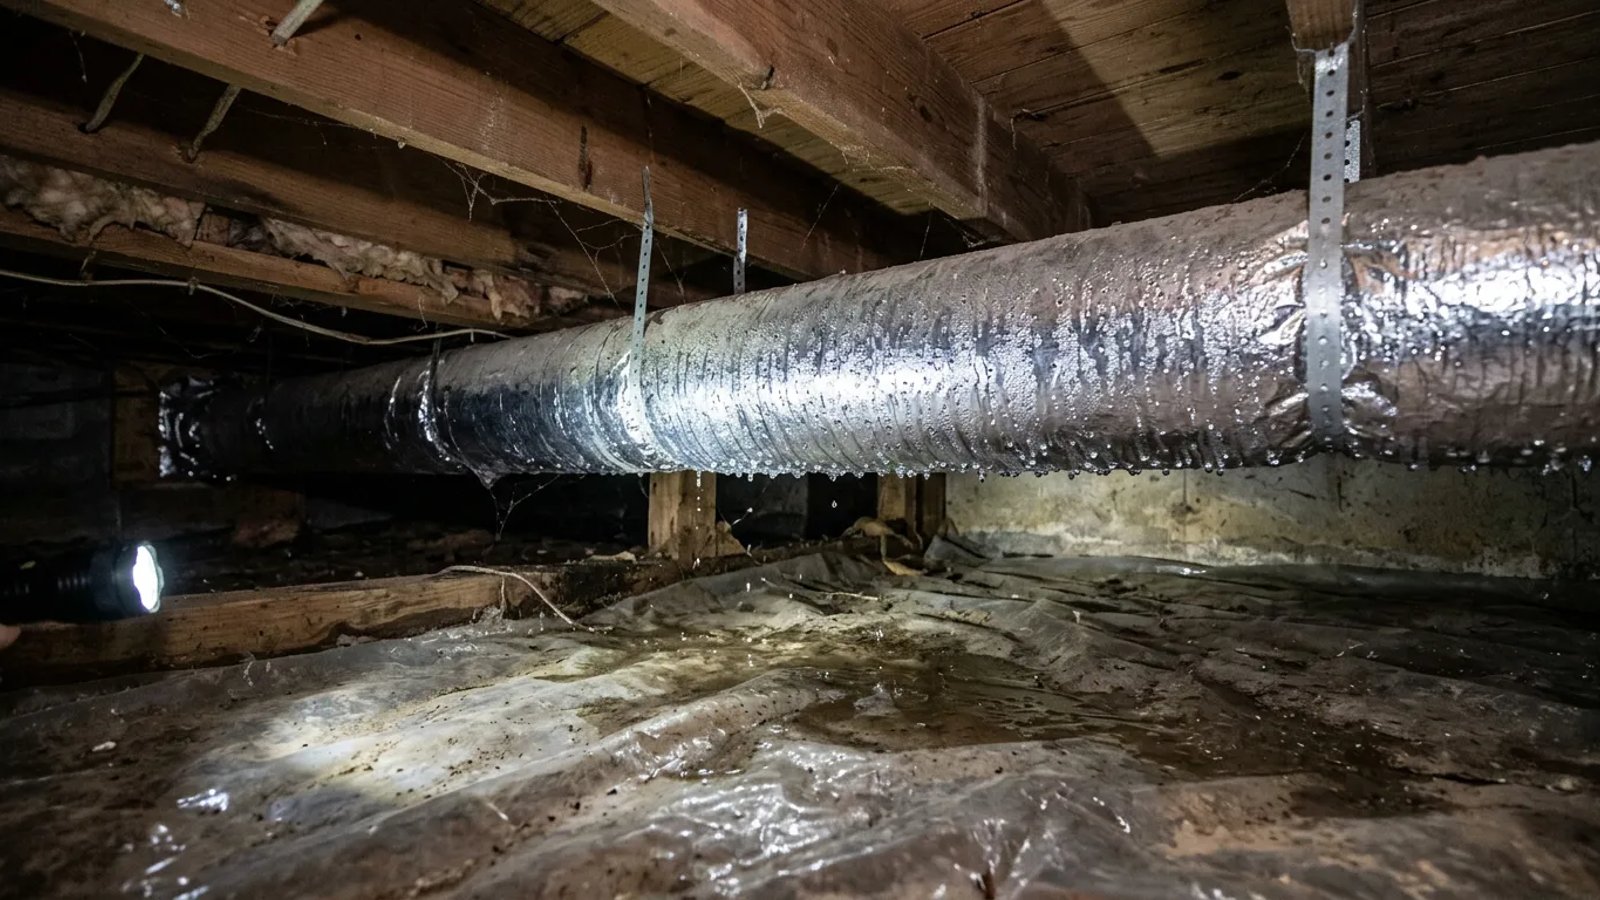
It happens every year. The first real hot day hits, you flip your thermostat to cool, and the air conditioner roars to life. A few weeks later, you go down into the crawl space to check on a pipe or grab a stored item, and you feel a cold drop of water hit your neck. You look up and see your metal HVAC trunk lines covered in heavy water droplets – a clear sign of sweating ducts in crawl space. This common issue is a massive headache for homeowners.
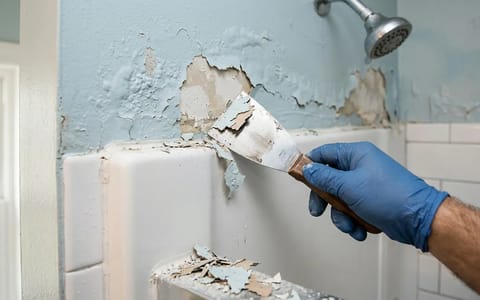
Beyond the unpleasant odor, persistent moisture can lead to serious structural damage, weakening wooden joists and subflooring over time. This creates a breeding ground for various types of mold, some of which can negatively impact indoor air quality and even trigger respiratory problems for occupants. Additionally, inefficient ducts that are constantly sweating indicate a loss of conditioned air, which translates directly to higher energy bills as your HVAC system works harder to maintain desired temperatures. While it looks like a plumbing leak, it is entirely a climate control problem, stemming from a combination of cold surfaces and high humidity. The good news is that you can stop this damaging condensation cycle with a few basic materials and a weekend of dirty work, safeguarding your home's integrity and improving its overall health.
Understanding Sweating Ducts in Crawl Space: Why They Happen
To fix the problem, you have to understand the basic science of condensation. Think about a glass of iced tea sitting on a patio table in the middle of July. The air right next to the cold glass cools down rapidly. Because cold air cannot hold as much moisture as warm air, it drops the excess water directly onto the side of the glass. In building science, the temperature at which this happens is called the dew point.
Your HVAC system is essentially a giant glass of iced tea. When your air conditioner runs, it blasts 55-degree air through thin sheet metal ducts. If those ducts run through an 80-degree crawl space with high humidity, the warm, wet air hits the freezing metal, hits the dew point, and condenses into liquid water.
Understanding relative humidity is key here. Relative humidity (RH) is the amount of water vapor present in air expressed as a percentage of the amount needed for saturation at the same temperature. The higher the temperature, the more moisture the air can hold. When warm, humid air comes into contact with a cold surface like an uninsulated duct, its temperature drops, causing the relative humidity to spike. Once it reaches 100% saturation, the excess moisture precipitates out as liquid water – this is the dew point. In a crawl space, this phenomenon is exacerbated because these spaces are often unsealed, allowing outdoor humidity to easily infiltrate and become trapped. The combination of cold ducts and a warm, moisture-laden environment creates the perfect storm for condensation. This is why addressing both the temperature of the ductwork and the ambient humidity in the crawl space is crucial for a lasting solution. The goal is to raise the surface temperature of the ductwork above the dew point of the surrounding air, or lower the dew point of the air itself.
A few years ago, I inspected a 1980s ranch home where the owner was convinced they had a massive plumbing leak under the kitchen. We crawled under the house and measured the ambient humidity at 85%. The main supply trunk had zero insulation left on it, and it was literally raining condensation onto the dirt floor below. The fix was not a plumber, but a proper moisture control strategy.
Step 1: Inspect the Crawl Space Floor and Vapor Barrier
Moisture has to come from somewhere, and in a crawl space, the primary culprit is usually the exposed dirt floor. Bare earth continuously pumps gallons of water vapor into the enclosed air space every single day. If your ducts are sweating, your first check should always be the ground.
This continuous evaporation from the soil significantly elevates the relative humidity within the crawl space, making it ripe for condensation. Therefore, a robust vapor barrier is the foundational step in any moisture control strategy. Beyond just covering the floor, ideally, the vapor barrier should extend at least six inches up the foundation walls and piers, creating a more complete seal. You can secure the plastic to the ground with landscaping stakes, and to the foundation walls with masonry fasteners or construction adhesive. When overlapping seams, ensure the tape creates an airtight bond; specialized crawl space tape is often reinforced and designed for extreme conditions. Don't forget to seal around any obstructions like pipes or support columns using the plastic and tape, effectively encapsulating the ground. This comprehensive approach to the vapor barrier installation is paramount, as it drastically reduces the amount of moisture vapor entering the air, making it much harder for your ducts to reach their dew point.
According to EPA moisture control guidelines, any dirt floor in a crawl space must be covered with a continuous vapor retarder. You need a minimum of 6-mil thick polyethylene plastic sheeting, though 10-mil or 12-mil is much more durable if you plan to crawl on it.
Check your existing plastic. Is it pushed into the corners? Is it torn? Does it leave large patches of dirt exposed? Roll out new plastic over any bare spots, overlap the seams by at least 12 inches, and tape them with specialized moisture-resistant seam tape. Stopping the moisture at the ground level dramatically lowers the overall humidity around your ductwork.
Step 2: Find and Seal Duct Air Leaks
Air leaks are double trouble. First, you are paying to blow cold, conditioned air directly into a space you do not live in. Second, that escaping cold air hits the outside of the duct jacket, dropping the local temperature even further and creating a concentrated freezing spot where heavy condensation forms.
These leaks are not always obvious, but you can often feel them with your hand, especially near joints, elbows, and where ducts connect to the plenum. For harder-to-find leaks, a smoke pencil or even a simple stick of incense can help visualize the airflow. Sealing these leaks is not just about stopping condensation; it's also about improving your home's energy efficiency and indoor air quality. By preventing conditioned air from escaping, your HVAC system won't have to work as hard, leading to noticeable savings on your utility bills. Moreover, a properly sealed duct system prevents crawl space air, which can carry mold spores and allergens, from being drawn into your living space. When applying mastic, don't be shy; a thick, even coat is essential for a durable seal. Ensure you work it into all crevices and screw heads. While 24 hours is typical for curing, thicker applications or very humid conditions might require a bit more time. Once cured, mastic forms a flexible, airtight, and waterproof barrier that will last for decades, unlike flimsy duct tape.
Before you add any new insulation, you must seal the metal seams. Do not use cloth-backed duct tape. It dries out, turns brittle, and fails within a year. Instead, use a bucket of water-based duct mastic.
- Clean the metal. Wipe down the duct joints with a rag to remove dust and existing condensation. The metal must be dry for the mastic to stick.
- Apply the mastic. Using a cheap disposable paintbrush, scoop up the grey mastic (it feels like thick pancake batter) and brush it heavily over every joint, seam, and screw hole.
- Embed mesh tape for large gaps. If you find a gap wider than a quarter of an inch, lay down a strip of fiberglass mesh tape first, then brush the mastic over it.
- Let it cure. Mastic usually needs 24 hours to fully dry into a rubbery, permanent seal.
Step 3: Upgrade Your Duct Insulation
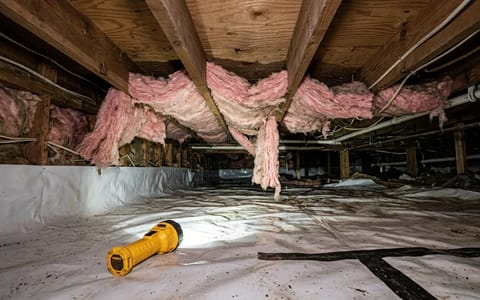
Once the seams are sealed and dry, you need to create a thermal break between the cold metal and the warm crawl space air. This is where duct wrap comes in. Older homes often have thin, decaying R-4 fiberglass that has sagged or fallen off entirely.
Buy rolls of R-8 fiberglass duct wrap with a foil vapor barrier facing. The foil is critical—it stops moisture from penetrating through the fiberglass and reaching the metal.
An R-value of 8 is generally recommended for ducts in unconditioned spaces like crawl spaces, providing a substantial thermal break. However, in extremely humid climates or for very cold supply lines, R-11 or higher might be beneficial. When selecting duct wrap, always prioritize products with an integrated foil vapor barrier, as this is your primary defense against moisture migration through the insulation. Without it, humidity can still penetrate the fiberglass, condense on the cold metal, and render your insulation ineffective. When cutting and fitting the insulation, ensure there are no gaps or bare spots. Overlap the edges by a few inches to create a continuous thermal envelope. You can temporarily secure the wrap with nylon ties or wire before taping the seams. The goal is to create a snug, but not compressed, fit around the ductwork. After applying the FSK tape, a firm rub with a squeegee or even the back of a spoon ensures maximum adhesion and creates a continuous vapor seal. This meticulous attention to detail during insulation installation is what truly prevents condensation and maintains the efficiency of your HVAC system.
Cut a length of insulation to wrap entirely around the duct. When you pull it tight, be careful not to crush the fiberglass. Insulation works by trapping tiny pockets of air; if you compress two inches of fiberglass down to half an inch, you lose most of the R-value, and the duct will sweat right through the wrap.
Seal the seams of the insulation jacket using 3-inch wide aluminum foil tape (often called FSK tape). Use a small plastic squeegee to press the tape firmly into the foil facing. If the tape isn't rubbed down flat, humidity will eventually sneak under the edges and ruin the adhesive.
When Does Condensation Require a Professional?
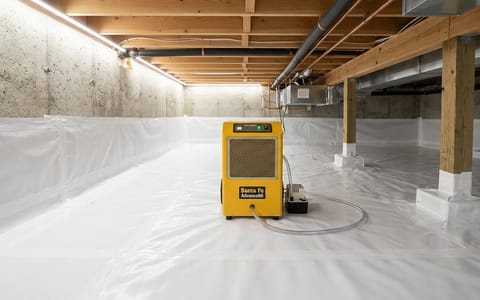
Sometimes, DIY sealing and wrapping is not enough. If you live in a deeply humid climate, the ambient air pulled into your crawl space through foundation vents might hold enough moisture to cause problems regardless of your duct wrap. In these cases, the crawl space itself needs to be conditioned.
A professional encapsulation involves sealing the foundation vents, running heavy-duty 20-mil plastic up the foundation walls, and installing a dedicated, hardwired dehumidifier. These commercial-grade units pull massive amounts of water out of the air, keeping the entire space below 50% relative humidity. At that humidity level, condensation is physically impossible, and mold cannot survive.
Full crawl space encapsulation is a comprehensive solution that transforms your crawl space into a semi-conditioned space, effectively isolating it from the outdoor environment. This not only eliminates duct sweating but also offers numerous other benefits, including improved indoor air quality by preventing outside air and soil gases from entering your home, enhanced energy efficiency by reducing heat loss/gain through the floor, and better pest control. The heavy-duty vapor barrier used in encapsulation is typically sealed to the foundation walls and piers, creating an impermeable liner. The dedicated dehumidifier, often integrated with your HVAC system or operating independently, is specifically designed for the challenging conditions of a crawl space, capable of handling large moisture loads. Maintaining a consistent relative humidity level below 50% in the crawl space is the gold standard for preventing condensation on any surface, including ductwork, and for inhibiting mold growth. This level of moisture control ensures a healthy, dry environment under your home, protecting your investment for years to come.
Controlling moisture under your house is one of the highest-return maintenance tasks you can perform. By laying down a solid vapor barrier, sealing the metal joints with mastic, and wrapping the lines in fresh R-8 foil insulation, you protect your subfloor from rot and keep your indoor air fresh. Take a flashlight down there this weekend and see what your ducts are telling you.
- Treat the source of the humidity first by ensuring your crawl space dirt floor is completely covered with a 6-mil or 10-mil vapor barrier.
- Never use standard cloth duct tape to seal HVAC leaks; use bucket mastic, which permanently seals gaps and survives extreme temperature shifts.
- When wrapping ducts, avoid compressing the fiberglass insulation, as squishing it lowers its R-value and invites condensation.
- If your wood joists read above 20% moisture content, you need immediate mechanical dehumidification to prevent rot.