Sagging Crawl Space Insulation? Why It Falls and How to Fix It
Finding sagging crawl space insulation during your spring inspection? Learn why shoving it back up traps moisture and causes wood rot, and how to fix the root cause.
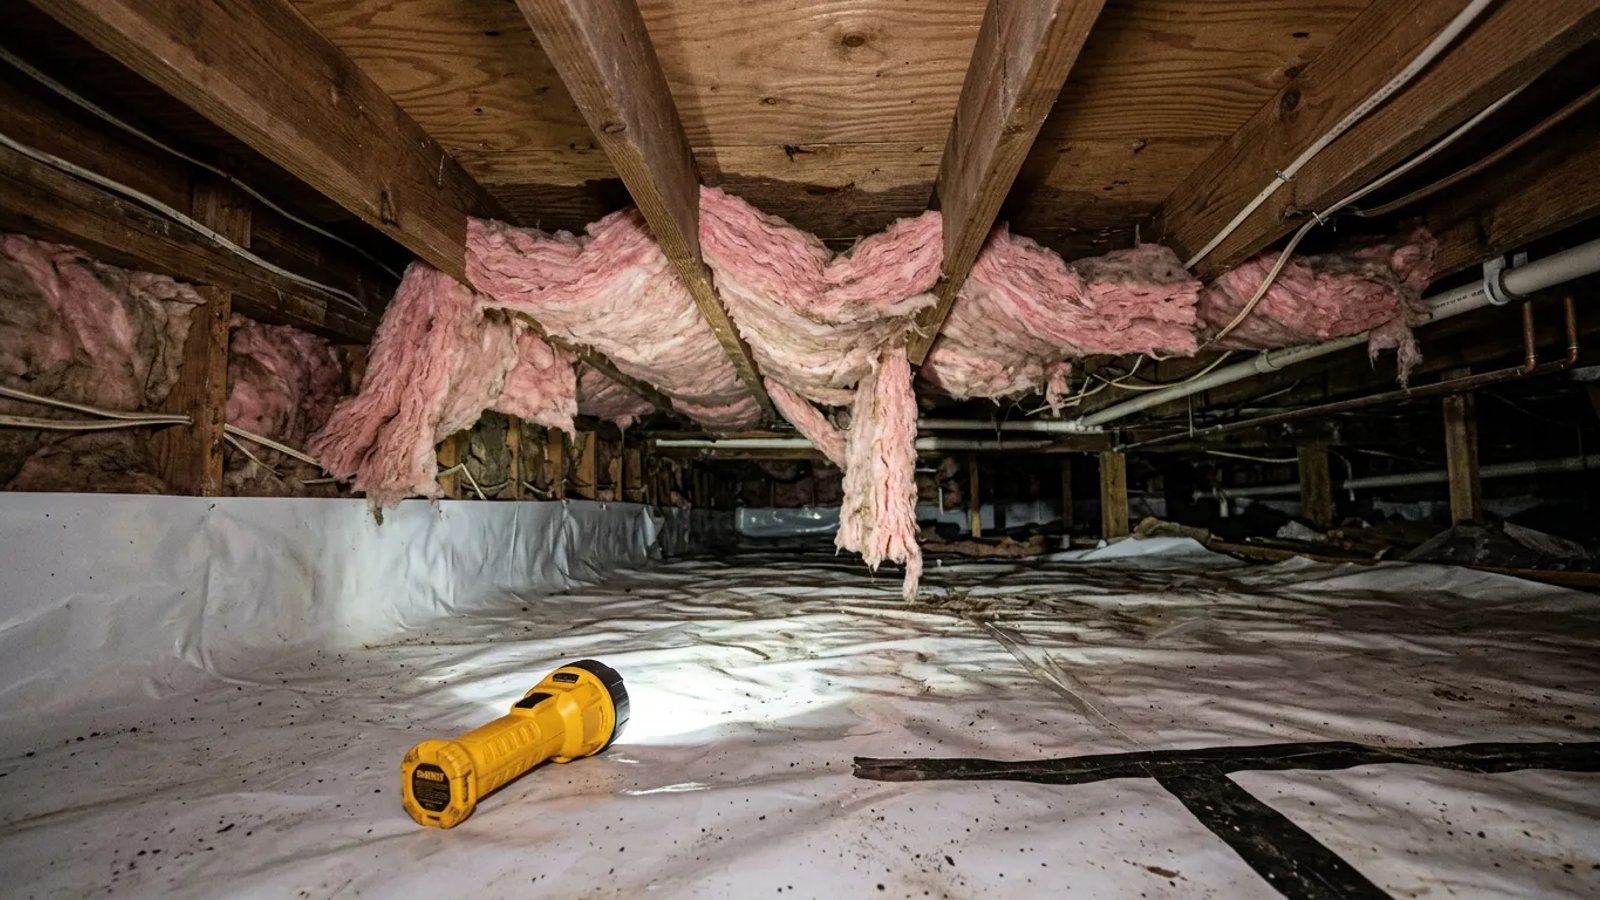
You shine a flashlight into the crawl space during your annual spring inspection, expecting to see clean subflooring and tidy wires. Instead, you are greeted by a cavern of pink stalactites. Your insulation is drooping, tearing, or resting entirely on the dirt floor. It is a frustrating sight, but sagging crawl space insulation is rarely just a cosmetic issue or a sign of lazy installation.
When insulation falls out of floor joists, it is usually trying to tell you something about the environment under your home. Fiberglass acts like an enormous sponge, and when it drops, it means it has taken on weight. Understanding exactly why it fell is the only way to ensure that your repairs last longer than a few months.
Why Do We Get Sagging Crawl Space Insulation?
The standard method for insulating a crawl space floor involves pressing R-19 fiberglass batts between the floor joists. Installers typically rely on the friction fit of the material, a few staples, or thin wire supports to hold it in place. Under perfect, bone-dry conditions, this works fine for years.
However, crawl spaces are rarely perfect. The primary reason insulation falls is moisture weight. Bare dirt floors constantly release water vapor into the enclosed air. During the heavy rains of spring, ground moisture spikes, and the relative humidity under your home can easily climb past 80 percent. The fiberglass batts absorb this ambient moisture, becoming heavy. Slowly, the sheer weight of the water pulls the batts past their staples and wire supports.
The secondary culprit is pests. Mice, rats, and insects love the warm, sheltered environment of fiberglass. Once they tunnel into the batts to build nests, they tear the fibers apart and add the weight of their nests and droppings, eventually causing the material to collapse.
Fiberglass insulation doesn't fall because it's tired; it falls because it's heavy with trapped water.
The Danger of the "Push It Back Up" Fix
A few years ago, I crawled under a 1980s ranch home to check a plumbing leak. The homeowner had spent a full weekend meticulously stapling up fallen fiberglass six months prior. By the time I got down there, the batts were hanging to the dirt again, heavy as wet blankets, and the wooden joists were already showing the early white fuzz of mold.
This is the most common mistake homeowners make. When you find sagging insulation, your first instinct is to grab a staple gun, lie on your back, and shove the material back into the joist bay. This is a critical error. By pushing wet, heavy fiberglass back against your wooden subfloor, you are effectively applying a wet poultice to the structural wood of your home.
How to Safely Inspect the Fallen Batts
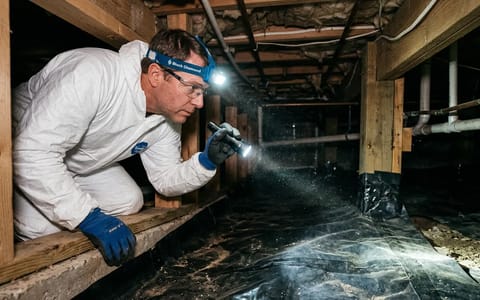
Before you decide on a repair strategy, you need to evaluate the condition of the fallen material and the wood above it. Crawl spaces are confined, dusty, and potentially hazardous, so proper preparation is non-negotiable.
- Gear up properly. Put on a long-sleeved shirt, heavy pants, or a disposable Tyvek suit. Wear a P100 half-face respirator to protect your lungs from fiberglass dust and mold spores, along with sealed safety goggles and heavy work gloves.
- Check for active water leaks. Look directly above the fallen insulation. Is there a leaking drain pipe, a sweating cold water line, or a gap in the perimeter foundation letting rain in? You must fix liquid water leaks before addressing humidity.
- Inspect for pests and mold. Shine a bright flashlight onto the exposed wood. Look for black or white spotting on the joists. Check the fallen insulation for mouse droppings, tunnels, or a strong urine odor.
- Bag the ruined material. If the insulation is wet, compressed, moldy, or infested, it cannot be saved. Pack it into heavy-duty 3-mil contractor bags while you are still in the crawl space to avoid dragging loose fiberglass through your house.
Fixing the Root Cause: Moisture Control
If you replace the insulation without changing the environment, you will be doing this exact same chore next spring. The ground under your home is an endless reservoir of moisture. You must cap that reservoir.
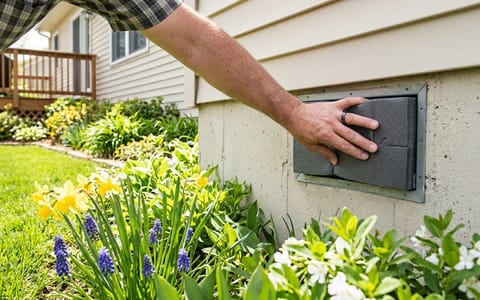
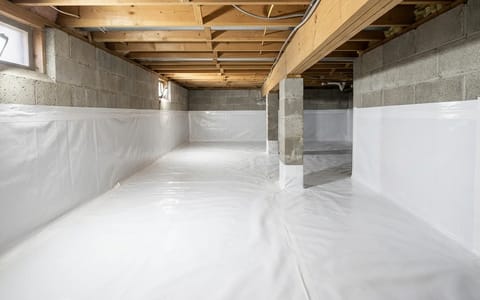
The most effective step is installing a proper vapor barrier. Many older homes have a thin, 4-mil plastic sheet that has been torn to shreds over the decades, or they have bare dirt. You need to lay down a continuous sheet of 10-mil or 12-mil polyethylene plastic. Run the plastic up the foundation walls by about six inches, and overlap any seams in the middle of the floor by at least 12 inches. Seal those seams thoroughly with specialized waterproof crawl space tape.
Once the ground moisture is capped, monitor the air. If your crawl space humidity still hovers above 60 percent, you will need a dedicated crawl space dehumidifier. These units are built to operate in low temperatures and can be piped directly into a sump pump or drain line so you never have to empty a bucket.
Reinstalling or Upgrading Your Insulation
With the moisture problem solved, you can safely insulate your floors again. You have two main paths forward: doing it right with fiberglass, or upgrading to rigid foam.
If you choose to reinstall fiberglass batts, ensure you purchase unfaced R-19 insulation (or faced, with the paper side touching the subfloor above). To keep it from falling, do not rely on staples. Purchase carbon steel wire insulation supports, often called "lightning rods" or "tiger teeth." These are stiff wire rods cut to exactly 15.5 inches or 23.5 inches. You push them up between the joists, and their tension bites into the wood, holding the batt firmly in place. Space these wires every 18 inches along the entire length of the joist bay.
For a more permanent solution, many homeowners are abandoning fiberglass entirely in favor of rigid foam board. Expanded Polystyrene (EPS) or Extruded Polystyrene (XPS) boards are cut to fit snugly between the joists. Because foam board does not absorb water and offers zero nesting material for pests, it will never sag or drop. You simply cut the panels on a table saw, press them into the bays, and seal the perimeter of each board with canned expanding spray foam to lock them in place and stop drafts.
Wrapping Up Your Crawl Space Repair
Tackling sagging crawl space insulation is dirty, tiring work, but it is one of the most vital maintenance tasks you can perform for the health of your home's structure. By treating the fallen fiberglass as a symptom rather than the disease, you protect your subfloor from rot and improve your indoor air quality. Take the time to clear out the ruined material, seal the earth with a thick vapor barrier, and use the right mechanical supports for your new insulation. Do it right once, and you won't have to face a cave of pink stalactites next spring.