Thermostat Screen Blank? The 5-Minute Troubleshooting Fix
Don't panic if your thermostat screen goes completely dark. Before calling an HVAC pro, try this 5-minute troubleshooting guide to restore power and save yourself a $150 service fee.
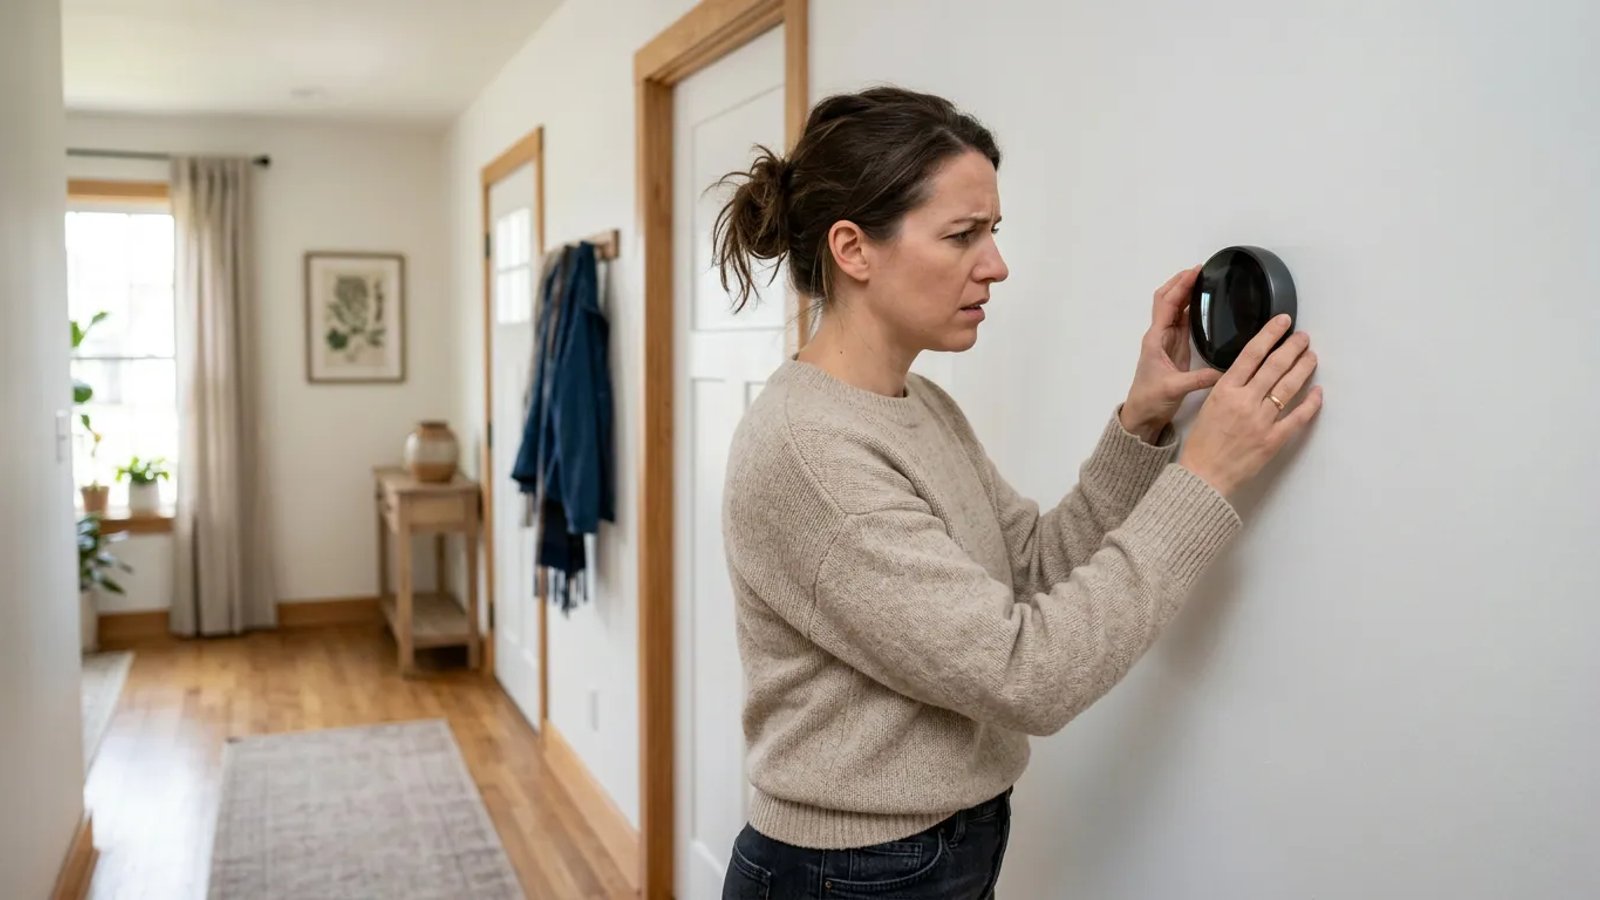
It is incredibly frustrating to walk up to your wall, expecting to turn on the air conditioning for the first time this spring, only to find your thermostat screen blank. You tap the glass. You press the buttons. Nothing happens. For most homeowners, a cold wave of panic immediately sets in. Did the entire HVAC system just die? Will this cost thousands of dollars to replace the air handler or the outdoor compressor?
Take a deep breath. A dead thermostat display is rarely a sign of a catastrophic, system-wide failure. Instead, it is almost always a simple, localized power interruption. Your thermostat is essentially a low-voltage remote control for your heating and cooling system. When it loses power, it goes to sleep.
Before you pick up the phone to schedule a $150 emergency service call, you need to walk through a basic diagnostic checklist. In my experience, nine times out of ten, a homeowner can find the culprit and restore power to their system in under five minutes. Let's walk through the exact steps you should take to bring your thermostat back to life.
Why Is My Thermostat Screen Blank? Understanding the Basics
To fix the problem, it helps to understand how your thermostat gets its power. Most modern thermostats operate on 24 volts of electricity. This power doesn't come directly from your home's electrical panel; it is stepped down by a transformer located inside your furnace or air handler. The power travels up to your thermostat through a dedicated wire, commonly referred to as the C-wire (common wire).
If the flow of that 24-volt electricity is interrupted anywhere between your main electrical panel, your furnace, and the wall, your thermostat screen goes blank. Modern HVAC systems are packed with safety switches designed to intentionally cut this power if they detect a problem—like a water leak or an open cabinet door. By systematically checking these power points, you can easily isolate the issue.
Step 1: The Battery Check (Yes, Even for Hardwired Units)
The very first thing you should check is the simplest: the batteries. Many homeowners assume that because their thermostat is hardwired to the house, it doesn't use batteries. This is a common misconception. Many popular models use AA or AAA batteries as a backup to preserve your schedule and settings during power outages. If those batteries die, the thermostat can sometimes lock up or go completely blank, even if the C-wire is still providing power.
Replacing the batteries is straightforward, but you need to be gentle to avoid damaging the mounting pins.
- Grasp the faceplate. Place your hands on the left and right edges of the thermostat body.
- Pull straight back. Do not tilt, twist, or pry the faceplate with a screwdriver. Gently pull it straight away from the wall until it pops off the base plate.
- Locate the battery compartment. Turn the faceplate over. You will typically see a slot for two AA or AAA batteries.
- Swap the batteries. Remove the old batteries and insert fresh, high-quality alkaline batteries. Avoid using rechargeable batteries, as their voltage output can be inconsistent for HVAC equipment.
- Reattach the faceplate. Line up the pins on the back of the faceplate with the terminal block on the wall and push straight in until it clicks into place.
Step 2: Inspecting the Main Electrical Breaker Box
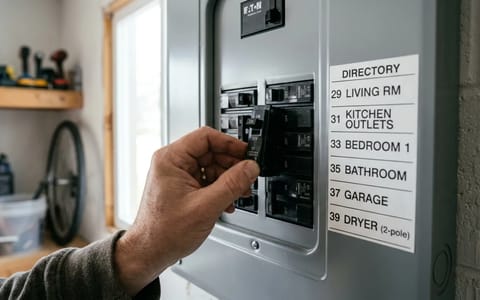
If fresh batteries didn't bring the screen back to life, it is time to check your home's main electrical panel. Because your thermostat gets its power from the indoor furnace or air handler, a tripped breaker on that main unit will instantly kill power to the thermostat.
Head to your breaker box and look for the circuit labeled "HVAC," "Furnace," "Air Handler," or "Indoor AC." You are looking for a breaker switch that is not entirely in the "ON" position. When a breaker trips, it usually rests in the middle, feeling slightly spongy if you touch it. Some modern breakers also display a small orange or red flag in a window when tripped.
To reset a tripped breaker, you cannot simply push it back to the "ON" position. You must first push the switch firmly all the way to the "OFF" position until you hear a loud click, and then push it firmly back to the "ON" position. If the breaker immediately trips again the moment you reset it, stop. Do not try to force it to stay on. This indicates a dead short or a serious electrical fault in your system.
Step 3: The Often-Ignored Furnace Power Switch
This next step is the culprit behind an astonishing number of unnecessary service calls. By building code, every indoor furnace or air handler must have a dedicated service disconnect switch nearby. This switch allows technicians to safely cut power to the unit while working on it.
The problem? This switch usually looks exactly like a standard residential light switch. It is typically mounted on the side of the furnace cabinet, on a nearby wall, or on a floor joist directly above the unit. Because it looks like a light switch, it gets accidentally flipped off all the time.
A bumped service switch is the single most common reason a perfectly healthy HVAC system suddenly plays dead.
A few years ago, I spent an hour tracing wires with a multimeter, completely baffled as to why my own thermostat was dead. It turned out I had bumped the furnace power switch with my shoulder while wrestling a heavy box of holiday decorations out of the attic. Kids playing in the basement, contractors doing other work, or even just reaching for a broom stored near the utility closet can easily result in a flipped switch.
Go to your indoor unit and locate this switch. Ensure it is firmly flipped to the "ON" (or up) position. If you find it was turned off, flip it back on and wait about 60 seconds. You should hear the furnace control board click, and your thermostat screen should light up shortly after.
Step 4: The AC Float Switch and Clogged Condensate Drains
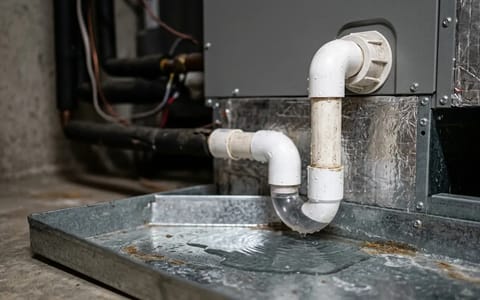
If you are turning on your air conditioning for the first time, or if it has been running heavily for a few days before the thermostat died, this is the most likely culprit. As your AC runs, the evaporator coil pulls humidity out of the air. This moisture drips into a drain pan and flows outside through a white PVC condensate pipe.
Over time, algae, mold, and dust can build up inside this wet pipe, creating a clog. If the water cannot drain outside, it backs up into the indoor drain pan. To prevent this water from overflowing and destroying your ceilings or floors, installers fit the drain line with a safety float switch.
This switch sits inside a small PVC tee-fitting near the indoor unit. If water backs up, a small plastic float rises. Once it rises high enough, it trips a microswitch that instantly cuts the 24-volt power to your thermostat. The system shuts down, the thermostat screen goes blank, and your house is saved from water damage.
To check if this is your problem, locate the float switch on the PVC pipe next to your indoor unit. It usually has two thin wires coming out of the top. Gently pull the switch assembly straight up and out of the pipe. If the little cup beneath it is full of water, you have found your problem.
The easiest way to clear a condensate clog is from the outside. Locate where the white PVC pipe exits your house (usually near the outdoor compressor unit). Take a wet/dry shop vacuum, place the hose over the end of the PVC pipe, and use your hands or a wet rag to create a tight seal. Turn the vacuum on for about three minutes. You will usually hear a satisfying "thwump" as the clog is sucked out, followed by a rush of dirty water. Once the line is clear, the water in the indoor pan will drain, the float switch will drop, and your thermostat will power back on.
Step 5: Verifying the Furnace Cabinet Door Switch
Furnaces and air handlers have another built-in safety mechanism: the blower door switch. This operates exactly like the light switch on your refrigerator door. When you take the metal front panel off the furnace to change the air filter, the switch pops out and cuts all power to the unit, protecting you from the spinning blower motor.
If you recently changed your HVAC air filter, you might not have seated the metal door properly when you put it back on. If the door is even slightly askew or not pushed entirely flush against the cabinet, it won't press the safety switch in far enough. Walk over to your indoor unit and give the blower compartment doors a firm push. Ensure all tabs are slotted correctly and any retaining screws are tightened. A loose door means a dead thermostat.
Step 6: Inspecting the 3-Amp Control Board Fuse
If you have checked the batteries, the breaker, the power switch, the float switch, and the cabinet door, and your thermostat is still blank, you might have a blown low-voltage fuse. Inside your furnace, mounted on the main green circuit board, is a small automotive-style blade fuse. It is usually purple (3-amp) or orange (5-amp).
This fuse protects the delicate control board from electrical shorts. If a dog chews through the thermostat wire outside, or if a wire shorts out against the metal cabinet, this little fuse sacrifices itself. To check it, ensure the main power to the furnace is turned off. Remove the blower door, locate the circuit board, and find the fuse. Pull it out and hold it up to the light. If the tiny metal "U" shape inside the plastic casing is broken or blackened, the fuse is blown.
When to Stop Troubleshooting and Call a Professional
Troubleshooting a blank thermostat is highly rewarding because the fixes are usually fast and free. However, there is a limit to what you should attempt on your own. If you have gone through every step on this list—new batteries, reset breakers, cleared drains, and checked fuses—and the screen is still dark, you have reached the end of the DIY road.
A dead thermostat is rarely a reason to panic. By taking a few minutes to systematically check your batteries, breakers, and safety switches, you can confidently diagnose the issue. Keep a spare set of batteries in your utility drawer, remember to check your drain lines when the weather gets hot, and you'll be well-prepared to keep your home comfortable all season long.