Toilet Runs Until You Jiggle Handle? Here is the Real Fix
Tired of the handle-jiggle routine? Learn exactly why your toilet keeps running and how to fix the flapper chain or handle nut in under 5 minutes.
Every homeowner knows the drill: you flush the toilet, wash your hands, walk out of the bathroom, and hear that endless rushing water sound. You sigh, walk back in, give the silver handle a quick shimmy, and the rushing immediately stops. While it feels like a harmless quirk of an older house, ignoring a toilet that requires a manual reset is a costly mistake.
In my first house, I ignored a jiggle-handle toilet for two months thinking it was just a minor annoyance. I stopped ignoring it when my quarterly water bill arrived with a $150 surprise attached to it. A seemingly minor leak like this can quietly send 200 gallons of clean water straight down the drain every single day.
The good news is that you do not need to be a master plumber to fix this. It requires zero specialized tools, takes about five minutes, and will permanently cure your bathroom of this annoying habit. Let us look at exactly why your toilet runs until you jiggle handle, and how to stop it for good.
Why Your Toilet Runs Until You Jiggle Handle
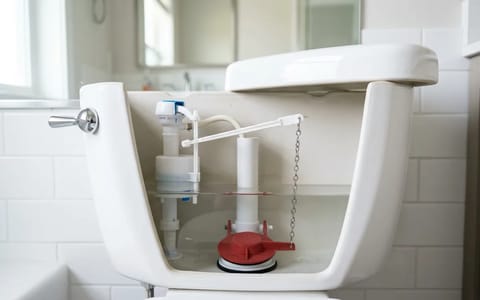
To understand the fix, you need a basic grasp of the anatomy inside your toilet tank. When you press the handle down on the outside of the tank, a metal or plastic lever arm lifts up on the inside. Connected to the end of this arm is a small metal or plastic chain. The other end of this chain is attached to a rubber stopper called a flapper.
When the lever lifts the chain, the flapper is pulled up, opening the flush valve and allowing the water in the tank to rush down into the bowl. As the tank empties, the flapper is supposed to drop naturally back down into place, creating a watertight seal so the tank can refill for the next use.
When your toilet runs continuously until you intervene, one of two mechanical failures is happening. Either the flapper chain is the wrong length and physically wedging itself between the flapper and the valve seat, or the handle itself is physically sticking because its mounting hardware has worked loose over years of use. Jiggling the handle momentarily frees the trapped chain or drops the stuck lever, allowing the flapper to finally seal.
A running toilet isn't just an annoying sound; it's a silent leak draining your wallet one flush at a time.
The Tools You Will Need
This is one of the most accessible DIY repairs in your home. In most cases, you will not need any tools at all—just your own two hands. The water inside the toilet tank is perfectly clean tap water, so there is no need for gloves unless you prefer them. You might want to have a small towel handy to set the heavy porcelain tank lid on, and perhaps a pair of slip-joint pliers if the handle nut is particularly stubborn.
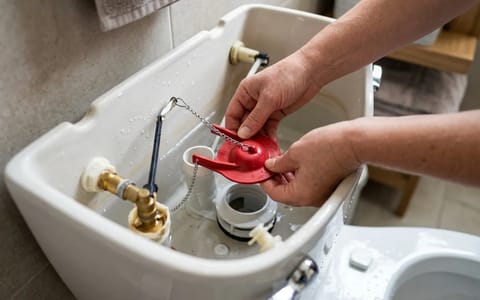
Step 1: Inspecting the Tank Mechanics
First, carefully remove the porcelain lid from the top of the toilet tank. These lids are surprisingly heavy and incredibly fragile, so lift it with both hands and set it down flat on a soft towel in a safe spot where it will not get kicked or knocked over.
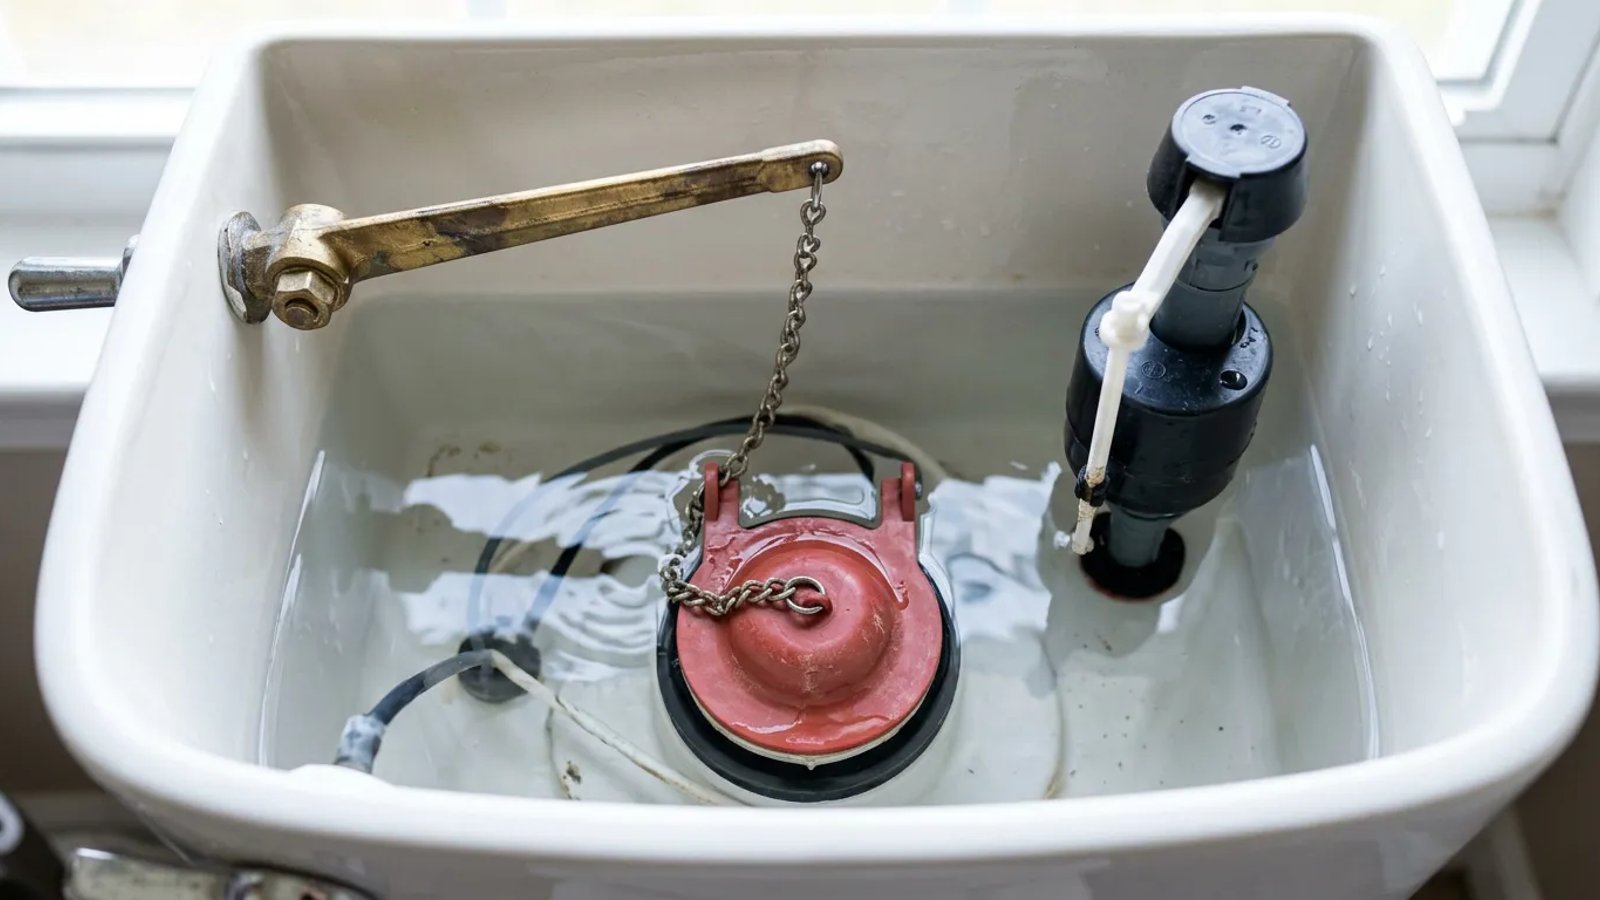
Look down into the water. Locate the handle arm, the chain, and the rubber flapper at the bottom. Give the toilet a normal flush and watch the mechanics in action. Pay close attention to how the chain behaves as the water drains and the flapper attempts to close.
- Watch the chain drop. Does the excess chain dangle so low that it gets sucked underneath the rubber flapper as the water rushes out?
- Check the tension. Is the chain so tight that the flapper never fully rests on the bottom, leaving a tiny gap for water to escape?
- Test the handle arm. Does the handle arm itself stay stuck in the "up" position, holding the flapper open until you physically push it back down?
Identifying which of these three scenarios is happening will tell you exactly which adjustment to make next.
Step 2: Finding the Goldilocks Chain Length
The most common culprit by far is a poorly sized chain. If the chain is too long, the excess links will droop down and get pulled into the flush valve opening. When the flapper drops, it lands on top of the metal chain instead of the smooth valve rim, ruining the seal. Water continuously leaks into the bowl, prompting the fill valve to run forever to try and replace it.
If the chain is too short, it acts like a taut leash, preventing the flapper from ever dropping completely into the seated position.
To adjust the length, reach into the water and unhook the small metal clip connecting the chain to the lever arm. Move the clip down a few links to shorten the chain, or up a few links to lengthen it. Reattach it to the lever arm. If you have a massive amount of excess chain hanging off the clip after shortening it, you can use wire cutters to snip the extra links off so they do not tangle around the main line.
Step 3: Tightening a Loose Handle Nut
If your chain length is perfect but the toilet still runs, the problem is likely the handle itself. Over hundreds of flushes, the nut holding the handle assembly to the porcelain tank can wiggle loose. When this happens, the entire handle mechanism droops and binds up against the side of the tank hole. Instead of springing back to a horizontal position after a flush, it stays stuck pointing downward, holding the lever arm up inside the tank.
Look at the inside of the tank directly behind where the handle sits. You will see a plastic or metal nut securing the handle assembly to the porcelain wall.
Use your fingers to turn the nut counter-clockwise until it is snug against the porcelain. If it is crusted with mineral deposits and hard to turn, use your slip-joint pliers to gently tighten it. Be extremely careful not to overtighten, especially if the nut is plastic, as you can easily crack the porcelain tank or snap the threads.
Step 4: Testing the Flush and Final Adjustments
With your chain adjusted to a half-inch of slack and your handle nut securely tightened, it is time to test your work. Press the handle down and release it normally. Watch the action inside the tank.
The flapper should lift cleanly, stay up while the tank empties, and then drop squarely onto the flush valve. The chain should rest with a slight droop, totally clear of the seal. Most importantly, the handle should snap right back to its resting horizontal position without any friction. Listen closely as the tank refills; once the water reaches the fill line, the hissing should stop completely, leaving total silence.
If you have made these adjustments and the water still seeps into the bowl, the rubber flapper itself has likely reached the end of its lifespan. Rubber degrades over time, warping or developing blisters from chlorine in the water.
Taking a few minutes to lift the tank lid and adjust a chain or tighten a nut is a tiny investment of time that pays off immediately. By permanently fixing the mechanics inside the tank, you protect your plumbing, lower your monthly utility bills, and finally put an end to the bathroom handle-jiggle dance.