Why Your Toilet Runs Randomly (And the 5-Minute Fix)
Startled by your toilet refilling itself in the middle of the night? Here is how to diagnose and fix a 'ghost flushing' toilet in under five minutes.
You are lying in bed, the house is perfectly quiet, and suddenly you hear it: the distinct hiss of water filling the bathroom tank. Nobody is awake, and nobody has used the bathroom. When your toilet runs randomly without being touched, it is easy to assume the plumbing is haunted. Plumbers actually have a name for this phenomenon. They call it "ghost flushing."
While the sound is startling, the reality is entirely mechanical. Your toilet is not flushing itself; it is simply refilling itself. Water is slowly escaping from the upper tank down into the bowl. When the water level in the tank drops below a certain threshold, the fill valve automatically kicks on to replace the lost water, creating that sudden rushing noise.
I once ignored a ghost-flushing guest bathroom for a month, assuming it was a minor quirk that I would get around to eventually. My next water bill was $85 higher than normal. A toilet that runs intermittently can silently waste up to 200 gallons of water a day. Fixing it is one of the easiest, most satisfying home maintenance tasks you can tackle, and it almost always costs less than ten dollars.
Why Your Toilet Runs Randomly (The Anatomy of a Ghost Flush)
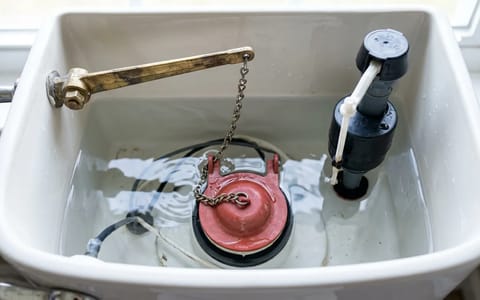
To understand how to fix the problem, you need a basic understanding of the ecosystem inside your toilet tank. When you remove the heavy porcelain lid, you will see a few distinct parts working together. On the left side, you typically have the fill valve, which brings fresh water into the tank. Connected to this is a float that tells the valve when the water has reached the correct height.
In the center of the tank, you have the flush valve. This is the large hole at the bottom where water rushes into the bowl when you push the handle. Covering this hole is the flapper—a rubber or silicone seal attached to a chain. Finally, standing up in the middle of the tank is the overflow tube, which prevents the tank from flooding your bathroom if the fill valve ever gets stuck in the open position.
Ghost flushing occurs when the harmony between these parts breaks down. If the flapper does not create a perfect, watertight seal against the flush valve, water slowly bleeds out of the tank. The float drops as the water level drops, and the fill valve activates to top it back off. Your goal is to find out exactly why that seal is failing.
The 5-Minute Diagnosis: The Food Coloring Dye Test
Before you start taking things apart or driving to the hardware store, you need to confirm that a slow leak is actually the culprit. The easiest way to do this is with a simple dye test using ordinary kitchen food coloring. Dark colors like blue, green, or red work best for visibility.
- Remove the tank lid. Carefully lift the heavy porcelain lid off the back of the toilet and set it flat on a towel out of the way.
- Add the dye. Squeeze 5 to 10 drops of dark food coloring directly into the water inside the upper tank.
- Wait patiently. Leave the bathroom and do not flush the toilet or use the water for at least 30 minutes.
- Check the bowl. Return to the bathroom and look at the water in the toilet bowl. If the water in the bowl has changed color to match the tank, you have a confirmed flapper leak.
Culprit #1: A Worn or Blistered Flapper Valve
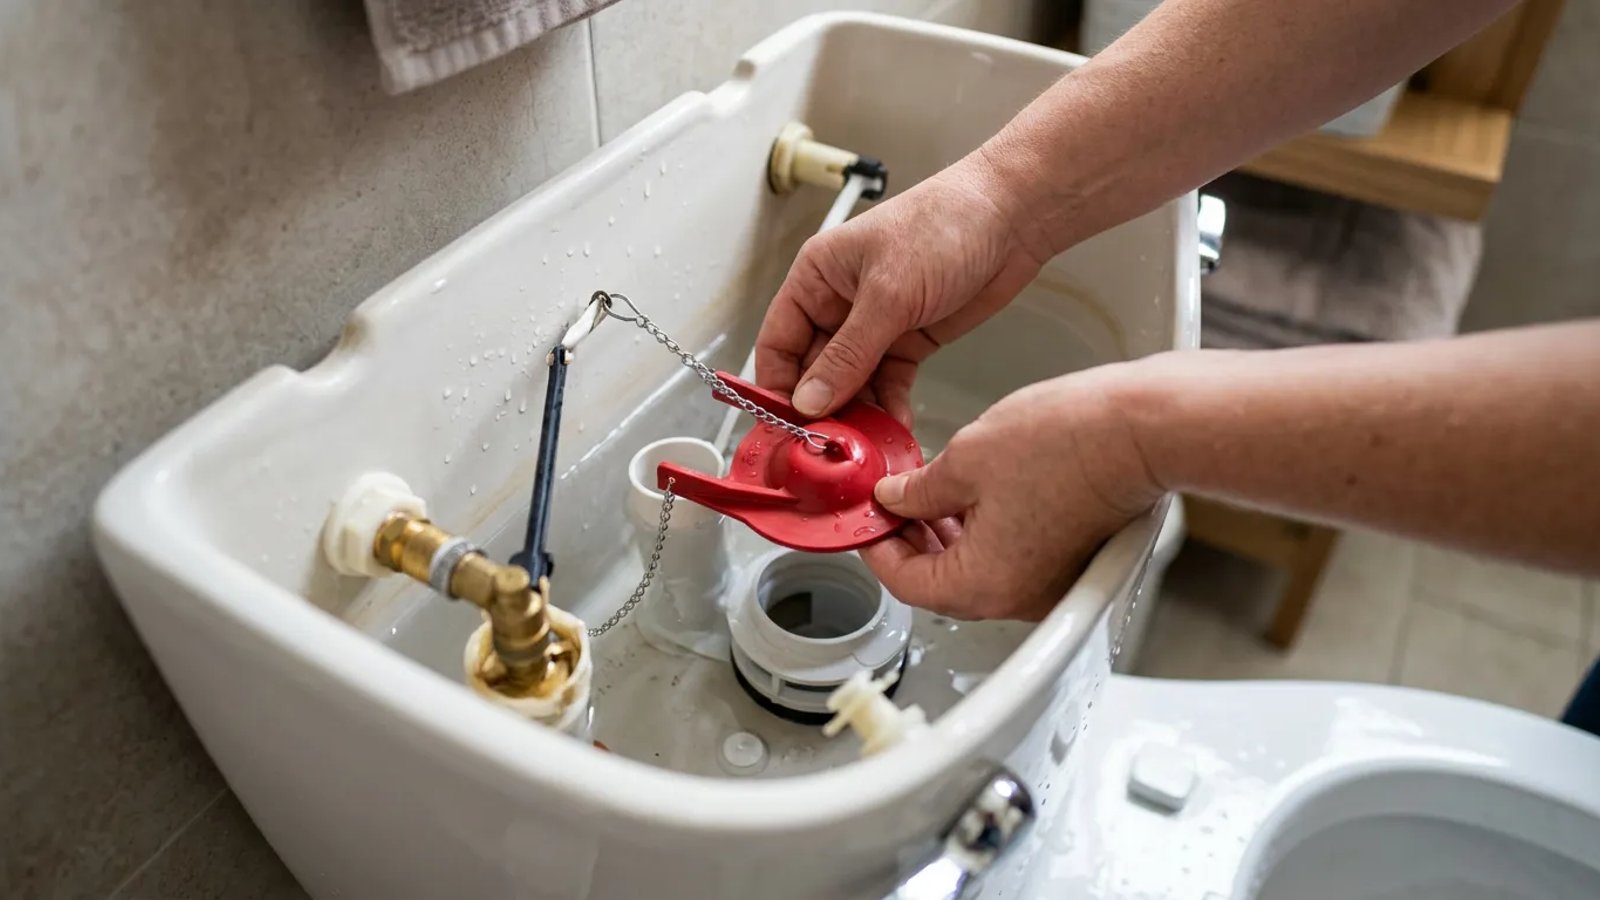
If your toilet failed the dye test, the most likely offender is the flapper itself. Toilet flappers live a harsh life. They are submerged in water 24 hours a day, 7 days a week. Over time, the chlorine and minerals in your municipal water supply break down the rubber. The flapper can become brittle, warp, or develop small blisters on the bottom that prevent it from sitting flat against the drain.
Replacing a flapper is a beginner-friendly project that requires zero specialized tools. You can purchase a universal replacement at any local hardware store for $5 to $10.
To replace the flapper, you first need to stop the flow of water. Reach behind the toilet near the floor and locate the shut-off valve on the wall. Turn the oval handle clockwise until it is tight. Next, flush the toilet. Because the water is turned off, the tank will empty into the bowl but will not refill, leaving you with a mostly dry workspace.
Unclip the small metal or plastic chain from the flush handle lever. Then, reach down to the base of the overflow tube. The flapper is held in place by two small arms that snap onto pegs on the sides of the tube. Simply pull the arms outward to unsnap the old flapper and lift it out.
Take your old flapper to the hardware store with you. Toilets generally use either a 2-inch or a 3-inch flapper. Holding your old one up against the new options in the plumbing aisle ensures you buy the exact right size. To install the new one, simply snap the arms onto the pegs, reconnect the chain, and turn the water back on.
Culprit #2: The Flush Valve Chain Tension
Sometimes the flapper itself is perfectly fine, but the chain connecting it to the handle is causing the leak. If your toilet runs randomly, the chain tension is the second thing you should check. It is a Goldilocks situation: the chain cannot be too tight, and it cannot be too loose.
If the chain is too tight, it will constantly pull up on the flapper, preventing it from resting fully against the valve seat. Even a millimeter of lift will let water escape. Conversely, if the chain is too loose, the excess slack can get sucked underneath the flapper as the water rushes out during a flush. The trapped chain breaks the seal, causing a continuous leak until the next time you flush and dislodge it.
A toilet that runs randomly isn't haunted—it is simply bleeding money down the drain, one silent drop at a time.
The ideal chain tension leaves exactly 1/2 inch of slack when the flapper is closed. You should be able to press the flush handle slightly before you feel the tension catch and lift the flapper. If you need to adjust it, unclip the small clasp from the handle lever, move it up or down the chain by a few beads, and reattach it. Clip off any long, dangling excess chain with a pair of wire cutters so it cannot get trapped.
Culprit #3: Mineral Buildup on the Valve Seat
If you have installed a brand new flapper and adjusted the chain perfectly, but the dye test still shows a leak, the problem is likely the valve seat. The valve seat is the beveled plastic or brass rim that the flapper rests against. In homes with hard water, calcium and mineral deposits can build up on this rim over time.
When these rough, crusty deposits form, even a brand-new, perfectly flexible flapper will not be able to create a watertight seal. The water will find the microscopic gaps between the rubber and the minerals and slowly trickle down into the bowl.
Turn off the water and flush the tank empty. Take a standard kitchen sponge with a mildly abrasive scouring pad on one side. Wet the sponge and scrub the rim of the flush valve seat vigorously. You want it to feel completely smooth to the touch. If the mineral buildup is severe, you can use a piece of 120-grit wet/dry sandpaper. Sand the rim very lightly in a circular motion, being careful not to gouge the plastic. Wipe away any grit with a damp paper towel, turn the water back on, and let the tank fill.
Culprit #4: The Refill Tube Siphon Effect
There is one more sneaky reason your toilet might run intermittently, and it has nothing to do with the flapper. Look at the fill valve on the left side of the tank. There should be a small, flexible plastic or rubber tube running from the fill valve over to the open top of the overflow pipe. This is the refill tube, and its job is to send a small amount of water down into the bowl to replenish the water level after a flush.
Sometimes, homeowners or overzealous handymen push this flexible tube deep down inside the overflow pipe to ensure it doesn't spray out. If the end of the refill tube sits below the resting water line of the tank, it creates a continuous siphon effect. It will quietly suck water out of the tank and down the overflow pipe, causing the fill valve to kick on randomly to replace the lost water.
Check the position of this tube. It should be attached to the very top rim of the overflow pipe using an angle adapter or a small metal clip. The tip of the tube should always remain above the water line, spraying down into the pipe rather than being submerged inside it.
Restoring Peace and Quiet to Your Bathroom
Fixing a toilet that runs randomly is a classic rite of passage for homeowners. It demystifies the plumbing in your house and proves that not every strange noise requires an expensive service call. By taking five minutes to run a dye test and inspect the rubber components in your tank, you can stop the phantom noises, conserve thousands of gallons of water, and keep your utility bills exactly where they belong.
Once you have successfully repaired the noisy toilet, it is a smart habit to drop some food coloring into the tanks of the other toilets in your home. Flappers tend to age at the same rate, and catching a silent leak early will save you from waking up to another ghost flush down the road.