Water Pressure Pulsing? How to Check Your Well Tank Air
If your well water pressure is surging and pulsing, a waterlogged pressure tank is likely to blame. Learn how to check and restore your tank's air charge to save your expensive well pump.
Turning on the shower only to be blasted with water, followed by a weak trickle, and then another blast is an incredibly frustrating way to start the morning. If you rely on a private well system, you might notice your water pressure pulsing or surging up and down while running the sink, flushing a toilet, or running the washing machine. This is one of the most common complaints among rural homeowners, and it rarely fixes itself.
While it might seem like your pump is failing or your pipes are clogged, the culprit is usually sitting right inside your house or pump house: your pressure tank. Specifically, your tank has likely lost its internal air charge. When this happens, the entire system loses its ability to regulate pressure smoothly.
Ignoring this symptom does more than just ruin your shower. It puts immense, destructive strain on your well pump. Fortunately, diagnosing and fixing water pressure pulsing is a straightforward process that requires only a few basic tools: a standard tire pressure gauge, an air compressor or bicycle pump, and a garden hose. Here is exactly how to check your well tank and restore your system's pressure.
Why Is My Water Pressure Pulsing? The Mechanics of the Air Bladder
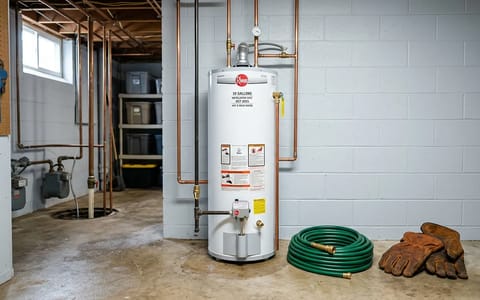
To understand why your water pressure is surging, you have to understand the job of the pressure tank. Water is a heavy, incompressible fluid. You cannot squeeze it into a smaller space. Air, on the other hand, is highly compressible. It acts like a giant, invisible spring.
Inside your metal pressure tank is a heavy-duty rubber balloon called a bladder or diaphragm. The bottom half of the tank holds your well water, and the top half (inside the bladder) holds pressurized air. When your well pump pushes water into the tank, it compresses the air bladder. That compressed air is what pushes the water through your home's pipes when you open a faucet, allowing the pump to rest.
Over time, just like a car tire, that air bladder can slowly lose pressure. It might leak out of the valve at the top of the tank, or it might slowly permeate through the rubber over several years. When the air is gone, the tank becomes "waterlogged." Because water cannot be compressed, the tank fills up instantly, hits the maximum pressure, and shuts the pump off. The moment you open a faucet, the pressure drops to zero instantly, and the pump slams back on.
The Hidden Danger: Short-Cycling Destroys Expensive Pumps
When a tank is waterlogged, it forces the well pump to rapidly cycle on and off every few seconds. This rapid switching is known in the plumbing world as "short-cycling."
Well pumps are designed for long, steady runs. They take a massive surge of electricity to start up—often pulling three to five times their normal running current just to get the heavy motor spinning. This startup phase generates a significant amount of heat. If the pump runs for several minutes, the cold well water flowing past the motor cools it down. If it only runs for three seconds before shutting off, that heat never dissipates.
I remember ignoring a slight pulse in my own guest bathroom shower for months. By the time I finally went down to the basement, the pump was clicking on and off every three seconds. I spent the next weekend replacing a burned-out control box capacitor that could have been saved with five minutes and a bicycle pump.
Short-cycling will quickly destroy the starting capacitors in your control box, burn out the pressure switch contacts, or worse, melt the windings inside a submersible pump sitting hundreds of feet underground. Replacing a waterlogged tank or adding air costs very little. Pulling a burned-out well pump out of the ground will easily cost $1,500 to $3,000.
The "Water Test": Is Your Bladder Permanently Ruptured?
Before you spend time draining the tank and dragging out the air compressor, you need to find out if the rubber bladder is simply low on air, or if it is torn and permanently destroyed. You can do this in about ten seconds.
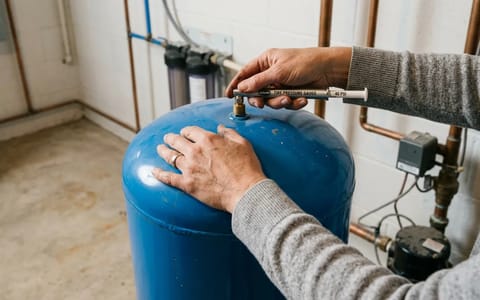
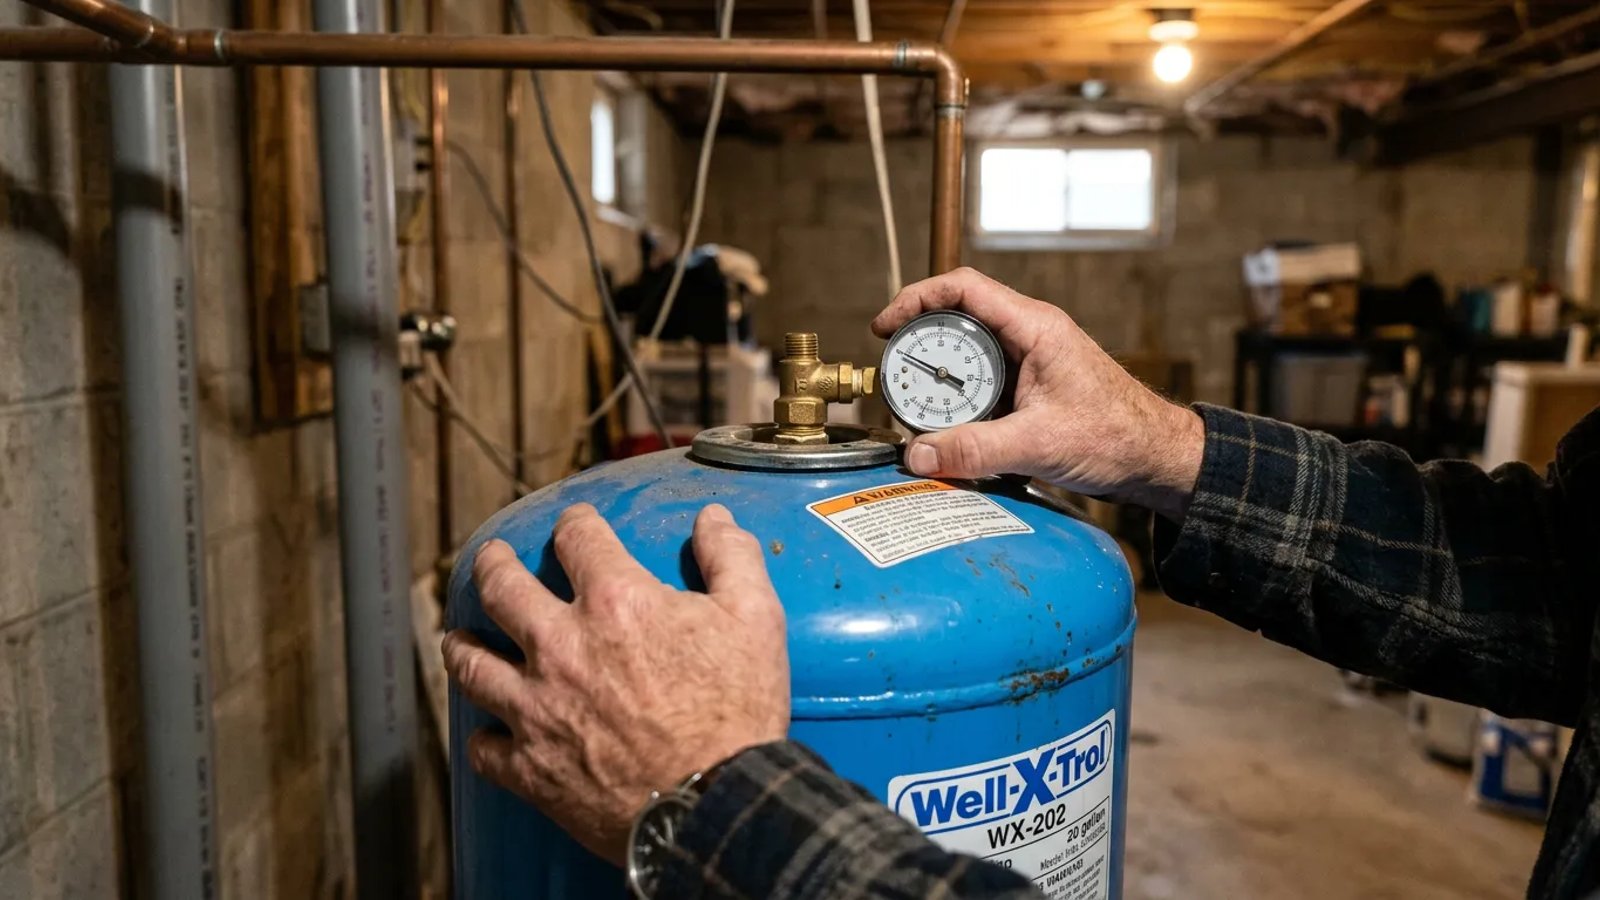
Look at the very top of your pressure tank. You will see a small valve covered by a plastic cap. This is a standard Schrader valve—the exact same type of valve found on your car or bicycle tires. Unscrew the plastic cap.
If you hear a sharp hiss of air, that is great news. The bladder is likely intact and simply needs to be recharged. However, if water spits, dribbles, or shoots out of that valve, stop immediately. The rubber bladder inside the tank has torn, allowing water to enter the air chamber. A ruptured bladder cannot be patched or repaired. The entire tank is compromised and must be replaced.
Finding Your Pressure Switch Settings
If your tank passed the water test, your next step is to figure out your target air pressure. You cannot just guess this number. The tank's air pressure must be precisely calibrated to match your system's pressure switch.
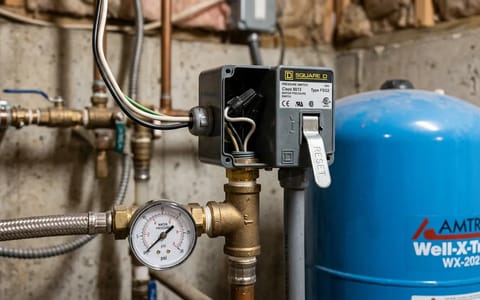
Look near the base of the tank for a small grey or black rectangular box connected to a pipe. This is the pressure switch. It has two settings: the "cut-in" pressure (when the pump turns on) and the "cut-out" pressure (when the pump turns off). Most residential systems operate on a 30/50 PSI cycle or a 40/60 PSI cycle.
To find your settings, look at the sticker on the inside of the pressure switch cover, or watch the dial pressure gauge mounted on the pipe next to the tank while water is running. Note the exact number on the gauge when you hear a loud "click" and the pump kicks on. That is your cut-in pressure.
The Golden Rule of Well Tanks: Your tank's air charge must be exactly 2 PSI below your cut-in pressure. If your pump turns on at 40 PSI, your empty tank needs 38 PSI of air. If it turns on at 30 PSI, you need 28 PSI of air.
Step-by-Step: How to Check and Restore Your Air Charge
You cannot check the air pressure while the tank has water in it. If you put a tire gauge on the valve while the system is pressurized, the gauge will just read the water pressure pushing against the bladder, giving you a false reading. You must drain the tank completely.
- Turn off the power. Locate the breaker box and turn off the 240V double-pole breaker labeled "Well Pump." Do not skip this step. If the pump turns on while the tank is empty, it can cause severe damage.
- Drain the tank. Attach a standard 5/8-inch garden hose to the brass boiler drain valve located at the plumbing tee near the bottom of the tank. Run the other end of the hose to a floor drain or outside. Open the valve and let the water flow.
- Break the vacuum. To help the tank drain faster, go to the highest floor in your house and open a cold water faucet. This allows air into the pipes, preventing a vacuum lock. Wait until the hose stops dripping completely. The tank should feel light or sound hollow when tapped.
- Check the air pressure. With the tank totally empty, press your tire gauge onto the top Schrader valve. If the gauge reads 15 PSI but your target is 38 PSI, you have found the cause of your pulsing water.
- Add air. Connect an air compressor to the Schrader valve. Add air in short bursts, checking the pressure frequently. If you do not have an air compressor, a standard bicycle floor pump will work, though it will take considerable physical effort to reach 38 PSI in a large tank.
- Restart the system. Once you hit your target pressure (2 PSI below cut-in), remove the compressor, replace the valve cap, and close the boiler drain valve at the bottom. Turn the well pump breaker back on. You will hear the pump start and water rush into the tank.
Troubleshooting Common Issues After Recharging
In most cases, restoring the air charge will immediately cure your water pressure pulsing. Go upstairs, turn on the shower, and you should experience smooth, uninterrupted flow. But what if the system is still acting up?
If you set the air pressure perfectly but the pump is still short-cycling, the issue likely lies with the pressure switch itself. Over time, the tiny 1/4-inch threaded pipe (called a nipple) that connects the pressure switch to the main plumbing line can become clogged with sediment, iron, or hard water scale. When this pipe is clogged, the switch cannot accurately sense the water pressure, causing it to bounce on and off erratically.
Replacing a pressure switch and its connecting nipple is a relatively simple DIY task that requires a wrench, some Teflon tape, and a new $25 switch from the hardware store. Just ensure the power is completely disconnected before touching any electrical wires.
Maintaining your well's pressure tank is one of the highest-return DIY tasks you can perform. By taking 30 to 60 minutes once a year to drain the tank and check the air pressure, you protect your expensive well pump from premature failure and ensure your morning shower is always a steady, comfortable experience.