How to Stop a Sweating Toilet Tank Before It Ruins Your Floor
As spring turns to sticky summer, a sweating toilet tank can pool water and ruin your bathroom subfloor. Learn how to diagnose the dripping and stop the condensation.
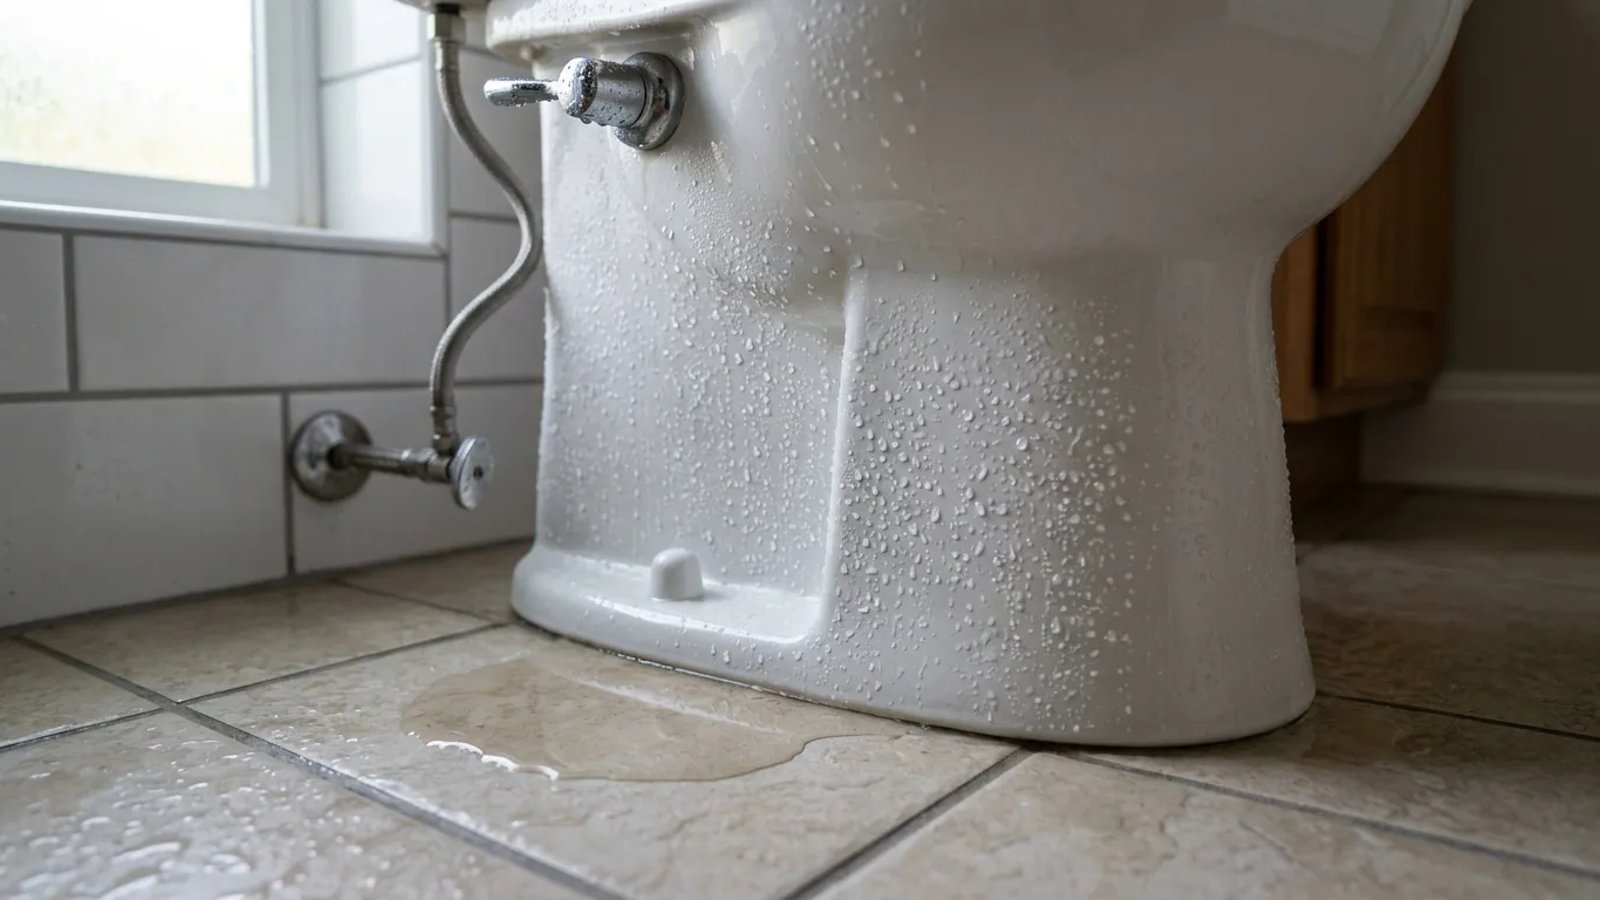
As we move from mid-spring into the sticky heat of summer, your home undergoes a massive shift in temperature and humidity. You might start noticing mystery puddles forming around the base of your bathroom fixtures. When soaring indoor humidity meets the ice-cold groundwater filling your toilet tank, the result is excessive condensation. This phenomenon—often called "toilet sweat"—creates constant dripping that pools around the base of the toilet.
Many homeowners understandably panic, mistaking this daily condensation for a failing wax ring or a cracked porcelain tank. However, left unchecked, this daily dripping is just as destructive as a real plumbing leak. It slowly rots the bathroom subfloor, peels paint, ruins baseboards, and creates a perfect breeding ground for hidden mold. If you want to protect your bathroom floor, you need to learn how to stop toilet tank sweating before the summer humidity peaks.
Diagnosing the Puddle: Is It Sweat or a Leak?
Before you buy any insulation kits or call a plumber, you must confirm that the water on your floor is actually condensation. A cracked tank or a deteriorating wax ring will also cause pooling water, but the solutions for those problems are entirely different. The easiest way to diagnose the issue is with a simple food-coloring test.
Remove the toilet tank lid and drop 5 to 6 drops of dark food coloring (blue or red works best) into the water. Do not flush the toilet. Let it sit undisturbed for 30 to 45 minutes. Next, check the puddle on the floor with a white paper towel. If the water on the floor is completely clear, you are dealing with condensation. If the water on the paper towel shows the food coloring, you have a physical leak in the tank, the mounting bolts, or the wax ring.
The Hidden Culprit: A Leaky Flapper Valve
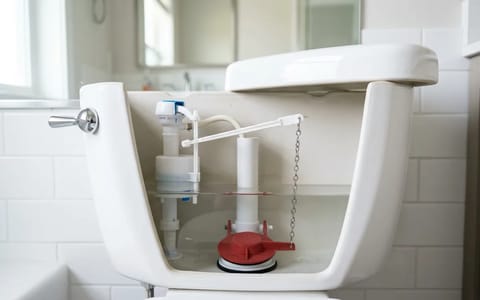
Sometimes, a sweating toilet isn't just a humidity problem; it is a running water problem. The flapper is the rubber seal at the bottom of your tank that lifts when you flush. Over time, this rubber degrades, hardens, or warps. When a flapper leaks, room-temperature water slowly drains into the bowl, prompting the fill valve to constantly inject freezing cold groundwater into the tank.
If the water in the tank sits still, it eventually warms up to room temperature, which naturally stops the condensation cycle. But if your flapper is leaking, the tank is in a perpetual state of refrigeration. The cold porcelain constantly drops below the room's dew point, forcing the air to dump its moisture onto the surface.
Replacing a faulty flapper is incredibly cheap—usually $5 to $15 at any hardware store—and takes less than 10 minutes. Turn off the water supply, flush to drain the tank, unhook the old flapper from the flush valve chain, and pop the new one into place. Sometimes the flapper itself is fine, but the metal chain connecting it to the flush lever is too tight, preventing the rubber from sealing completely. Adjust the chain so it has a slight amount of slack—about half an inch—and see if that stops the slow leak.
How to Stop Toilet Tank Sweating with an Insulation Kit
If your flapper is fine but the tank still sweats profusely every afternoon, your best line of defense is a foam insulation kit. Because porcelain transfers temperature efficiently, the cold water chills the outside of the tank almost instantly. By installing a layer of closed-cell foam inside the tank, you create a thermal barrier between the ice-cold water and the porcelain walls.
- Shut off and drain the water. Turn the water supply valve behind the toilet clockwise until it stops. Flush the toilet and hold the handle down to drain as much water as possible.
- Dry the tank completely. This is the most critical step. Use a large sponge to soak up the remaining inch of water at the bottom. Then, use an old towel and a hairdryer on a warm setting to ensure the inside walls are bone-dry. Adhesive will not stick to damp porcelain.
- Measure and cut the foam. Most kits come with a large sheet of flexible foam. Measure the inside walls of your tank and cut the foam panels to fit using heavy-duty scissors or a utility knife. Leave about an inch of clearance at the top so the foam doesn't interfere with the flush mechanism.
- Apply the adhesive and press into place. Apply the included water-resistant adhesive evenly across the back of the foam panels. Press them firmly against the inside walls of the tank, smoothing out any air bubbles.
- Let the adhesive cure. Do not turn the water back on immediately. Let the tank sit empty for 8 to 12 hours (or whatever the adhesive manufacturer recommends) to ensure a permanent bond.
Using Drip Trays as a Temporary Band-Aid
What if you don't have the time to drain your tank and install a foam kit this weekend, but the puddles are driving you crazy right now? While not a permanent fix, a toilet drip tray can save your floor in the short term.
These are inexpensive plastic trays designed to fit perfectly around the base of a standard toilet. They catch the heavy condensation as it rolls off the porcelain, keeping the water off your grout and wood. You can find them for about $10 to $15 at most hardware stores. However, remember that the water in the tray will eventually evaporate back into the room (increasing humidity) or overflow if the sweating is severe. You will need to sponge the tray dry regularly. Consider this a temporary measure to protect your subfloor while you wait for the weekend to tackle the insulation kit.
Installing an Anti-Sweat Valve (The Permanent Plumbing Fix)
If you live in an extremely humid climate, or if your home relies on exceptionally cold well water, foam insulation might not be enough. In these severe cases, the most effective way to stop toilet tank sweating is to change the temperature of the water entering the tank. This is done by installing an anti-sweat valve.
An anti-sweat valve is a small brass mixing valve installed on the water supply lines behind or below the toilet. It connects to both your hot and cold water lines, mixing a tiny amount of hot water into the cold line before it enters the toilet. This raises the temperature of the water inside the tank just enough to stay above the dew point, preventing condensation from forming entirely. The valve itself usually costs between $25 and $40.
Lowering Bathroom Humidity to Prevent Condensation
Condensation is a two-part equation: cold surfaces and high humidity. While we have discussed warming the tank, tackling the ambient humidity in your bathroom is equally important. Summer showers, baths, and general seasonal weather can easily push a bathroom's moisture levels past 70 percent.
Lowering your bathroom humidity doesn't just stop your toilet from sweating—it protects your drywall, prevents mildew, and keeps your mirrors fog-free.
The most effective tool you have is your bathroom exhaust fan. Many homeowners turn the fan off the second they step out of the shower. To truly clear the moisture, you need to let the fan run for 20 to 30 minutes after you finish bathing. If your bathroom still feels like a sauna, your fan might be undersized. Check the CFM (Cubic Feet per Minute) rating. A standard bathroom needs a fan rated for at least 50 CFM, but larger bathrooms or those with high ceilings may require 80 to 100 CFM to effectively move the heavy, wet air outside.
Inspecting and Repairing Subfloor Damage
If your toilet has been sweating for several summers, the constant dripping has likely taken a toll on the floor beneath it. Water that pools around the base of the toilet inevitably seeps into the grout lines, under the linoleum, or through the seams of laminate flooring. Once it reaches the wooden subfloor, rot sets in quickly.
I once ignored a slightly wobbly toilet in a humid July, thinking the mounting bolts just needed a quick tightening. When I finally pulled the toilet to investigate, the plywood subfloor beneath the flange was completely black and crumbled at the touch. A simple condensation issue had turned into a weekend-long carpentry project involving a circular saw and fresh subfloor panels.
Check for soft spots by pressing firmly on the floor immediately surrounding the toilet base. Look for discoloration in the flooring, peeling caulk, or a toilet that rocks slightly when you sit down. If the floor is soft, you will need to pull the toilet, cut out the rotted wood, and replace it before the toilet actually falls through the floor joists.
Dealing with a sweating toilet tank is an annoying summer ritual, but it is one you can absolutely control. By addressing the temperature of the tank and the humidity in the room, you can keep your bathroom dry and safe. Take a Saturday afternoon to swap out that old flapper or install a foam liner. Your subfloor—and your bare feet—will thank you for eliminating those mystery puddles once and for all.