Low Water Pressure Whole House? How to Find the Cause
Experiencing a sudden or gradual drop in water pressure across your entire home? Learn how to troubleshoot the main shutoff, check the PRV, and find hidden leaks.
Turning on the shower only to be greeted by a weak, sputtering trickle is a frustrating way to start the morning. When that same weak flow happens at the kitchen sink, the bathroom vanity, and the washing machine, you have a systemic issue on your hands. Dealing with low water pressure whole house scenarios can feel overwhelming, but the diagnostic process is actually very straightforward. Unlike a single malfunctioning faucet, a house-wide pressure drop means the bottleneck is located somewhere between the city water main and the point where your pipes branch out to individual rooms.
Finding the root cause requires a logical, step-by-step approach. You do not need to start tearing into drywall or immediately paying emergency weekend rates for a plumber. Most of the common culprits can be diagnosed with a simple visual inspection and a $15 tool from the hardware store. We will walk through exactly how to isolate the problem, starting with the simplest fixes and moving toward the more complex components of your plumbing system.
Confirm It Is Actually a Whole-House Issue
Before heading to the basement or the utility closet, verify that the pressure drop is truly affecting the entire house. Turn on the cold water at the kitchen sink, a bathroom sink, and the bathtub. If the bathtub has strong pressure but the sinks do not, you are likely dealing with clogged aerators. Aerators are the small screw-on screens at the tip of your faucets. Over time, they trap calcium, mineral deposits, and tiny pieces of sediment. Unscrewing them and soaking them in white vinegar for 30 minutes is usually all it takes to restore flow.
Similarly, if only the hot water is experiencing low pressure while the cold water runs fine, the issue is isolated to your water heater. This typically points to severe sediment buildup in the tank, a failing dielectric union, or a partially closed supply valve on the top of the heater. However, if both hot and cold water are equally weak across every fixture in the home, you have confirmed a whole-house restriction. It is time to look at the main line.
Check the Main Water Shutoff Valve
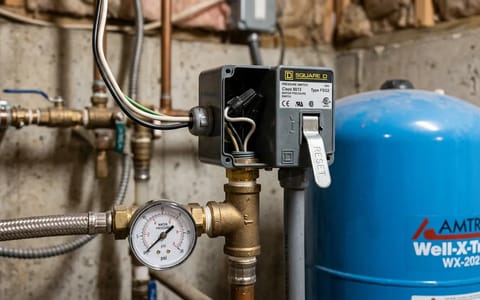
The first and easiest diagnostic step is locating your main water shutoff valve. This is the valve that controls all water entering your home. It is usually located in a basement, a crawlspace, a utility closet, or on an exterior wall near the water meter. If you have recently had plumbing work done, or if you recently moved boxes around in your utility room, this valve may have been partially closed or accidentally bumped.
There are two primary types of shutoff valves: ball valves and gate valves. A ball valve has a straight lever handle. When the valve is fully open, the handle should be perfectly parallel to the pipe. If it is sitting at an angle, your water flow is being restricted. Simply turn the handle until it aligns with the pipe.
A gate valve looks like a traditional outdoor spigot handle or a small steering wheel. These require multiple turns to open and close. Turn the handle counterclockwise until it stops. Do not force it, but ensure it is rotated as far as it will naturally go. Gate valves are notorious for internal failures; sometimes the handle turns, but the internal gate remains partially dropped, blocking the flow of water. If the handle spins freely without resistance, the internal stem may be snapped.
Test Your Baseline Pressure
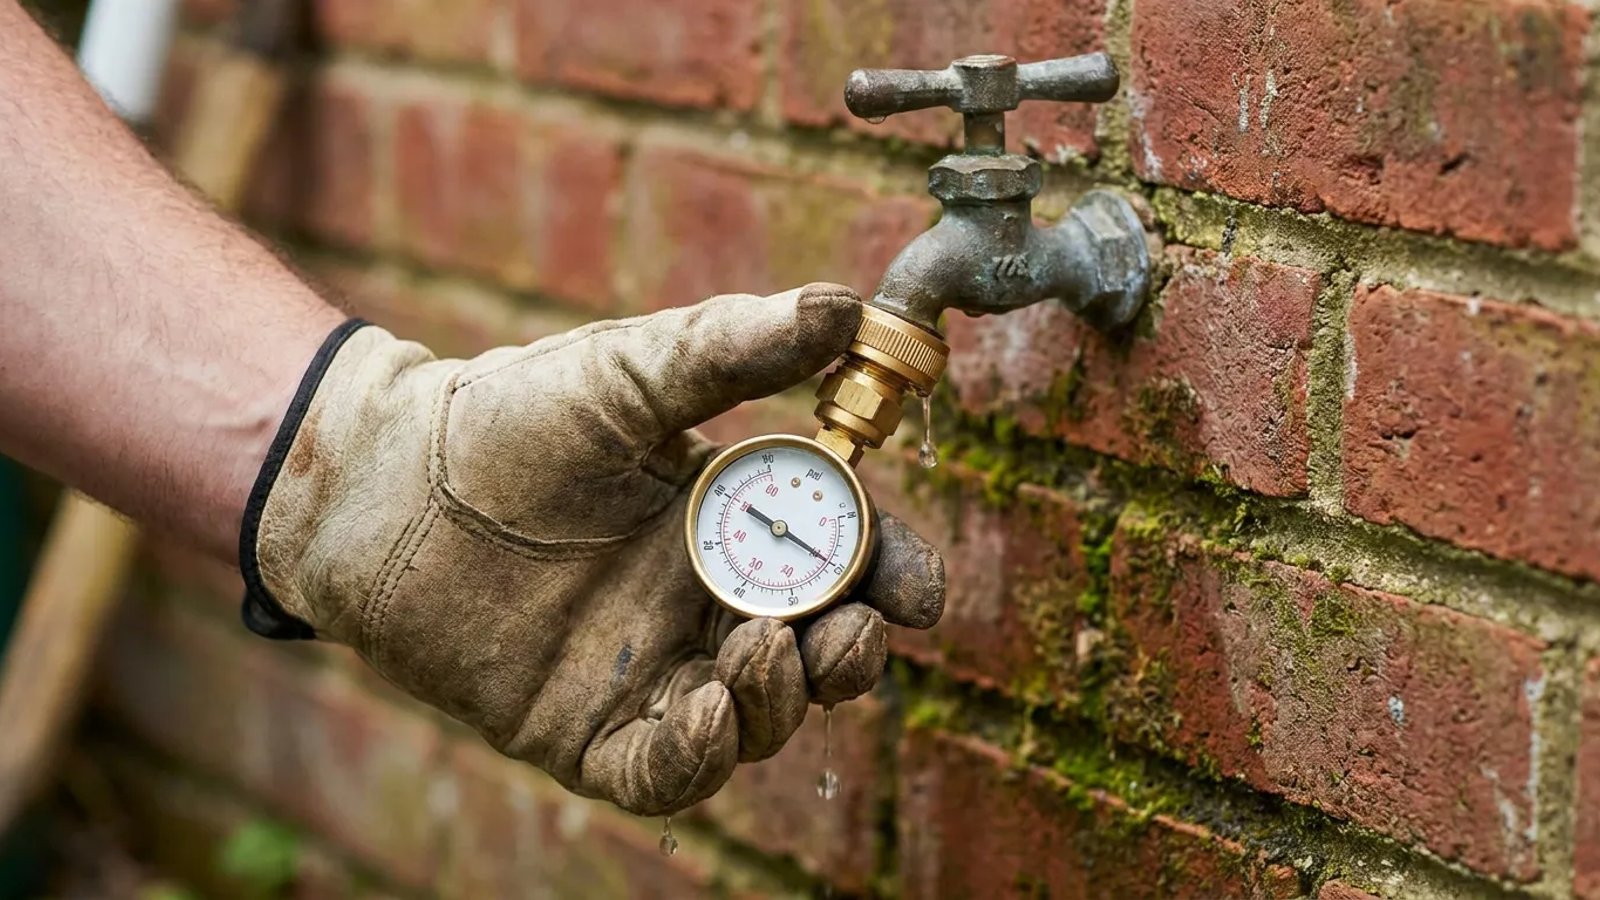
To accurately diagnose the system, you need to know exactly what your water pressure is. Relying on how the shower "feels" is not accurate enough. You can measure your exact pressure using a simple water pressure test gauge, which costs about $10 to $15 at any home improvement store. It looks like a small dial attached to a female hose thread.
If the gauge reads 50 PSI or higher, but the flow inside the house is still weak, you likely have a volume problem, not a pressure problem. This often indicates severe mineral buildup or corrosion inside older galvanized steel pipes, which physically chokes off the inside diameter of the plumbing. If the gauge reads 40 PSI or below, you have a true pressure deficiency, and the next component to check is the PRV.
The Most Common Culprit: The Pressure Reducing Valve (PRV)
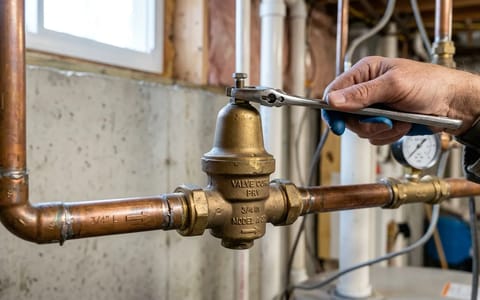
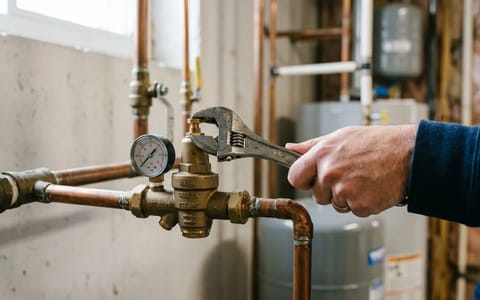
Municipal water mains often pump water at incredibly high pressures—sometimes exceeding 120 PSI—to ensure it reaches fire hydrants and distant neighborhoods. Because 120 PSI would blow the seals out of your dishwasher and washing machine, homes are equipped with a Pressure Reducing Valve (PRV). The PRV is a bell-shaped brass device installed on your main water line, usually situated just after the main shutoff valve.
Inside the PRV is a heavy spring and a rubber diaphragm that regulate the incoming municipal pressure down to a safe 50 to 70 PSI. The problem is that PRVs do not last forever. The rubber diaphragm eventually tears, or the spring loses its tension. The typical lifespan of a PRV is 10 to 15 years. When they fail, they usually fail in the closed position, resulting in a sudden, dramatic drop in whole-house water pressure.
I once spent three hours taking apart showerheads and faucet cartridges before realizing a 12-year-old failing PRV was starving the entire house of pressure. Always check the main line first.
You can attempt to adjust the PRV to see if it responds. Loosen the locknut on the threaded stem at the top of the bell. Using a wrench, turn the adjustment screw clockwise to increase the pressure. Turn it one full rotation, then check your pressure gauge. If the pressure does not change, or if water begins weeping from the top of the bell, the internal diaphragm is ruptured and the entire valve must be replaced.
Bypass Water Softeners and Filtration Systems
If your PRV is functioning correctly, the next potential bottleneck is a whole-house water treatment system. Water softeners, carbon filters, and sediment filters are installed directly on the main water line. Over time, filter cartridges become heavily saturated with debris, dirt, and minerals. When a filter is clogged, water struggles to push through the media, resulting in a massive pressure drop for every fixture downstream.
To test this, locate the bypass valve on your water softener or whole-house filter. This is usually a push-pull valve or a set of three ball valves located directly behind the unit. Engage the bypass so that water flows around the treatment system rather than through it. Go inside and test a faucet. If your water pressure instantly returns to normal, you have found the problem. You simply need to replace the clogged filter cartridge or service the water softener resin bed.
Look for Hidden Leaks at the Water Meter
A massive, hidden leak can divert so much water that it robs the rest of your house of pressure. This could be a ruptured underground supply line between the street and your house, or a major pipe break in a crawlspace. To rule this out, you need to check your municipal water meter.
Your water meter is usually located in an underground concrete box near the street, or inside your basement where the main line enters the foundation. Ensure absolutely every fixture and water-using appliance in your house is turned off. Do not run the washing machine, dishwasher, or irrigation system.
Open the cover of the water meter and look at the dial. Most modern meters feature a low-flow leak indicator. This is typically a small red or black triangle, or a small star-shaped gear. If that indicator is spinning, even slowly, water is actively flowing through the meter. If everything in the house is off but the meter is spinning, you have a leak. If the pressure is noticeably low and the meter is spinning rapidly, you have a catastrophic leak that requires immediate attention.
Municipal Water Supply and Neighborhood Issues
Sometimes, the problem has nothing to do with your house at all. Municipal water systems undergo routine maintenance, and unexpected emergencies happen. If a water main breaks a few streets over, the city may reduce pressure to the surrounding grid to isolate the leak. Similarly, if the local fire department is testing fire hydrants or fighting a fire nearby, the massive draw of water will temporarily lower the pressure for the entire neighborhood.
If your pressure drops suddenly out of nowhere, walk outside and ask a neighbor if they are experiencing the same issue. If they are, the problem is municipal. You can call your local water utility department's non-emergency line to report the issue and ask if there are known outages or maintenance events in your zip code. In these cases, all you can do is wait for the city to complete their repairs.
Typical Diagnostic and Repair Costs
Troubleshooting low water pressure whole house issues comes down to a process of elimination. By verifying the main valve is open, checking your baseline PSI, evaluating the PRV, and ruling out clogged filters or hidden leaks, you can pinpoint the exact cause of the restriction. Even if the repair ultimately requires a professional, diagnosing the issue yourself saves the plumber time and ensures you only pay for the exact repair your home actually needs.