See Daylight Under Your Front Door? How to Seal the Gap
Seeing daylight under your front door means drafts, bugs, and wasted energy are getting through. Learn how to replace a worn door sweep for a permanent, weather-tight seal.
If you can stand in your entryway, look down, and see a sliver of the outside world, your home is leaking money. Seeing daylight under your front door is a clear indicator that your entryway lacks a proper seal. That small gap might not look intimidating, but over the course of a year, it acts like an open window, constantly venting your expensive heated or air-conditioned air to the outside.
Beyond the energy loss, that gap is an open invitation. Spiders, ants, and other pests use it as a highway into your home. Moisture from heavy rain can driven underneath, potentially rotting your subfloor. The good news is that fixing this issue is a straightforward, inexpensive project that requires only basic hand tools and about an hour of your time. You do not need to replace the entire door or hire a contractor to regain a weather-tight seal.
The Real Cost of a Drafty Entryway
Homeowners often underestimate how much air moves through small spaces. A gap that is just one-eighth of an inch tall and 36 inches wide is the equivalent of having a two-and-a-half-inch hole punched directly through your living room wall. You would never tolerate a hole that size in your drywall, yet many people ignore the gap under their door for years.
When you see daylight under your front door, you are witnessing the failure of your door sweep. The door sweep is the strip of rubber, vinyl, or bristle attached to the very bottom of the door. Its sole job is to bridge the gap between the moving door and the stationary threshold on the floor. Over time, the constant friction of opening and closing the door causes the rubber fins to tear, flatten, or become brittle and snap off entirely.
A gap just one-eighth of an inch tall across a standard front door is the equivalent of a two-and-a-half-inch hole punched straight through your wall.
Many homeowners attempt a quick fix by applying adhesive foam weatherstripping tape to the bottom of the door or the threshold. This is a mistake. Standard weatherstripping is designed for compression—like when a door closes against the side jambs. It is not designed for the intense, dragging friction that occurs at the bottom of a door. Adhesive foam will tear off within days, leaving a sticky residue that only attracts dirt. To fix this permanently, you need a proper mechanical door sweep.
Step 1: Identify Your Door Sweep Type
Before you drive to the hardware store, you need to know exactly what kind of door sweep you are replacing. Exterior doors generally use one of three main types of sweeps. You can usually identify yours by getting close to the floor and inspecting the bottom edge of the door.
U-Channel Sweeps: These are the most common sweeps on modern steel and fiberglass doors. The sweep is shaped like a squared-off "U" that wraps around the bottom edge of the door. It slides onto the bottom and is often secured with a few staples or screws driven into the underside. You will definitely need to remove the door from its hinges to replace this type.
Slide-On (Kerf) Sweeps: Also common on modern manufactured doors, these sweeps have two rigid plastic rails that slide into corresponding grooves (kerfs) cut into the very bottom of the door. They do not wrap around the sides. Like the U-channel, replacing a slide-on sweep requires taking the door off its hinges.
Screw-On Face Sweeps: These are mostly found on older wooden doors. The sweep is an aluminum track holding a rubber seal, and it is screwed directly into the inside-facing bottom surface of the door. These are the easiest to replace because you can do the job while the door is still hanging on its hinges.
Step 2: Measure the Gap and Buy the Replacement
Accuracy is crucial here. If you buy a sweep with rubber fins that are too short, you will still see daylight under your front door. If the fins are too long, the door will drag heavily on the floor and be difficult to open.
Close the door and measure the width of the door itself. Standard front doors are 36 inches wide, but older homes or custom entries might be 32, 34, or 42 inches. Next, measure the height of the gap between the bottom of the door and the threshold. You want a sweep whose rubber fins or bulbs are slightly longer than this gap so they compress slightly when the door is closed.
When shopping at the hardware store, look for heavy-duty rubber or silicone sweeps. Vinyl is cheaper but becomes rigid and brittle in freezing winter temperatures, which can cause it to snap. Silicone remains flexible year-round, ensuring a tight seal regardless of the season outside.
Step 3: Remove the Old Door Sweep Safely
If you have a U-channel or slide-on sweep, you must remove the door. Do not let this intimidate you; it is easier than it sounds, though doors are heavy, so having a helper is highly recommended.
Close the door and tap the hinge pins out from the bottom using a hammer and a nail punch or a flathead screwdriver. Start with the bottom hinge and work your way to the top. Once the pins are out, open the door slightly, grip it by the sides, and lift it straight up and off the hinges. Carefully lay the door flat across two sawhorses or on a blanket on the floor.
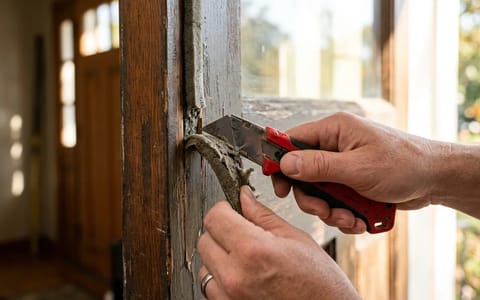
With the bottom of the door exposed, remove the old sweep. For a U-channel, look for staples or screws holding it in place and remove them with pliers or a screwdriver. Then, pull the old sweep off. For a slide-on sweep, simply grab one end and slide it out of the grooves. If it is stuck, a pair of locking pliers can give you the leverage you need. Once the old sweep is off, scrape away any accumulated dirt, old caulk, or adhesive from the bottom of the door using a putty knife.
Step 4: Cut and Install the New Door Sweep
Most replacement door sweeps come in standard 36-inch lengths. If your door is exactly 36 inches, it might be a perfect fit. If your door is slightly narrower, you will need to trim the new sweep.
Measure the exact width of the door bottom. Transfer this measurement to your new door sweep. If your sweep is made entirely of rubber or vinyl, you can cut it easily with a sharp utility knife or heavy-duty shears. If your sweep has a metal track (like a screw-on face sweep), you will need a hacksaw to cut the metal and a utility knife to cut the rubber seal.
- Trim the sweep to size. Cut the metal track with a hacksaw. If using a U-channel, ensure you cut it perfectly square so it aligns with the edges of the door.
- Crimp the ends (for slide-on sweeps). If your sweep features rubber tubes or fins that slide into a track, use pliers to gently crimind the very ends of the metal or plastic track. This prevents the rubber from sliding out over time.
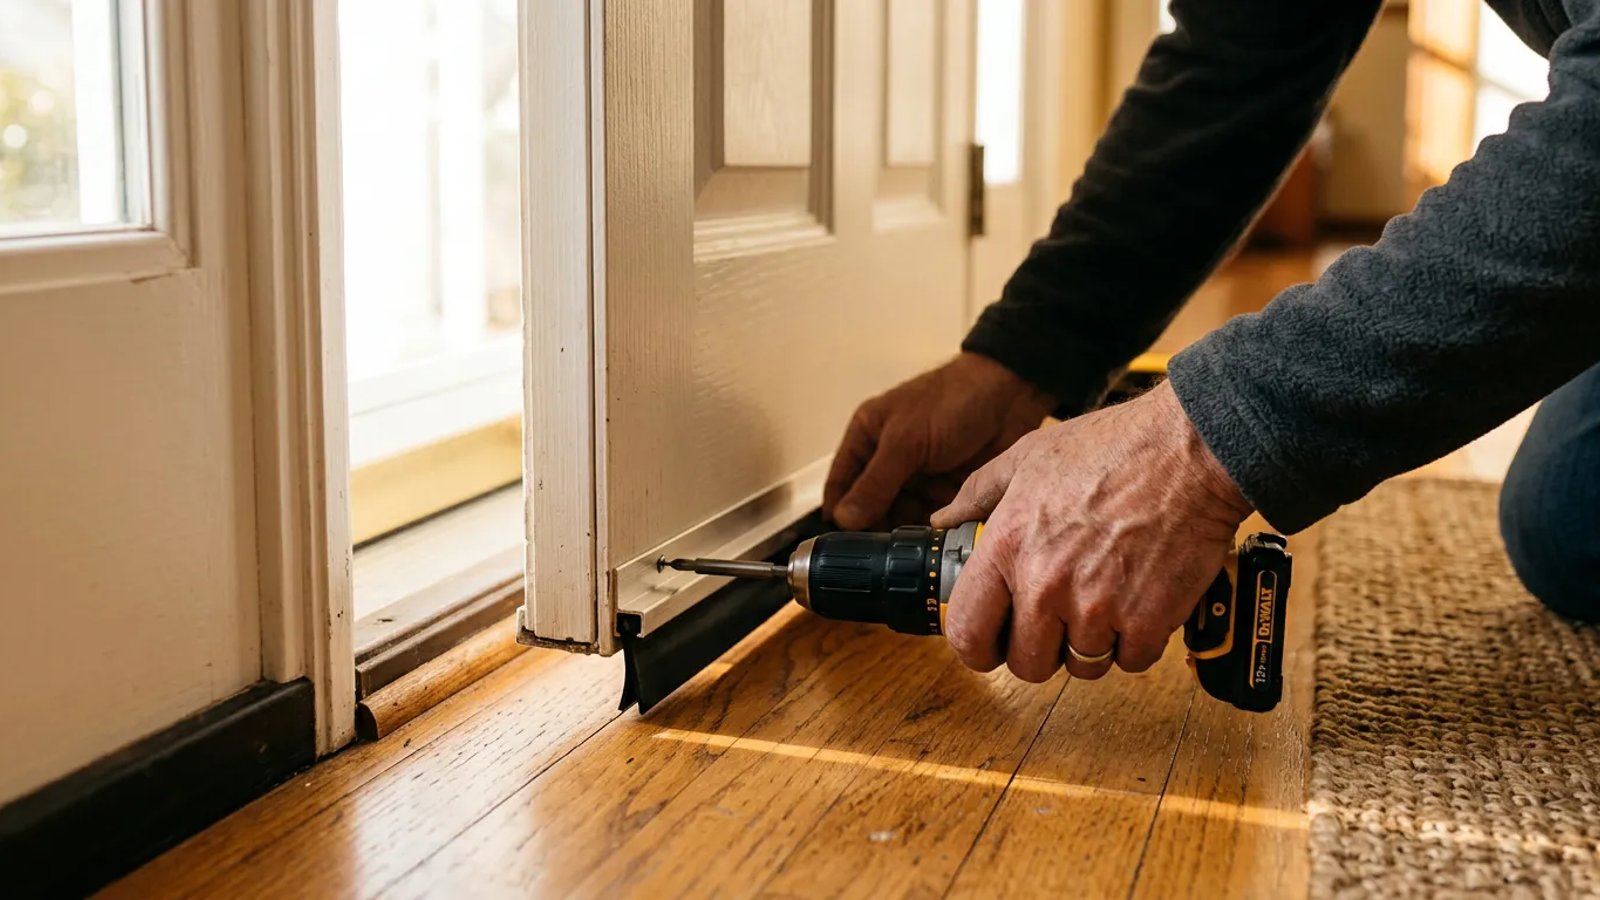
- Attach the new sweep. For a U-channel, apply a thin bead of exterior-grade silicone caulk along the inside of the channel, press it firmly onto the door bottom, and secure it with the provided screws. For a slide-on, line up the rails with the kerfs and push it all the way across. For a screw-on, align it on the door face so the rubber compresses slightly against the threshold, mark the holes, drill pilot holes, and drive the screws.
- Rehang the door. Lift the door back onto the hinges, align the knuckles, and drop the pins back in. Tap them down securely with a hammer.
The Final Tweak: Adjusting the Threshold Plate
After you rehang the door and close it, you should immediately notice a difference. The daylight under your front door should be completely gone. However, you might find that the door is now quite difficult to close, or that it closes easily but there is still a tiny sliver of light in one corner.
This is where the adjustable threshold plate comes in. Look at the metal threshold on the floor. On most modern exterior doors, you will see a row of four or five large Phillips-head screws running across the center of the threshold strip. This strip is actually an adjustable cap.
By turning these screws, you can raise or lower the threshold to perfectly meet your new door sweep. If the door is dragging too hard, turn the screws clockwise to lower the threshold cap. If there is still a slight gap, turn the screws counterclockwise to raise the cap. Adjust each screw slightly until you achieve a perfect, uniform seal across the entire width of the door.
Taking an hour to replace a worn door sweep is one of the highest-return DIY projects you can tackle. By eliminating that gap, you instantly stop drafts, keep out unwanted pests, and ensure your climate-controlled air stays exactly where you want it—inside your home.