How to Check Weatherstripping and Keep Summer Heat Out
Don't let your expensive air conditioning seep out the window. Learn how to inspect, remove, and replace your home's weatherstripping before the summer heat hits.
We have all experienced that frustrating mid-summer afternoon. The heat is radiating off the pavement, your air conditioner has been running for three hours straight, and the living room still feels uncomfortably warm. You check the thermostat and inspect the air vents, but the culprit is often entirely invisible. Those tiny, unassuming gaps around your exterior doors and windows are quietly siphoning your expensive, conditioned air right out of the house. If you want to keep the heat out and your utility bills manageable, you need to check weatherstripping before the peak cooling season arrives.
Most homeowners associate drafts strictly with the dead of winter. We notice the cold air blowing in. But air leakage is a two-way street. In the summer, the physics of heat transfer and air pressure mean that hot, humid exterior air is constantly trying to push its way into your cool, dry home. When your window and door seals are cracked, compressed, or missing entirely, your HVAC system has to work overtime just to maintain a baseline temperature.
Up to 30% of a home's cooling energy is lost through poorly sealed windows and doors.
Taking a Saturday morning to inspect and replace these degraded seals is one of the highest-return DIY projects you can tackle. It requires no specialized skills, only basic hand tools, and materials that cost less than a few cups of coffee. Let us walk through exactly how to find those hidden leaks and seal your home tight for the summer.
How to Check Weatherstripping: The Dollar Bill Test
Before you run out to the hardware store, you need to know exactly which doors and windows are actually leaking. Visual inspections are a good start. Stand inside your home on a bright, sunny day with the lights turned off. Look closely at the perimeters of your exterior doors and closed windows. If you can see daylight peeking through the edges, you have a guaranteed air leak. But not all leaks are visible to the naked eye.
This is where the classic dollar bill test comes in. It is a simple, highly effective way to check weatherstripping compression.
- Position the bill. Open your exterior door or window and place a crisp dollar bill across the weatherstripping seal.
- Close the door or window. Shut it completely and lock it, trapping the bill between the door and the jamb (or the window sash and the frame).
- Pull the bill. Grab the exposed end of the bill and gently try to pull it out.
If the bill resists slightly and feels like it is gripping the surface, your seal is in good shape. If the bill slides out effortlessly with zero friction, the weatherstripping in that specific spot is failing. You should repeat this test every 12 to 18 inches around the entire perimeter of the door or window. Often, you will find that a door seals perfectly at the top but fails completely near the bottom hinge.
Choosing the Right Weatherstripping Material
Once you have identified the problem areas, you need to purchase replacement materials. Walking down the weatherstripping aisle at a home improvement center can be overwhelming. There are dozens of profiles, widths, and materials. Choosing the right one depends on the size of the gap and whether the surface experiences friction.
Adhesive-Backed Foam Tape: This is the most common and affordable option. It comes in rolls and is incredibly easy to cut and apply. However, it is best used for irregular gaps and stationary windows. Because it is highly susceptible to friction, foam tape used on a high-traffic door jamb will often shred or lose its elasticity within a year or two.
Tubular Rubber or Silicone: This material features a hollow tube attached to an adhesive backing or a flange. When the door closes against it, the tube compresses to form a highly effective, airtight seal. Silicone remains flexible even in extreme temperatures and bounces back to its original shape. This is the ideal choice for exterior doors and can easily last five to ten years.
V-Strip (Tension Seal): Made of durable vinyl or thin metal (like bronze or aluminum), V-strips are folded into a 'V' shape that springs open to fill gaps. They are excellent for the sliding channels of double-hung windows or the sides of a door, as they can withstand constant friction without tearing.
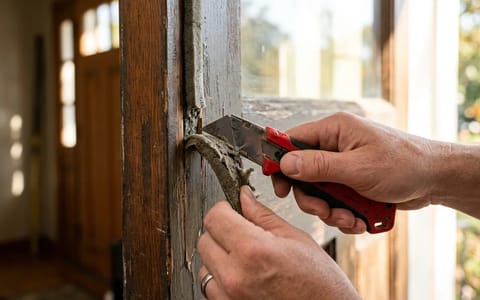
The Crucial Step: Removing Old Seals and Prepping the Surface
The biggest mistake homeowners make when replacing weatherstripping is rushing the preparation phase. You cannot simply stick new adhesive tape over old, brittle foam. If you apply a new seal to a dirty, uneven surface, the adhesive will fail, and the strip will peel off within weeks.
Start by gently pulling away the old weatherstripping. If it has been there for years, it will likely tear and leave chunks of foam and stubborn adhesive residue behind. Use a rigid metal putty knife to scrape away the bulk of the remaining material. Be careful not to gouge the wood frame or chip the paint.
Once the heavy debris is gone, you need to dissolve the leftover glue. Apply a commercial adhesive remover, like Goo Gone, to a rag and rub it into the residue. Let it sit for about five minutes to soften the glue, then scrape it away. If the surface is still rough, a quick pass with 120-grit sandpaper will smooth things out nicely.
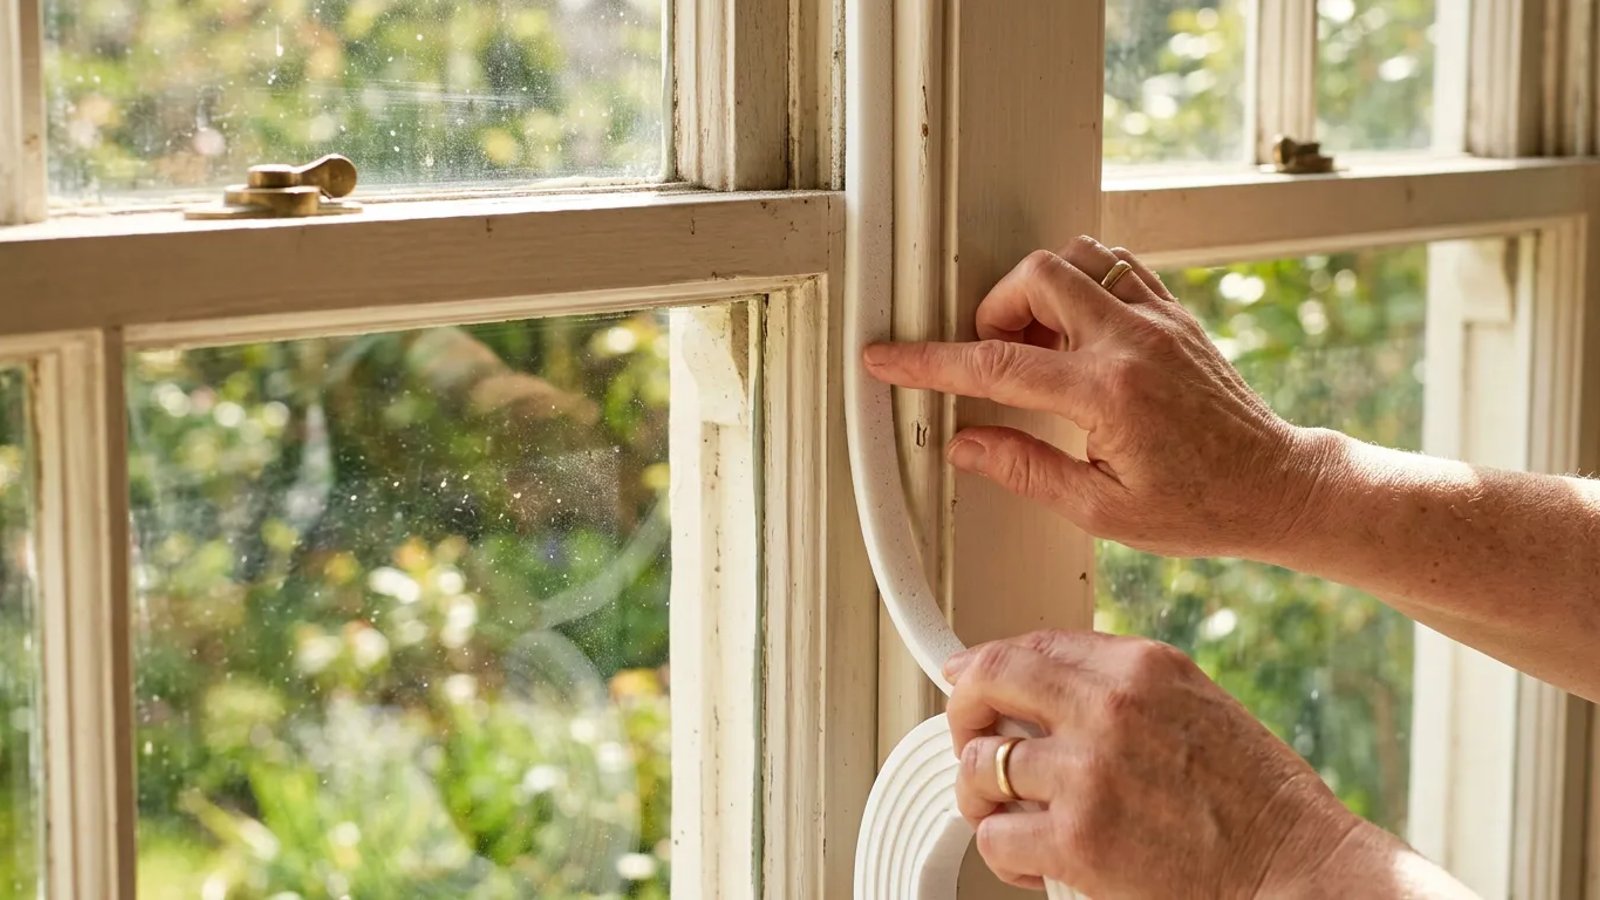
Step-by-Step: Applying New Weatherstripping Like a Pro
With a perfectly clean, dry surface, you are ready to install the new seals. For the best adhesion, ensure you are doing this on a mild day. Most weatherstripping adhesives require the surface temperature to be above 50°F (10°C) to cure properly.
- Measure twice, cut once. Measure the length of the door jamb or window frame. Roll out your weatherstripping and cut it to the exact length using sharp heavy-duty scissors or utility shears. Do not try to stretch the material to fit, as it will eventually shrink back and leave a gap.
- Peel and stick gradually. Do not remove the entire backing strip at once. Peel back just the first two inches of the paper backing.
- Press firmly into place. Start at a top corner. Press the sticky side firmly against the frame. Slowly peel the backing away with one hand while trailing closely with your other thumb, pressing the strip firmly into the jamb.
- Check the compression. Once installed, close the door or window. You should feel a slight resistance as the latch clicks into place, indicating that the weatherstripping is properly compressed.
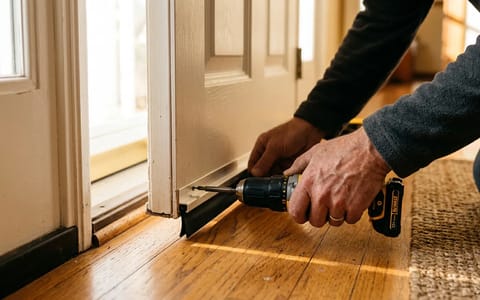
Don't Forget the Door Sweep and Threshold
You can have perfect weatherstripping along the sides and top of your door, but if the bottom is leaking, you are still losing massive amounts of conditioned air. The gap beneath an exterior door is notorious for letting in hot drafts, humidity, and even summer pests.
First, check your threshold. Many modern exterior doors feature adjustable thresholds with four or five large screws running across the top. If you can see daylight under the door, try turning these screws counter-clockwise slightly to raise the threshold until it makes snug contact with the bottom of the door.
If your threshold is not adjustable, or if the rubber fin on the bottom of the door is torn, you need to install a new door sweep. A standard aluminum-and-rubber door sweep costs about $10 to $15 at any hardware store. Simply measure the width of the door, cut the sweep to size with a hacksaw, and screw it directly into the interior bottom face of the door. Adjust it so the rubber fin sweeps firmly across the threshold without making the door impossible to close.
Taking the time to check weatherstripping and replace failing seals is an afternoon project that pays immediate dividends. Not only will your home maintain a more consistent, comfortable temperature during those brutal July heatwaves, but your air conditioner will cycle less frequently, extending its lifespan. Grab a crisp dollar bill, take a walk around your house this weekend, and start sealing up those leaks.