Should Crawl Space Vents Be Open or Closed in Summer?
Wondering what to do with your foundation vents as the weather warms up? Discover why modern building science says keeping them closed is the best way to prevent mold, rot, and moisture damage.
Every spring, as the ground thaws and the air turns thick with humidity, homeowners start asking the exact same question. The debate over whether to leave foundation vents open to "air out" the space or close them up tight has raged in neighborhoods for decades. If you are frantically searching to find out whether keeping your crawl space vents open or closed is the right move for the upcoming summer, you are definitely not alone.
For a long time, the standard advice was to open your vents in the summer to let the house breathe, and close them in the winter to keep the pipes from freezing. It sounds perfectly logical on the surface. Unfortunately, this outdated advice has caused millions of dollars in structural damage, ruined hardwood floors, and created massive indoor air quality issues for homeowners across the country.
As we head into the warmer months, it is time to look at what modern building science actually says about foundation ventilation. By understanding how moisture moves through your home, you can take a few simple, inexpensive steps right now to protect your home's structural integrity and keep your indoor air fresh and clean.
The Great Debate: Crawl Space Vents Open or Closed in Summer?
To understand why there is so much confusion, we have to look back at how houses used to be built. Historically, building codes dictated that crawl spaces needed cross-ventilation. The old rule of thumb was one square foot of vent space for every 150 square feet of crawl space area. The theory was simple: a nice summer breeze would blow through the vents, pick up any dampness from the dirt floor, and carry it harmlessly out the other side.
There is just one massive flaw in this logic: it completely ignores the physics of humidity and temperature. When you open a vent in the middle of July, you are not inviting a dry, refreshing breeze into your home. You are inviting a heavy, wet blanket of humid air into a dark, cool cave.
Opening your crawl space vents in the summer is like leaving your refrigerator door open on a hot day and expecting the kitchen to cool down.
Modern building scientists, including the experts at the Department of Energy and Advanced Energy, have spent years studying this exact issue. Their conclusion is unanimous. In almost all climates, bringing warm, humid outside air into a cool crawl space is a recipe for disaster. The science definitively proves that your foundation vents should be closed and completely sealed year-round.
The Physics of Crawl Space Condensation
To really grasp why open vents are so destructive, you need to understand a concept called the dew point. Warm air can hold significantly more water vapor than cold air. When warm, humid air cools down, it loses its ability to hold that moisture. The excess water has to go somewhere, so it turns into liquid condensation on the nearest cold surface.
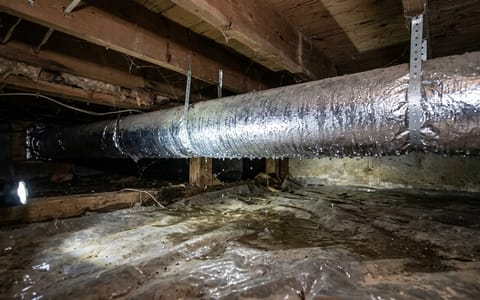
Let's look at a typical mid-summer day. Outside, it might be 85°F with 75% humidity. But inside your crawl space, the temperature is heavily influenced by the earth, meaning it usually hovers around a cool 60°F to 65°F. Your cold water pipes and uninsulated air conditioning ducts might be even colder, sometimes dropping into the 50s.
When that 85°F humid air flows through your open vents and hits those 60°F surfaces, the air temperature drops rapidly below its dew point. Immediately, water droplets begin to form. It is the exact same phenomenon that causes a glass of iced tea to sweat on a porch in July. Except in this case, the "sweat" is coating your wooden floor joists, your fiberglass insulation, and your metal ductwork.
The Consequences of Leaving Vents Open
I remember crawling under my first house in early July, convinced that the open vents were doing their job. Instead, I was greeted by the smell of a damp basement and the sight of water physically dripping from the HVAC ducts onto the dirt floor. That single afternoon taught me more about building science than any textbook ever could.
When condensation is allowed to form continuously throughout the spring and summer, the results are highly predictable and incredibly expensive to fix. First, the fiberglass insulation absorbs the ambient moisture. It becomes heavy, loses its insulating value, and begins to hang down in sad, wet clumps.
Next, the wooden floor joists and subfloor absorb the water. Wood rot fungi thrive when the moisture content of wood exceeds 20%. Once the rot sets in, the structural integrity of your home is compromised. You might start to notice bouncy floors or doors that suddenly refuse to close properly.
Finally, there is the issue of indoor air quality. Due to the "stack effect"—the natural upward movement of air in a building—up to 50% of the air you breathe on the first floor of your home actually comes from your crawl space. If your crawl space is filled with mold spores, mildew, and pest droppings because of open vents, that contaminated air is being pulled directly into your living room and bedrooms.
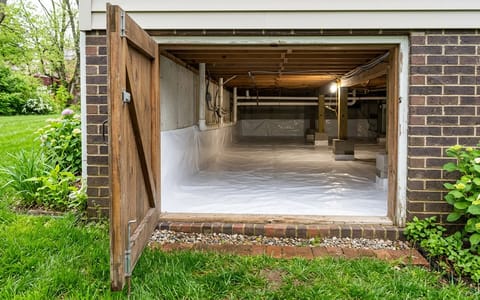
How to Safely Inspect Your Crawl Space
Before you seal anything up, you need to know exactly what you are dealing with. Sealing a crawl space that already has standing water or active leaks will only trap the moisture inside and accelerate the damage. You need to conduct a thorough inspection.
Crawl to each corner of the foundation and shine your light along the perimeter walls. Look closely at the wood framing just above the foundation wall, known as the sill plate. You are looking for dark staining, white powdery patches, or any wood that looks soft and spongy. Check the ground for any signs of pooling water or dark, muddy tracks that indicate water flows through the space during heavy spring rains.
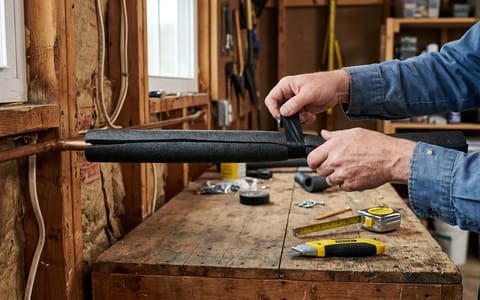
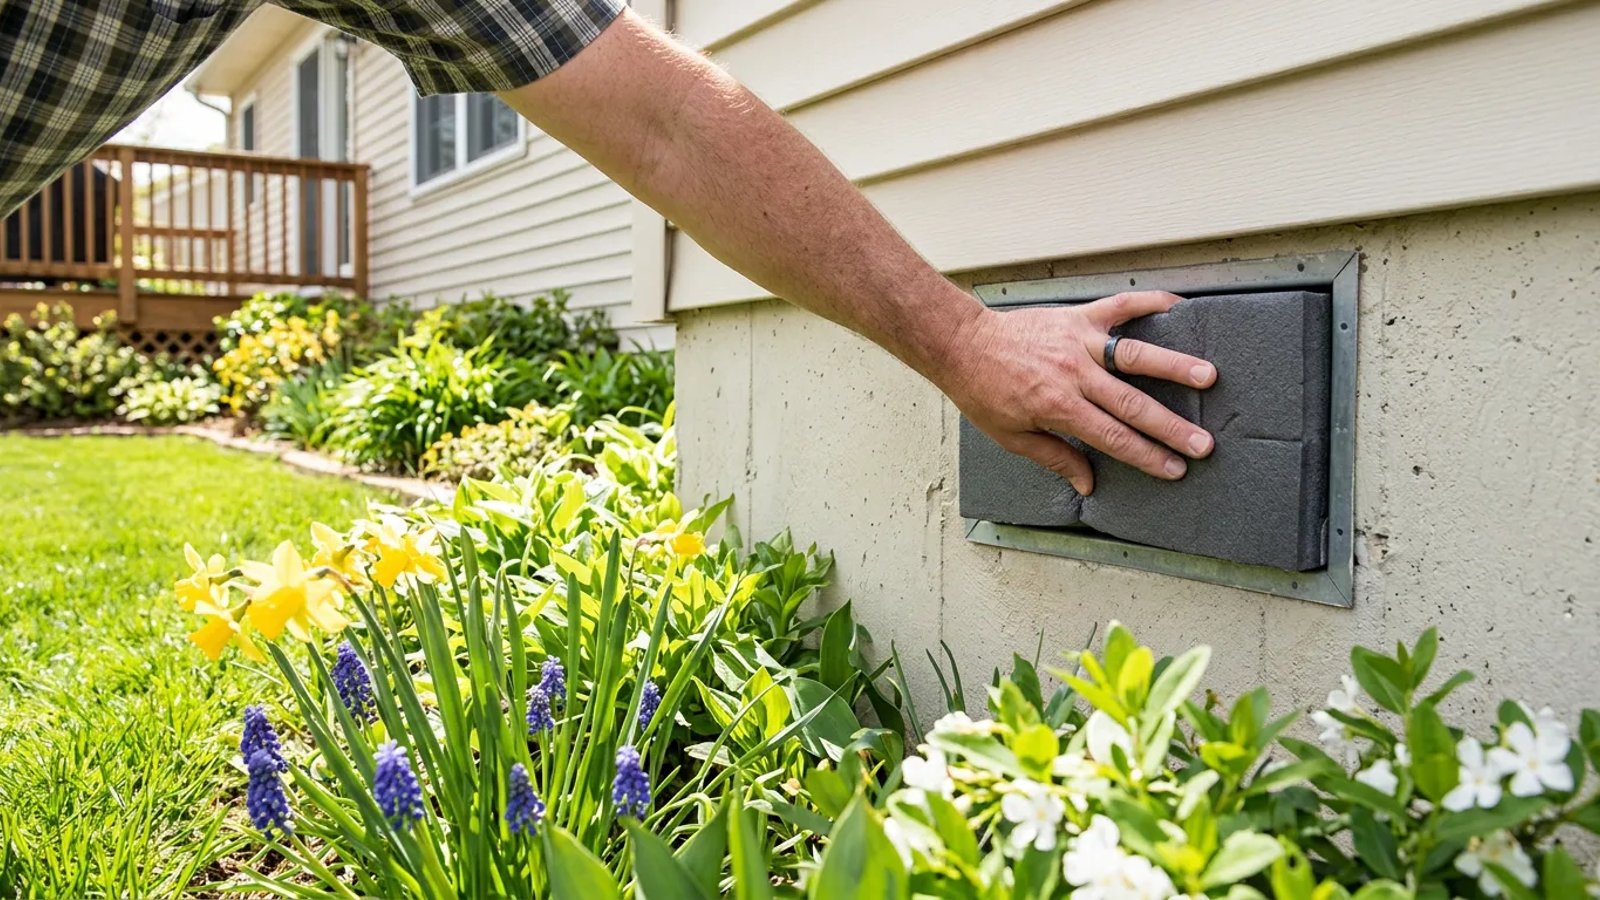
Step-by-Step: Sealing Your Vents for Summer
If your inspection reveals a generally dry space with intact wood, you are ready to take action. Sealing your vents is a highly approachable weekend project that requires only a few basic materials from your local home improvement store.
- Measure your vent openings. Take exact measurements of the inside dimensions of your foundation vents. Most standard vents are roughly 8 inches tall by 16 inches wide, but they can vary significantly based on the age of the home.
- Purchase rigid foam board. Head to the hardware store and buy a sheet of 2-inch thick extruded polystyrene (XPS) rigid foam board. This usually costs around $30 to $40 for a large 4x8 sheet, which is more than enough for a typical house.
- Cut the foam blocks. Using a utility knife or a fine-toothed hand saw, cut the foam board into rectangles that are about 1/4-inch smaller than your vent measurements.
- Seal the blocks in place. Apply a generous bead of exterior-grade silicone caulk or expanding spray foam around the edges of the foam block. Press the block firmly into the vent opening from the inside of the crawl space. The sealant will hold it in place and block any air leaks.
- Close the exterior louvers. If your vents have operable metal louvers on the outside, slide them to the fully closed position for an extra layer of protection against the elements.
The Crucial Role of the Vapor Barrier
Closing the vents stops humid air from coming in from the outside, but you still have to deal with the moisture coming up from the ground. The earth is naturally damp, and as temperatures rise, that moisture evaporates directly into your crawl space.
This is where a high-quality vapor barrier becomes absolutely critical. A vapor barrier is a thick plastic sheet that covers the dirt floor, trapping the moisture in the ground where it belongs. Many older homes have thin, 4-mil plastic that is ripped, degraded, or only covers half the floor.
To properly protect your home, you need a continuous layer of 6-mil or 10-mil polyethylene plastic covering 100% of the dirt. The seams where the plastic sheets meet should overlap by at least 12 inches and be sealed completely with specialized acrylic crawl space tape. Never use standard duct tape, as the adhesive will fail in a matter of weeks in a damp environment. The plastic should also run about 6 inches up the foundation walls and foundation piers to ensure complete coverage.
Monitoring and Managing Indoor Humidity
Once you have sealed the vents and ensured your vapor barrier is perfectly intact, your crawl space is effectively isolated from the outside environment. However, you still need a way to monitor the conditions down there to ensure your hard work is paying off.
The smartest investment you can make is purchasing a digital hygrometer with a remote sensor. These cost about $20 to $30. You place the battery-operated sensor in the middle of your crawl space and keep the digital display in your kitchen or living room. This allows you to check the exact temperature and humidity under your house without ever having to put your coveralls back on.
If you monitor the space and find that the humidity is still creeping above 60% during the dog days of summer, you may need to add active moisture control. Because the space is now sealed, you can install a crawl space-specific dehumidifier. Unlike the small units meant for a bedroom, these are robust, high-capacity machines designed to operate efficiently in cooler temperatures. They can be plumbed to drain automatically to the exterior, ensuring your foundation remains bone dry year-round.
Taking the time this spring to seal your vents, upgrade your vapor barrier, and monitor your humidity will pay massive dividends. You will prevent costly wood rot, keep pests at bay, and ensure the air your family breathes all summer long is healthy and clean. It is one of the most impactful weekend projects a homeowner can tackle.