Deck Boards Splintering? How to Restore Wood Fast
Don't rip up your weathered deck just yet. Learn how to safely clean, sand, and seal graying, splintering wood boards in a single weekend.
Full guide Exterior: Siding, Garage & Decks Learn how to maintain your siding, garage doors, and decks to protect your home from the weather.You step outside to enjoy the warm early-summer weather, only to realize your wooden deck is looking gray, weathered, and actively shedding sharp splinters. If you are worried about bare feet and the issue of **deck boards splintering**, and wondering how much a contractor will charge to rebuild the structure, take a deep breath. Your first thought might be that the expensive lumber is completely ruined, but appearances can be deceiving.
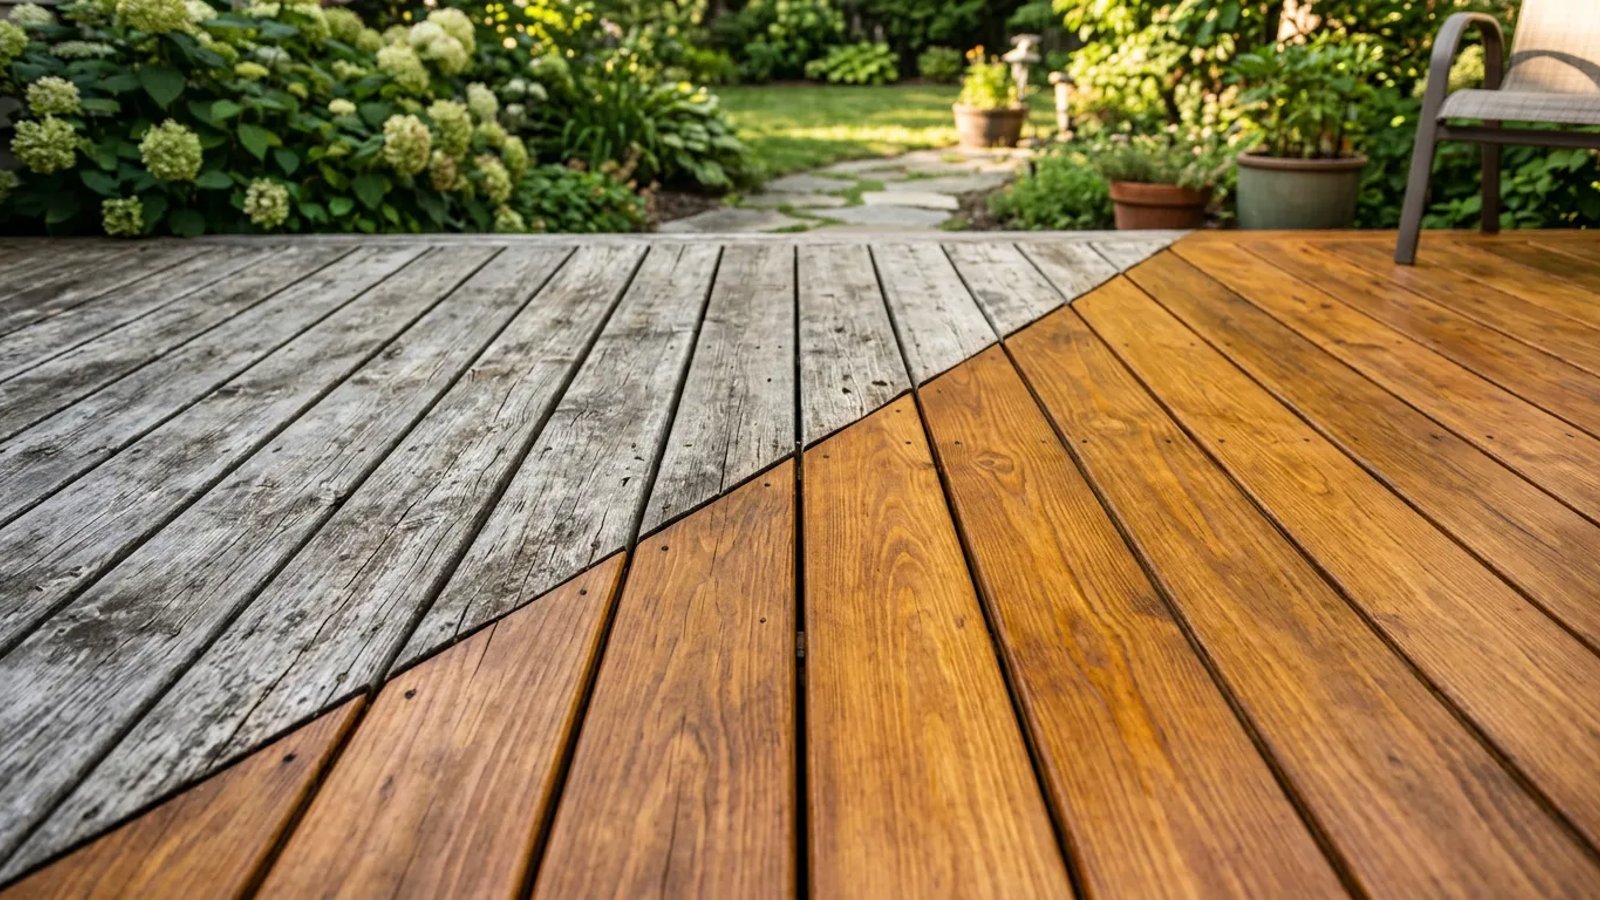
Sunlight and winter moisture strip away wood's natural oils over time. This causes the top fibers to dry out, lift up, and turn a dull gray. Many homeowners assume they need to rip up and replace the boards, but most surface damage is entirely reversible. With a few basic tools and a free weekend, you can restore your outdoor living space to a safe, smooth finish.
Why Are My Deck Boards Splintering?
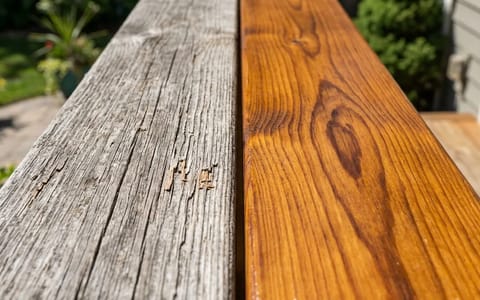
Wood is held together by a natural polymer called lignin. It acts as the cellular glue keeping the wood fibers tight and strong. When your deck is exposed to direct sunlight, ultraviolet (UV) rays bake the wood and slowly break down this lignin, often weakening the top **1-2 millimeters** of the wood's surface. Once the glue weakens, the top layer of wood fibers begins to detach.
Add seasonal weather to the mix, and the problem accelerates. Rain and snow soak into the unprotected wood, causing it to swell. When the sun comes out, the wood dries and shrinks. This constant expansion and contraction acts like a slow-motion crowbar, prying the weakened surface fibers apart. The result is a fuzzy, gray surface that easily catches on socks and bare skin.
Most surface damage is entirely reversible without replacing a single piece of lumber.
The good news is that UV damage rarely penetrates deeper than a few millimeters. Beneath that gray, splintery exterior is usually healthy, solid wood waiting to be exposed.
Is It Rot, or Just Surface Wear?
Before you spend money on stains and sandpaper, you must confirm the structural integrity of the deck. Cosmetic restoration will not fix rotting wood.
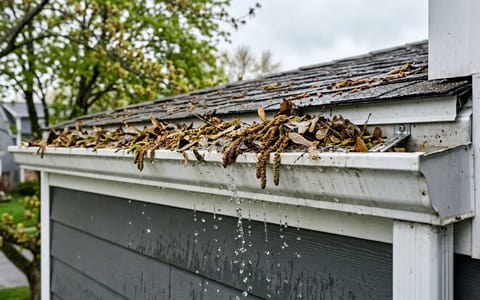
To check your deck, grab a standard flathead screwdriver and walk the perimeter. Pay close attention to areas that stay damp, such as boards near downspouts, under large potted plants, or where the deck meets the house (the ledger board).
Press the tip of the screwdriver firmly into the wood. If the wood is healthy, the screwdriver should barely make a dent. If the tip sinks easily into the wood—a quarter-inch or more—and the surrounding area feels soft or spongy, you are dealing with wood rot.
A few years ago, I helped a neighbor inspect what they thought was a ruined deck. We tested the boards and found the underlying joists were perfectly solid. Only three surface boards had actual rot. By simply replacing those three boards and restoring the rest, we saved them over $3,000 in lumber costs.
How to Clean and Strip the Gray Wood
Once you know the wood is solid, the first step is removing the dead, gray fibers and ground-in dirt. Do not skip straight to sanding, or you will grind dirt deeper into the wood grain.
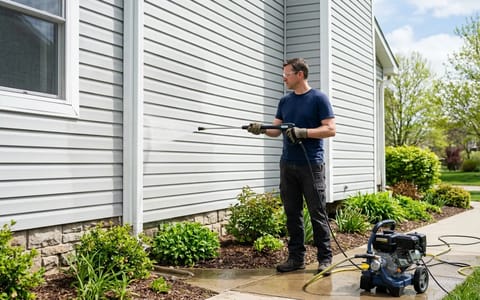
Many people reach for a pressure washer, but high pressure is the fastest way to destroy wood. Instead, rely on a chemical deck cleaner to do the heavy lifting.
Instead, look for oxygen-based cleaners containing sodium percarbonate. According to the EPA Safer Choice program, oxygen-based bleaches are much safer for the environment and effectively lift dirt without destroying the wood's cellular structure. If your deck has dark black stains around the nail heads, you will want a wood brightener containing oxalic acid, which specifically neutralizes rust and tannin stains.
- Clear the deck completely. Remove all furniture, planters, and rugs to give yourself an unobstructed workspace.
- Wet the surrounding plants. Spray down any nearby landscaping with a hose so they do not absorb any stray cleaner.
- Apply the cleaner. Mix your oxygen bleach solution in a pump sprayer and saturate the damp deck boards.
- Scrub the grain. Let the cleaner sit for 15 minutes, then use a stiff-bristled synthetic brush on a long pole to agitate the wood.
- Rinse thoroughly. Use a garden hose with a standard spray nozzle to wash away the lifted dirt and gray wood fibers.
Let the deck dry completely. Depending on humidity and sunlight, this usually takes 24 to 48 hours. You will notice the wood already looks drastically better, but the grain will likely feel rough to the touch. That is exactly what we fix next.
Sanding Away the Splinters
Cleaning lifts the dirt, but water naturally raises the grain of the wood. To eliminate the splinters and create a barefoot-friendly surface, you must sand the boards.
If you have a small deck, a handheld random orbital sander is sufficient. However, for anything larger than 100 square feet, renting an upright vibrating floor sander from your local hardware store is a massive time-saver. Last summer, I rented one for $60 for the day. It saved my knees and cut the sanding job down to just two hours, compared to the grueling weekend I spent crawling around with a hand sander on a previous house.
Start with 60-grit or 80-grit sandpaper to knock down the sharp splinters and smooth out any deep scratches. Move the sander in the direction of the wood grain. Once the deck is uniform, you can do a quick second pass with 100-grit paper to smooth the finish.
Do not use sandpaper finer than 100-grit. If the wood is polished too smoothly, the pores will close up, and your new stain will not be able to penetrate the surface.
Choosing and Applying the Right Sealer
With the deck clean, smooth, and dry, it is time to protect your hard work. The goal is to replace the natural oils that the sun baked away and establish a barrier against future UV damage.
Walk down the paint aisle, and you will see clear sealers, semi-transparent stains, semi-solid stains, and solid stains. For a deck that is in good structural shape but prone to drying out, a semi-transparent penetrating oil stain is the gold standard.
Clear sealers offer very little UV protection and usually need to be reapplied every single year. Solid stains act like paint; they sit on top of the wood and will eventually peel. Semi-transparent stains strike the perfect balance. They contain enough pigment to block UV rays, but they soak deep into the wood fibers, nourishing the boards and allowing the natural grain to show through.
Apply the stain when the temperature is between 50°F and 90°F, and avoid working in direct afternoon sunlight, which can cause the stain to flash-dry before it penetrates.
Use a wide stain pad attached to a pole to apply the product to two or three boards at a time, running the pad the entire length of the boards to avoid lap marks. Keep a high-quality natural bristle brush handy to work the stain into the gaps between the boards. If you notice puddles forming after 20 minutes, wipe up the excess with a clean rag. Oil that sits on the surface will dry into a sticky, tacky mess.
What Does DIY Deck Restoration Cost?
Taking the time to restore your wood deck is one of the highest-return DIY projects you can tackle. Hiring a contractor to sand and stain a standard 200-square-foot deck can easily cost over a thousand dollars, while replacing the lumber entirely would cost several times that.
Maintaining your deck moving forward is simple. Keep leaves and pine needles swept off the boards, as trapped organic matter holds moisture and promotes rot. Give the deck a light wash with oxygen bleach every spring, and plan to apply a fresh coat of semi-transparent stain every two to three years. Your bare feet will thank you.
- Never use a high-pressure power washer with a zero-degree nozzle on a wood deck, as it will gouge the boards and create more splinters.
- Avoid household bleach for cleaning; it destroys the wood's cellular structure and harms surrounding plants.
- Sand just enough to smooth the surface (stopping at 80 or 100 grit); over-sanding prevents the stain from soaking in properly.
- Wait at least 48 hours after washing before applying any stain, ensuring the wood is completely dry.