How to Mulch Around Your Foundation Without Causing Rot
Spreading fresh mulch is a classic spring chore, but piling it against your siding can cause expensive rot and invite termites. Learn how to grade your soil and mulch safely.
Spring has arrived, and for many of us, that means spending the weekend hauling heavy bags from the hardware store to refresh our garden beds. There is nothing quite like the crisp look and earthy smell of fresh wood chips to instantly boost your home's curb appeal. But while you are working hard to make your yard look pristine, you might be making a critical structural error. Learning how to properly mulch around your foundation is one of the most vital preventative maintenance skills a homeowner can master.
A few years ago, I helped a neighbor pull back a massive, decaying mound of dyed black mulch that had been piled halfway up his vinyl siding. When we finally hit the concrete foundation, the wood sheathing underneath the siding was completely rotted out, crumbling in our hands like wet cardboard. That afternoon of yard work turned into a multi-thousand-dollar structural repair.
The problem is rampant. Landscapers and DIYers alike frequently create "mulch volcanoes" against trees and houses. This common mistake traps moisture directly against the structure, invites wood-destroying insects right to your doorstep, and slowly destroys the home's sill plate. Here is exactly how to protect your home while still getting that fresh, manicured garden look.
The Hidden Danger of the Mulch Volcano
To understand why piling mulch against your house is so destructive, you have to look at how your home is built. The lowest part of your home's wooden framing is called the sill plate. This is the horizontal piece of treated lumber that sits directly on top of your concrete foundation wall. Everything else in your house—the studs, the walls, the roof—rests on this single perimeter plate.
Wood and water are natural enemies. When you pile mulch high enough to cover the concrete foundation and touch the siding, you create a sponge that holds rainwater directly against the house. Capillary action draws that moisture up behind the siding and into the wood framing. Because the mulch blocks airflow, the wood never gets a chance to dry out. Over a few seasons, the sill plate and wall studs begin to rot.
Furthermore, this wet, decaying environment is a dinner bell for pests. Carpenter ants seek out damp, soft wood to excavate their nests. Termites require a constant source of moisture to survive, and a thick layer of wet mulch provides a perfect, insulated highway right to your home's structural framing.
Termites don't usually eat the mulch, but they love the dark, damp highway it creates right to your home's framing.
If you have a brick home, you aren't immune. Brick veneers have "weep holes"—small gaps in the mortar at the bottom of the wall designed to let trapped moisture escape. If you suffocate these holes with mulch, water gets trapped inside the wall cavity, leading to mold, interior water damage, and accelerated mortar decay.
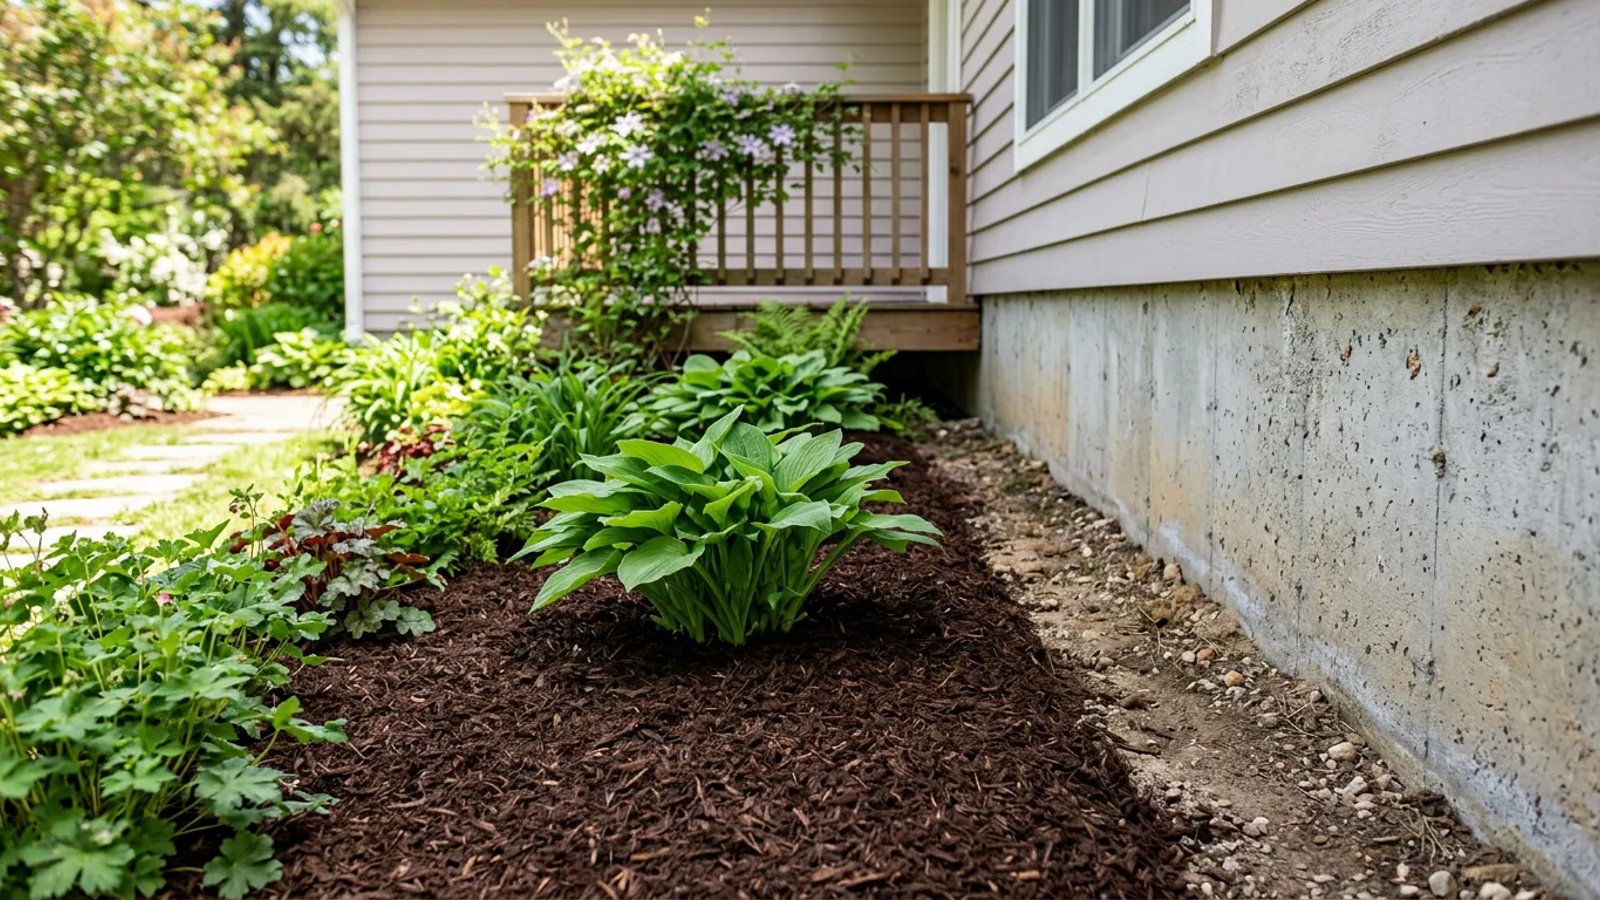
The Golden Rule: Maintain a 6-Inch Clearance
The single most important rule when applying mulch around your foundation is maintaining vertical clearance. Building codes dictate that there should be a minimum of 6 inches of bare concrete foundation visible between the final grade of the soil (or mulch) and the start of your siding, brick, or stucco.
Why exactly 6 inches? This specific measurement serves three critical purposes:
- Termite Inspection: Termites build pencil-thin mud tubes to travel from the soil into your home. A 6-inch bare concrete gap forces them to build these tubes out in the open, making them easy for you or a pest inspector to spot before major damage occurs.
- Splashback Prevention: Rainwater hitting the ground splashes dirt and moisture back up. Six inches is generally high enough to prevent heavy rain from splashing constant moisture and soil-borne fungi onto your wood or vinyl siding.
- Airflow: A clear gap allows wind to circulate at the base of the wall, rapidly drying out the siding and the foundation after a heavy spring storm.
If your garden beds are currently built up too high, simply spreading less mulch won't solve the problem. You will need to physically remove the excess dirt and old mulch to re-establish this critical 6-inch gap.
Grading and Prepping the Bed Before You Pour
Before you even open a bag of mulch, you have to look at the dirt underneath it. Mulch is highly porous; water runs right through it and hits the soil below. If that soil slopes toward your house, the water will pool against your foundation, eventually causing basement leaks or structural settling.
Proper grading is non-negotiable. The soil around your foundation must slope downward and away from the house. The standard guideline is a drop of 1 inch per foot for the first 5 to 10 feet away from the foundation wall.
To prep your beds properly, grab a hard steel bow rake. Pull any existing old, faded mulch out of the beds. Check the soil slope with a level if you aren't sure. If the ground slopes toward the house, bring in dense, clay-heavy topsoil (not fluffy garden soil or potting mix) to build up the grade near the house, tamping it down firmly. Remember, even after adding this new soil, you still need to leave room for 2 inches of mulch while maintaining that 6-inch clearance to the siding.
Choosing the Right Material: Wood vs. Inorganic
Not all mulches are created equal, especially when they are sitting a few feet from your living room. The type of material you choose impacts both the health of your plants and the safety of your home.
Cedar and Cypress
If you are going to use wood mulch near the house, premium cedar or cypress are your best options. You will typically pay $4 to $6 per bag at a big box store, but the investment is worth it. The natural oils and resins in these woods act as a mild deterrent to many insects. While they won't stop a determined termite colony, they are far less attractive to pests than standard hardwood blends. They also break down slower, meaning you won't have to re-apply them as often.
Dyed Hardwood and Pine
The cheap $2 bags of dyed black, brown, or red mulch are usually made from recycled pallets and scrap wood. They decompose rapidly, requiring annual replacement, and hold moisture aggressively. Pine bark nuggets are great for plant health but tend to float away during heavy rainstorms, leaving your foundation beds bare and washing debris into your lawn.
The Stone Barrier Trick
For the ultimate in foundation protection, consider skipping wood mulch entirely for the first foot around your house. Many knowledgeable homeowners install a 12-to-18-inch border of crushed stone, river rock, or pea gravel directly against the foundation, using metal or plastic edging to separate it from the wood-mulched garden bed. Stone doesn't hold moisture, won't rot, and offers absolutely zero food value or shelter for termites and carpenter ants.
Step-by-Step: How to Mulch Around Your Foundation Safely
Once your beds are graded and you have selected the right material, it is time to lay it down. Follow this process to ensure you get a beautiful finish without endangering your home's structure.
- Clear the canvas. Remove weeds, dead leaves, and heavily compacted old mulch. If last year's mulch is still less than an inch thick and in good shape, you can lightly till it with a cultivator to break up the crust.
- Verify the grade. Ensure the bare soil slopes away from the foundation at a rate of 1 inch per foot, and confirm you have at least 8 inches of bare foundation showing (to account for the 2 inches of mulch you are about to add).
- Protect the HVAC. If you have an outdoor air conditioning condenser unit, ensure you leave a 12-inch clearance around the base. Mulch drawn into the condenser fins will choke the system and cause it to overheat.
- Spread evenly, not deeply. Pour the mulch and use a rake or your gloved hands to spread it. The final depth should be exactly 2 to 3 inches. Anything less won't block weeds; anything more will suffocate plant roots and trap too much water.
- Taper the edges. As you get within a few inches of the concrete foundation, taper the mulch layer down so it is as thin as possible right where it meets the wall. Absolutely zero mulch should touch the siding.
- Keep away from trunks. Apply the same logic to your shrubs and trees. Pull the mulch back 2 to 3 inches from the base of plant stems and tree trunks to prevent root rot and fungal diseases.
Maintaining your home's exterior doesn't stop once the bags are empty. Throughout the summer, take a few minutes while mowing the lawn to inspect the perimeter. Heavy rains, stray lawnmower wheels, and foraging animals can easily kick mulch back against the siding. Keep a rake handy to push it back into place, and occasionally fluff the top layer to prevent it from baking into a hard, water-repellent crust under the summer sun. A little vigilance now ensures your foundation stays dry, solid, and pest-free for decades to come.