How to Seal Asphalt Driveway Cracks Before Winter Hits
Don't let winter freeze-thaw cycles turn tiny surface fissures into expensive potholes. Learn how to prep, fill, and seal asphalt driveway cracks like a pro before cold weather hits.
Full guide Exterior: Siding, Garage & Decks Learn how to maintain your siding, garage doors, and decks to protect your home from the weather.Homeowners with asphalt driveways often ignore small surface fissures during the summer months. The gaps look harmless enough, barely wide enough to catch a stray pebble. But if you want to seal asphalt driveway cracks properly, the clock is ticking. Those tiny surface imperfections are ticking time bombs waiting for the first hard freeze of the season.
Since we are in mid-summer, the next few weeks offer the perfect weather window to tackle this project. Asphalt sealant requires warm, dry temperatures to cure. Waiting until November means fighting moisture, cold asphalt, and materials that refuse to flow or bond. Taking an afternoon right now to walk your driveway with a bottle of filler saves thousands of dollars in future repaving costs.
You do not need heavy machinery or a contractor's license for this job. Armed with a few basic tools from the hardware store and a bit of elbow grease, you can secure your driveway against the coming winter. Here is exactly how to get the job done right.
Why Do Small Driveway Cracks Turn Into Potholes?
Asphalt is inherently flexible, but it is not waterproof. Over time, UV rays from the sun bake the essential oils out of the asphalt binder, causing it to become brittle and shrink. This shrinkage creates hairline stress fractures across the surface. On their own, these fractures are mostly a cosmetic issue. The real danger lies beneath the surface.
When rain falls, water seeps through those unsealed cracks and saturates the crushed stone base beneath your driveway. As the seasons change and temperatures plummet, that trapped water freezes. Water expands by roughly 9% when it turns to ice. This expansion exerts incredible hydraulic pressure, up to 2,000 pounds per square inch, on the surrounding asphalt, forcing the crack wider and pushing the pavement upward.
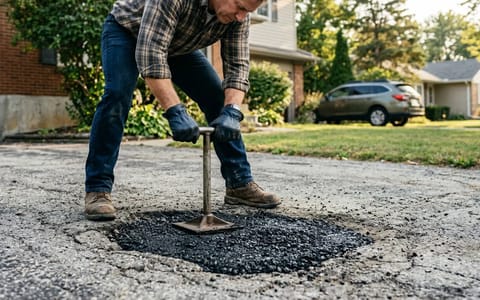
When the ice melts a few days later, it leaves a void underneath the asphalt. The next time you drive your 4,000-pound car over that void, the unsupported asphalt collapses into the hole. This is the freeze-thaw cycle in action. What started as a 1/4-inch gap in August becomes a massive, tire-damaging pothole by March.
Choosing the Right Crack Filler for Your Driveway
Walk down the driveway maintenance aisle at any large home center, and you will see dozens of buckets, jugs, and tubes. For residential DIY crack repair, you want a cold-pour rubberized crack filler. These typically come in one-gallon plastic jugs with an applicator spout and cost between $15 and $25.
Standard asphalt emulsion fillers dry very hard. While they look good initially, they cannot handle the natural expansion and contraction of the pavement during extreme temperature swings. Rubberized fillers, on the other hand, contain latex or synthetic rubber additives. They remain slightly flexible even in freezing weather, allowing them to stretch with the driveway rather than snapping open.
When shopping for supplies, pay attention to the chemical makeup. Many older driveway products relied heavily on coal tar, which releases high levels of volatile organic compounds and toxic runoff. If you want to protect local waterways, look for asphalt-based or acrylic-based fillers. You can check the EPA guidelines on environmental safety regarding pavement sealants to learn more about choosing low-toxicity options for your property.
Last August, I repaired a jagged, 15-foot fissure down the center of my own driveway. I tested a standard cold-pour rubberized filler against a cheaper non-rubberized brand. After one brutal winter, the rubberized section looked completely untouched, while the cheaper filler had already separated from the asphalt walls.
How to Seal Asphalt Driveway Cracks
Proper preparation dictates the success of this project. If you pour expensive sealant over loose dirt and dead grass, the sealant will stick to the dirt instead of the asphalt, and the whole plug will pop out during the first snowstorm. Take your time with the prep work.
- Kill the weeds. A few days before you plan to seal, spray any vegetation growing in the cracks with weed killer, or hit them with a propane weed torch. Dead, brittle roots are much easier to remove than live ones.
- Scrape the crack walls. Use a specialized crack-cleaning tool, an old flathead screwdriver, or a stiff wire brush to aggressively scrub the inside of the crack. You want to expose fresh, clean asphalt on both sides.
- Blow out the debris. Use a leaf blower, a shop vacuum, or an air compressor to blast all the loosened dirt, dust, and pebbles out of the crack. The gap must be completely clean and dry.
- Fill deep voids with sand. If the crack is deeper than 1/2 inch, fill it partially with coarse builder's sand or push a foam backer rod into the gap. Leave the top 1/2 inch empty for the liquid sealant.
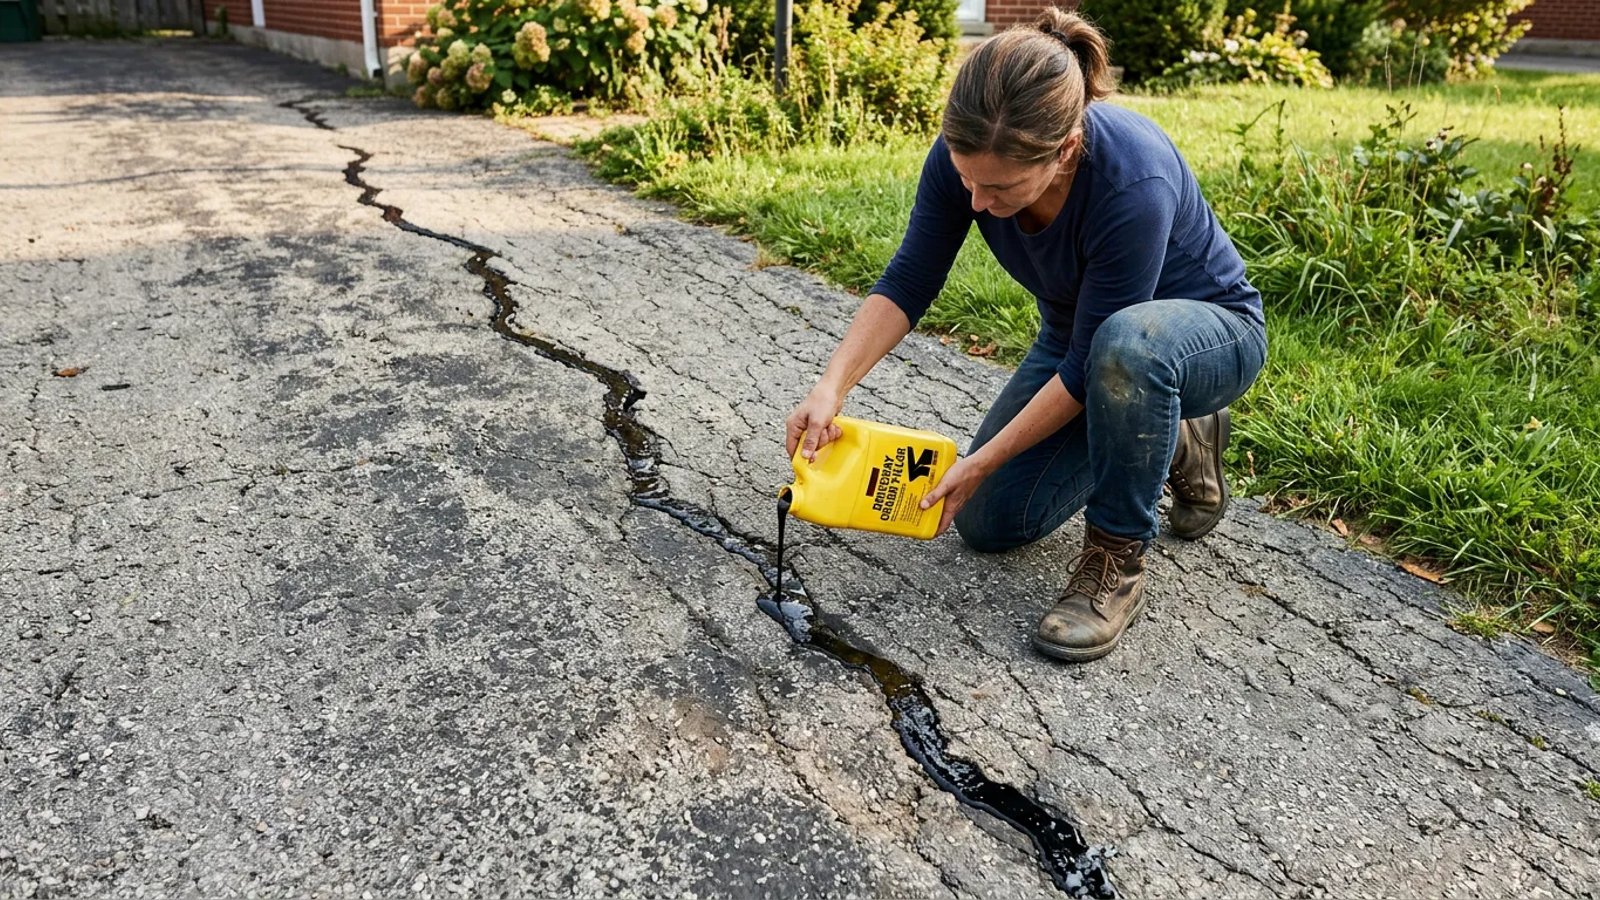
- Apply the rubberized filler. Shake the jug vigorously. Snip the tip off the applicator spout to match the width of your crack. Slowly pour the liquid into the crack, slightly overfilling it above the surface level.
- Smooth the surface. Immediately drag a V-shaped rubber squeegee or a putty knife over the wet filler. This forces the liquid down into the pores of the asphalt and leaves a clean, flat band on the surface.
The Late-Summer Weather Window: Curing Times
Cold-pour sealants rely on evaporation to cure. The water inside the emulsion must evaporate into the air, leaving the solid rubberized asphalt behind. This chemical process requires specific weather conditions.
You need an ambient temperature of at least 65°F and rising. Mid-to-late summer is ideal because the asphalt itself absorbs heat from the sun, creating a warm bed that accelerates the curing process. If you apply the filler when the pavement is cold, the emulsion can stay wet for days.
Moisture is your biggest enemy during the curing phase. Check the forecast carefully. You need a window of at least 24 to 48 hours with absolutely zero chance of rain. If a sudden thunderstorm hits while your filler is still wet, the rain will wash the black emulsion out of the crack and stain your surrounding concrete sidewalks or garage floor.
When Is a Crack Too Big to DIY?
While cold-pour rubberized filler is incredible for routine maintenance, it has physical limits. Knowing when to put down the jug and call a professional prevents you from wasting money on a lost cause.
Cold-pour filler is designed for isolated, linear cracks ranging from 1/4 inch to 1/2 inch wide. If you have a massive fissure that is an inch wide, liquid filler will simply sink to the bottom and never cure properly. For wider cracks, you can use asphalt cold-patch material, which is a mixture of asphalt binder and aggregate stone that you tamp down with a heavy tamper.
However, if your driveway resembles the shattered shell of a hardboiled egg—a condition known in the paving industry as "alligator cracking"—no amount of liquid filler will save it. Alligator cracking indicates that the crushed stone base beneath the asphalt has completely failed, usually due to poor drainage or prolonged water saturation.
Final Steps for a Winter-Ready Driveway
Once you have filled all the cracks and allowed them to cure for a full 48 hours, you can evaluate the rest of the driveway. If the asphalt looks gray, faded, and porous, those sealed cracks are just the first step. Applying a high-quality driveway sealer over the entire surface will lock in your crack repairs, restore the deep black color, and provide a protective barrier against next year's sun and rain.
By taking advantage of the warm summer weather to address these minor defects, you stop the freeze-thaw cycle in its tracks. A few hours of scraping and pouring today ensures your driveway remains smooth, solid, and structurally sound for years to come.
- Clean the crack entirely to the base; filler will not stick to dust, dirt, or dead organic material.
- Choose a cold-pour rubberized sealant for its ability to flex during extreme winter temperature swings.
- Apply filler in layers if the crack is deep, allowing time for the liquid to settle between passes.
- Wait for a dry weather window of at least 24 to 48 hours to ensure a complete, traffic-ready cure.