How to Air Seal an Attic Before Insulation (The Missing Step)
Planning to upgrade your attic insulation this spring? Don't skip the most critical step. Learn how to find and seal hidden air leaks to keep your upstairs cool and slash your AC bills.
As mid-spring weather starts warming up the roof deck, many homeowners realize their upstairs bedrooms are already getting uncomfortably warm. The natural reflex is to plan a weekend project to blow in another 10 inches of cellulose or lay down thick fiberglass batts. But if you are researching how much R-value you need to keep your house cool this summer, you might be missing the most critical step of the entire project. Throwing new insulation over an unsealed ceiling is exactly like wearing a thick, chunky wool sweater on a windy day without a windbreaker. The sweater has plenty of insulating power, but the wind simply cuts right through it. In your house, your expensive, conditioned indoor air behaves the same way, escaping right past the drywall and up into the rafters.
If you want to permanently fix those hot upstairs rooms and lower your air conditioning bills, you have to air seal an attic before insulation goes in. This guide will walk you through exactly how to find the hidden thermal bypasses in your ceiling, navigate your joists safely, and seal up the gaps so your new insulation can actually perform at its maximum rated efficiency.
Understanding the Thermal Bypass Problem
To understand why air sealing is so crucial, you have to understand a concept called thermal bypass. Most homes are full of tiny cracks, gaps, and holes between the living space and the attic. These gaps exist around light fixtures, plumbing pipes, electrical wires, and the tops of your interior walls. When your air conditioning runs during the summer, the heavy, cool air sinks to the lower levels of your house. This displacement pushes the warmer air in your home upward. If your ceiling is full of unsealed gaps, that conditioned air is pushed directly into the 130-degree attic environment and lost forever.
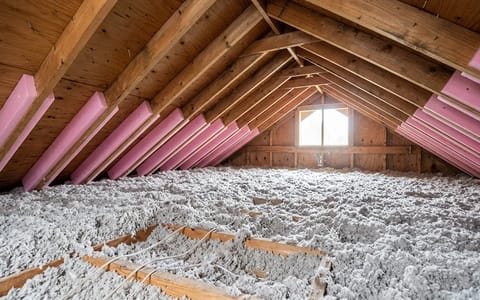
Fiberglass and cellulose insulation are excellent at slowing down the transfer of heat (conduction), but they are terrible at stopping airflow (convection). Air moves right through them. When conditioned house air flows through fiberglass insulation, the insulation acts like a giant furnace filter, catching the dust and debris carried by the draft.
Dirty insulation is the smoking gun of energy loss. Where you see black, dusty fiberglass, you have an air leak.
By sealing these bypasses, you create a continuous, airtight barrier. This "windbreaker" layer ensures that the new thermal insulation you plan to install will trap heat exactly as it was designed to, without being compromised by drafts.
Essential Gear and Attic Safety
Working in an attic requires preparation. The environment is dusty, cramped, and potentially dangerous if you do not step carefully. Before you open the attic hatch, you need the right gear. A high-quality P100 respirator is non-negotiable. Old insulation is full of dust, rodent droppings, and potentially hazardous fibers that you do not want in your lungs. Wear a disposable Tyvek suit, heavy-duty knee pads, safety goggles, and a bright LED headlamp so you have both hands free to work.
Navigating the attic is the most physically demanding part of the job. You will be moving across wooden ceiling joists, which are typically spaced 16 or 24 inches apart. Never step between the joists. The material between the joists is just half-inch drywall, which will not support your weight.
To move safely, cut a piece of 3/4-inch plywood or oriented strand board (OSB) to roughly 24 inches by 24 inches. Lay this board across at least two joists to create a stable, secure platform for kneeling and working. As you move across the attic, simply slide your board along the joists with you.
Where to Find the Biggest Air Leaks
Once you are safely positioned in the attic, you need to know where to look. You do not need to seal the entire attic floor; you only need to seal the specific penetrations where air escapes from the living space below. Start by identifying the layout of your house from above. The interior walls of your home are framed with horizontal pieces of wood at the top, known as top plates. The seams where the drywall meets these wooden top plates are notorious for leaking air.
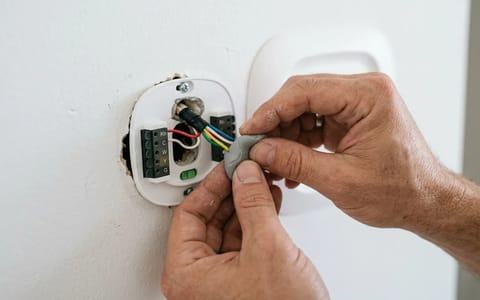
Next, look for plumbing stacks. Every bathroom and kitchen has a large PVC or cast-iron vent pipe that runs up through the walls and out the roof. The holes cut for these pipes are almost always cut larger than the pipe itself, leaving a massive gap for air to flow through. Electrical wires (Romex) also run through holes drilled into the top plates to drop down to light switches and outlets. Each of these drilled holes is a direct pipeline for conditioned air to escape.
How to Air Seal an Attic Before Insulation: Step-by-Step
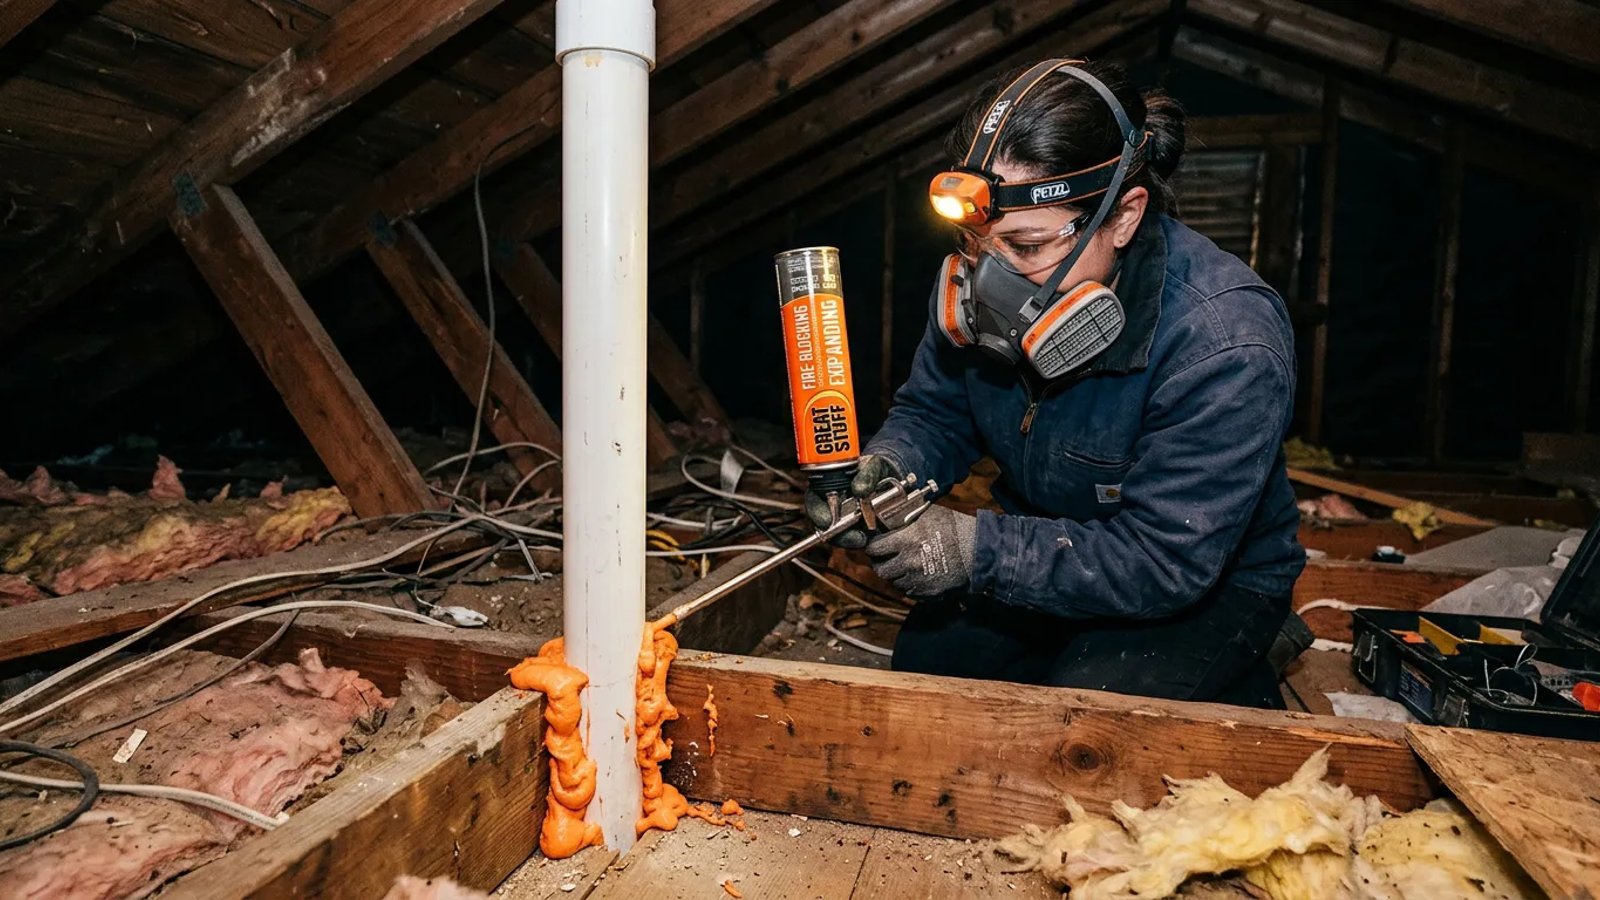
The actual process of sealing the gaps is straightforward once you have located them. You will need a few cans of closed-cell polyurethane expanding foam (look for the orange "fire-blocking" variety) and a standard caulking gun loaded with acrylic latex or silicone caulk.
- Rake back the old insulation. Using a small garden rake or your gloved hands, carefully pull the existing insulation away from the top plates, plumbing stacks, and wire holes. Pile it neatly out of your way.
- Clean the surface area. Expanding foam and caulk will not stick to a thick layer of dust. Use a small whisk broom or a shop vacuum to clear the dust and debris away from the gap you intend to seal.
- Apply the right sealant. For small cracks less than 1/4 inch wide (like the seam between the drywall and the top plate), run a continuous bead of caulk. For larger gaps around wires and pipes (up to 3 inches wide), use the canned expanding foam. Insert the straw deep into the gap and dispense the foam slowly, allowing it to expand and fill the void.
- Replace the insulation. Once the foam has cured to a tack-free state (usually 15 to 30 minutes), push the old insulation back into place over the newly sealed area.
Sealing Large Gaps, Chases, and Dropped Soffits
While canned foam is perfect for wire holes and plumbing pipes, you will likely encounter much larger openings that require a different approach. Many homes feature dropped soffits—the lowered ceiling areas often found above kitchen cabinets or in bathrooms. From the attic side, these soffits are often completely open, creating a massive cavity where conditioned air can pool and escape.
You will also find large gaps around chimney chases and HVAC ductwork running between floors. You cannot simply fill a two-foot-wide hole with canned foam. Instead, you need to create a rigid barrier. Purchase a sheet of 1-inch or 2-inch foil-faced rigid foam board (polyisocyanurate). Measure the opening of the chase or soffit, and cut the foam board to fit using a utility knife. Place the foam board over the opening, and then use your canned expanding foam to seal the edges where the board meets the wooden framing.
If you are sealing around a hot metal masonry chimney or a furnace flue pipe, you must use specialized materials. Combustible materials like standard rigid foam and canned expanding foam must be kept at least 2 to 3 inches away from hot flues to prevent fire hazards. To bridge this gap, use lightweight aluminum flashing cut to fit around the pipe, and seal the edges with high-temperature red silicone caulk.
Handling Recessed Lights Safely
Recessed lighting fixtures (often called "can lights") are some of the worst offenders for thermal bypass. Because they protrude directly into the attic space, they act like miniature chimneys, venting hot air from your living room straight into the roof deck. However, you must handle them with extreme care.
Check the label inside the metal housing of the light from the living space below. If the light is rated "ICAT" (Insulation Contact Air Tight), the housing is already sealed, and it is safe to bury the fixture in insulation. You can simply apply a bead of caulk around the base where the metal housing meets the attic drywall.
If the light is NOT rated for insulation contact (Non-IC), you cannot seal it directly with foam, and you cannot let your new insulation touch it. The heat generated by the bulb can cause a fire if the fixture is smothered. For these older lights, you must build a protective box out of drywall or purchase pre-made fire-safe recessed light covers. Secure the cover over the light fixture, leaving at least 3 inches of clearance on all sides, and then use expanding foam to seal the bottom edges of the cover to the attic floor.
By taking the time to crawl through the joists and meticulously seal every top plate, wire hole, and plumbing chase, you are setting the stage for a truly efficient home. Once the air leaks are stopped, you can confidently blow in your new cellulose or roll out your fiberglass batts, knowing that every inch of that new R-value will actually keep your upstairs cool and comfortable all summer long.