How to Check Your Crawl Space for Moisture and Stop Mold
Spring rainstorms often trap hidden water under your house. Learn how to safely inspect your crawl space for moisture before summer heat turns it into a mold problem.
Spring rainstorms are notorious for leaving behind a hidden danger: trapped water under your house. While you might be focused on mowing the lawn or cleaning the gutters, the dirt floor beneath your living room could be quietly turning into a swamp. As we head into the summer heat, that leftover moisture will begin to evaporate, turning your dark, enclosed crawl space into the perfect breeding ground for mold, wood rot, and destructive pests.
Understanding what happens beneath your floorboards is crucial for maintaining a healthy home. Because of a phenomenon called the "stack effect," up to 50 percent of the air you breathe on your first floor actually originates in your crawl space. If that air is filled with mold spores and musty odors, your indoor air quality will plummet. This guide will walk you through exactly how to check your crawl space for moisture, what warning signs to look for, and how to stop water intrusion before it leads to thousands of dollars in structural repairs.
The Science of Crawl Space Moisture
To understand why spring is the critical time for an inspection, you have to understand the relationship between temperature, humidity, and wood. During the cooler, wetter months, rainwater saturates the soil around your foundation. Hydrostatic pressure forces this water through tiny cracks in cinderblocks or simply allows it to pool under the house if the grading is poor.
When the weather warms up, the temperature inside the crawl space rises. Warm air holds more moisture than cold air. The damp soil begins to release water vapor into the trapped air under your house. If the relative humidity in your crawl space hits 70 percent, mold spores—which are always naturally present in the environment—will begin to colonize on your wooden floor joists and fiberglass insulation.
Catching moisture early is the difference between a $50 DIY weekend project and a $15,000 structural nightmare.
Worse, if the moisture content of the wood itself reaches 20 percent, wood-decay fungi will take hold. This causes what homeowners commonly call "dry rot," though the term is a misnomer since the rot is entirely caused by excessive moisture. Termites and carpenter ants also seek out wet, softened wood, making a damp crawl space an open invitation for an infestation.
Gear Up: What You Need Before Going Under
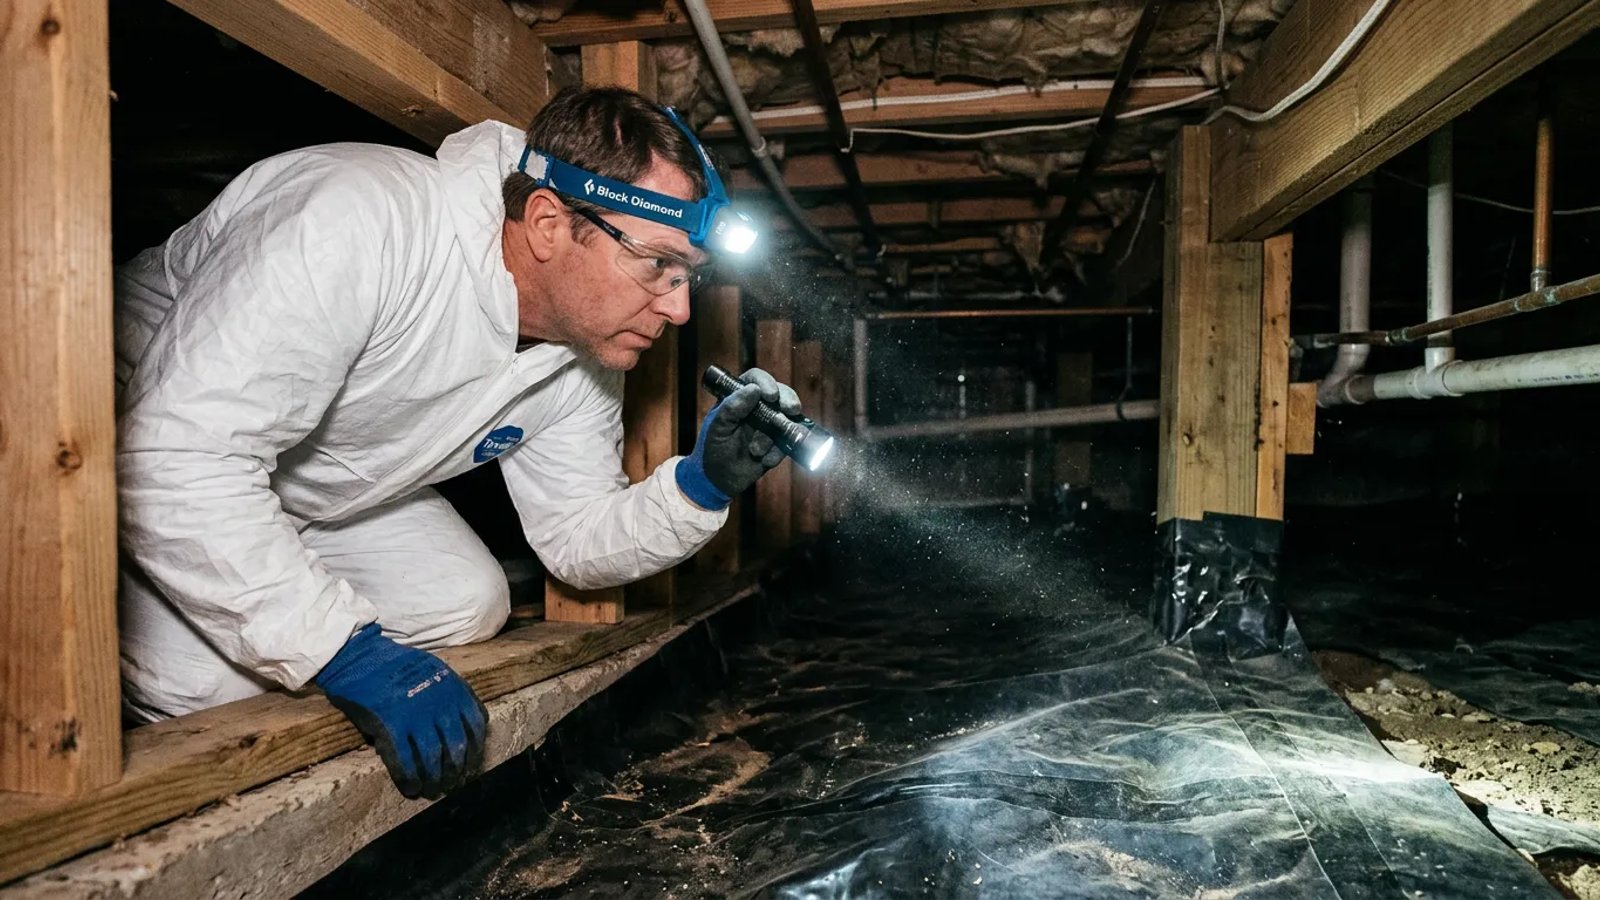
Before you even think about opening that crawl space door, you need to prepare. Crawl spaces are tight, dirty, and potentially hazardous environments. You don't want to crawl over sharp rocks, exposed nails, or animal droppings in your weekend clothes. Furthermore, disturbing the dust in a confined space requires proper respiratory protection.
Here is the basic kit you should assemble before your inspection:
- Respirator: A standard paper mask isn't enough. Use an N95 or P100 half-face respirator to protect your lungs from mold spores, hantavirus (from rodent droppings), and fiberglass dust.
- Lighting: A high-lumen headlamp (at least 300 lumens) is mandatory. You need both hands free to crawl and probe wood. Do not rely on your smartphone's flashlight.
- Clothing: A disposable Tyvek suit with a hood costs about $15 at any hardware store and will keep you completely clean. If you don't use a suit, wear heavy long sleeves, pants you don't care about, and a hat.
- Protection: Heavy-duty knee pads and leather work gloves will save you from serious discomfort on gravel or hard dirt floors.
- Testing Tool: A digital pin-type moisture meter. You can buy a reliable one for $25 to $40 at home improvement stores. This is the only way to know for sure if your wood is at risk.
Step-by-Step: How to Check Your Crawl Space for Moisture
Once you are suited up and your headlamp is secured, it is time to head inside. Move slowly and methodically. Your goal is to inspect the perimeter walls, the floor, and the ceiling (your floor joists) for any signs of water intrusion.
- Do the initial sniff test. Before you even crawl fully inside, pause at the entrance and take a breath through your respirator. If you immediately smell a strong, earthy, musty odor, you almost certainly have active mold and high humidity.
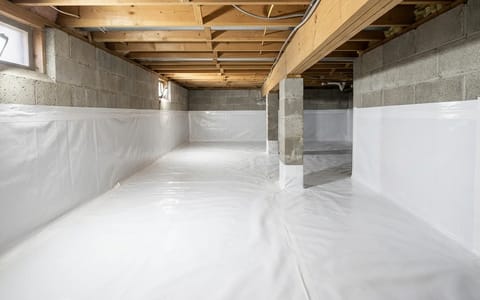
- Inspect the vapor barrier. Look at the plastic sheeting covering the dirt floor. It should be at least 6-mil thick (preferably 10-mil or 20-mil). Check for large tears, exposed patches of dirt, or areas where the plastic has completely degraded. There should never be standing water pooling on top of the plastic.
- Check the foundation walls. Slowly crawl the perimeter of the foundation. Shine your light on the cinderblocks or poured concrete. You are looking for wet spots, active trickles of water, or white, chalky stains.
- Examine the insulation. Look up at the fiberglass batt insulation tucked between your floor joists. It should be fluffy and sitting flush against the subfloor. If it is hanging down, sagging heavily, or falling out entirely, it has likely absorbed water from the humid air.
- Probe the floor joists. Take your pin-type moisture meter and press the sharp metal pins firmly into several different floor joists, especially those near the perimeter walls and under the bathrooms or kitchen. You want readings below 15 percent. Anything higher is a red flag.
Warning Signs You Shouldn't Ignore
Sometimes, moisture issues aren't as obvious as a puddle of water. You have to play detective. One of the most common signs of chronic water intrusion is efflorescence. This appears as a white, powdery, or crystalline substance on your brick or concrete block walls. As water moves through the porous concrete, it carries naturally occurring salts with it. When the water evaporates into the crawl space, the salt is left behind on the surface. While efflorescence itself is harmless, it is a guaranteed indicator that water is moving through your foundation.
Another subtle sign is condensation on cold surfaces. Shine your light on the metal ductwork or cold water plumbing pipes. If they are sweating or dripping water, your crawl space humidity is far too high. This condensation will eventually drip down onto the vapor barrier or soak into the surrounding wood.
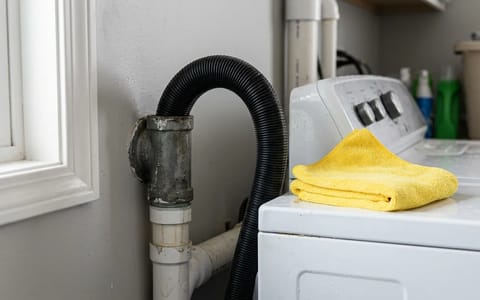
I once helped a neighbor who couldn't figure out why his hardwood floors were cupping in the living room. We went into the crawl space and found that the dryer vent had disconnected. Instead of venting hot, moist air outside, it was pumping it directly under the house. The moisture had saturated the subfloor, causing the hardwood above to warp. Always check that your dryer and bathroom exhaust fans are fully ducted to the exterior of the home.
Preventing Future Moisture Buildup
If you find minor moisture issues, the good news is that the solutions are often inexpensive and handled entirely on the outside of the home. The vast majority of crawl space water problems are caused by poor exterior drainage.
Start by looking up at your gutters. Are they overflowing during rainstorms? If gutters are clogged, gallons of water will dump directly next to your foundation. Clean them out thoroughly. Next, check your downspouts. A downspout that empties right at the base of the wall is useless. You must attach corrugated plastic extensions to route the water at least 4 to 6 feet away from the house.
Grading is the next line of defense. The soil around your home should slope away from the foundation. A standard rule of thumb is a 5 percent slope, which means the ground should drop about 6 inches over the first 10 feet moving away from the house. If you have low spots or flower beds that trap water against the brick, you need to bring in topsoil to build up the grade.
Fixing the Vapor Barrier
If your exterior drainage is perfect but you still have high humidity, your vapor barrier might be failing. The dirt under your house contains a massive amount of moisture, even if it looks dry on the surface. A proper vapor barrier stops this moisture from evaporating into the air.
If you find small tears in your 6-mil plastic, you can patch them easily. Do not use standard duct tape; it will peel off in a damp environment within weeks. Instead, use specialized crawl space seam tape or heavy-duty waterproof butyl tape. If large sections of the dirt are exposed, buy a roll of 6-mil or 10-mil polyethylene sheeting from the hardware store. Overlap the new plastic over the old by at least 12 inches, and tape the seam continuously to create an airtight seal.
DIY Fixes vs. When to Call a Professional
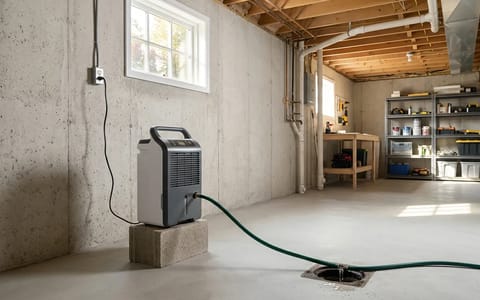
Cleaning gutters, extending downspouts, and taping a few holes in a vapor barrier are easy weekend projects for almost any homeowner. Even installing a small crawl space dehumidifier can be a DIY job if you have an accessible electrical outlet. However, some situations require heavy machinery and specialized knowledge.
Attempting to clean extensive toxic mold yourself without proper containment can pull those spores up into your living space, making the problem much worse. Likewise, if water is actively flowing through the foundation walls despite perfect exterior grading, you may be dealing with a high underground water table that requires professional waterproofing.
Taking 45 minutes this weekend to put on some coveralls and crawl under your house might not be the most glamorous spring chore, but it is one of the most important. By verifying your vapor barrier is intact and your wood is dry now, you can head into the humid summer months knowing your home's foundation—and the air your family breathes—is safe and protected.