Thermostat Reading Wrong Temperature? How to Fix It Fast
Is your thermostat reading 72 degrees but your house feels like a sauna? Learn how to troubleshoot and fix a thermostat that is displaying the wrong temperature before the summer heat arrives.
As the mid-spring weather warms up and we inch closer to the heavy heat of summer, your home's cooling system is about to start working overtime. But right now, you might be noticing a highly frustrating issue: the house feels incredibly stuffy, yet the thermostat insists it is a perfectly comfortable 72 degrees. Or conversely, you are freezing in your living room while the system refuses to shut off. Having a thermostat reading wrong temperature data is one of the most common seasonal complaints homeowners face.
If left unfixed before the real summer heat hits, this issue will cause your air conditioner to run constantly, which spikes your energy bills and wears out your compressor prematurely. Alternatively, it might shut off too early, leaving you sweating in your own living room. The good news is that a mismatched temperature reading rarely means your expensive HVAC unit is broken. More often than not, the brain of the operation—the thermostat itself—is just a little confused.
We are going to take a practical, step-by-step troubleshooting approach to help you solve this without spending $150 on a professional service call. From clearing out winter dust to a clever trick involving a $3 tub of plumber's putty, here is exactly how to get your thermostat back on track.
Why Is My Thermostat Reading the Wrong Temperature?
Before we start taking things apart, it helps to understand how your thermostat actually works. Modern digital thermostats use a component called a thermistor to gauge the air temperature. A thermistor is simply a resistor whose electrical resistance changes with the temperature. When the air directly touching that tiny sensor hits your target degree, the thermostat sends a low-voltage signal to your furnace or air conditioner to shut off.
Notice the key phrase there: the air directly touching the sensor. Your thermostat has no idea what the temperature is on the other side of the room, upstairs, or in your kitchen. It only knows the exact temperature of the one square inch of air inside its plastic casing.
If your thermostat is reading the wrong temperature, it is almost always because the local environment right around that sensor has been artificially altered. Our goal is to figure out what is tricking the sensor and remove the interference so it can get an accurate read on the room.
Step 1: Check for "Ghost" Heat Sources
The most common culprit for a skewed temperature reading is an external heat source that you might not even realize is affecting the unit. Because the mid-spring sun sits at a different angle in the sky than it did during the winter, sunlight might suddenly be hitting the wall where your thermostat is mounted.
If direct sunlight hits the plastic casing for even twenty minutes a day, it acts like a miniature greenhouse. The sensor bakes, reads 80 degrees, and kicks your AC on, turning the rest of the house into an icebox.
Sunlight is not the only offender. Look around the immediate vicinity of your thermostat. Is there a warm incandescent lamp sitting on a console table directly below it? Did you recently mount a large television on the adjacent wall? Electronics generate a surprising amount of ambient heat that rises directly into the thermostat housing. Even a nearby supply register blowing warm air from a recent heating cycle can throw off the baseline reading.
Step 2: Clean the Internal Sensor
Over the course of a long winter, your home circulates a massive amount of dust, pet dander, and lint. Because your thermostat cover has ventilation slots to allow room air to reach the sensor, that dust inevitably settles inside the unit.
When dust coats the tiny thermistor, it acts exactly like a microscopic winter coat. It insulates the sensor from the ambient room air. If the sensor is insulated, it takes much longer to register a drop or rise in temperature, leading to heavy temperature swings in your home.
Cleaning the sensor takes only a few minutes and requires zero technical expertise.
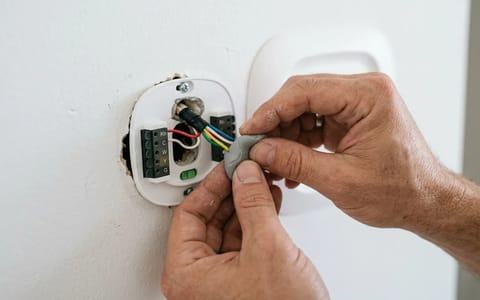
- Turn off the power. While thermostats use low voltage (usually 24V), it is always best practice to switch off the breaker to your HVAC system before opening the unit to avoid accidentally shorting a wire.
- Remove the cover. Most thermostat faces simply pull straight off the wall base with a gentle tug. Some older models might have a small latch or screw at the bottom.
- Locate the sensor. Look at the exposed circuit board. You are looking for a small component that often looks like a tiny bead or a flat disc with two thin wires attached to it.
- Gently clean the interior. Use a very soft, clean paintbrush or a can of compressed air to remove the dust. If using canned air, hold the nozzle at least three inches away and use short, gentle bursts so you do not freeze or damage the delicate components.
Step 3: The Wall Draft Trick
If the sensor is clean and there are no lamps nearby, we need to look behind the thermostat. This is a trade secret that HVAC technicians check on almost every service call.
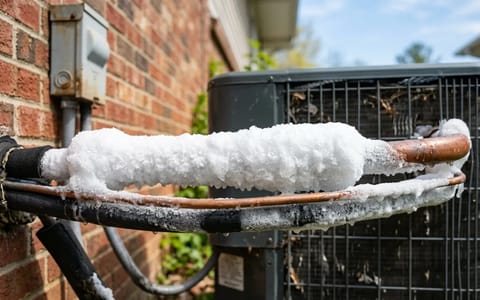
When your home was built, an electrician drilled a hole in the drywall to pull the thermostat wires through from the wall cavity. In many homes, this hole is a half-inch to an inch wide. The problem is that the air inside your wall cavity is not conditioned. In the spring and summer, hot air from your attic can easily sink down through the stud bays. In the winter, cold drafts push through.
If that unconditioned air is blowing out of the hole in the drywall, it hits the back of your thermostat sensor directly. Your thermostat is essentially measuring the temperature inside your walls, not inside your living room.
The fix is incredibly cheap and easy. You need to plug that hole.
Go to any local hardware store and buy a small tub of plumber's putty for about $3. Pull the thermostat face off the wall so you can see the baseplate and the wires coming through the drywall. Take a small marble-sized chunk of the putty, roll it in your fingers to soften it, and gently press it into the hole around the wires. You want to create an airtight seal so no drafts can escape the wall cavity.
Step 4: Calibrate the Unit Manually
If you have cleaned the sensor and plugged the wall draft, but the thermostat is still reading the wrong temperature, the unit might simply be out of calibration. Over time, sensors can drift from their factory baseline.
Before you adjust anything, you need to know exactly how far off the thermostat is. Do not rely on how the room "feels." You need hard data.
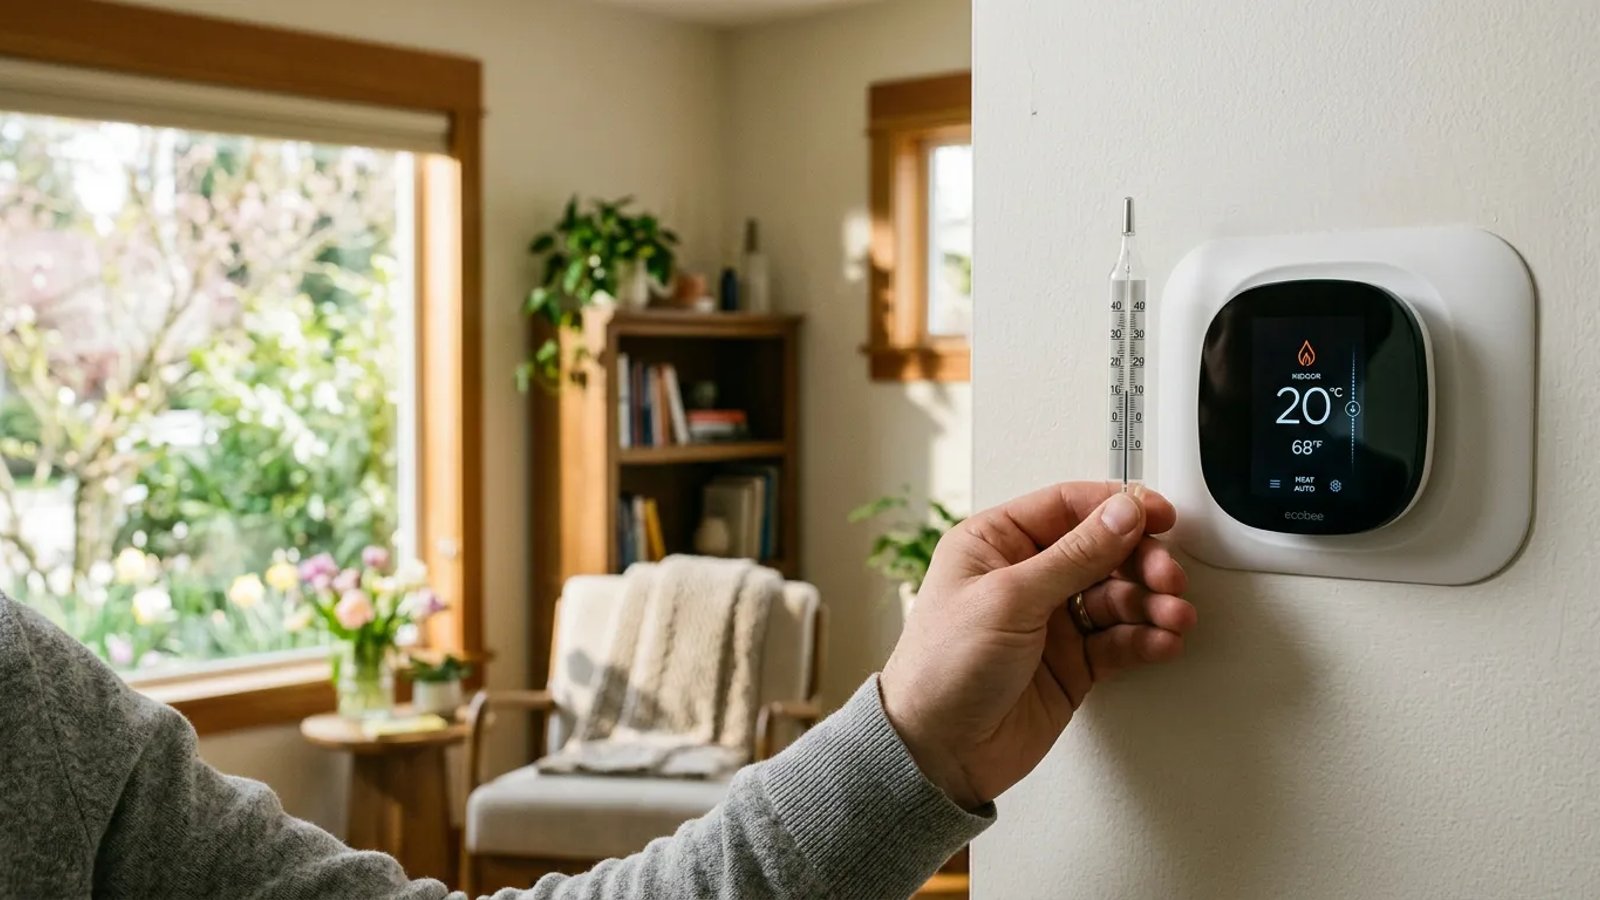
Take a standard glass room thermometer (the kind you might hang on a patio, or a reliable digital meat thermometer if it reads ambient air) and tape it to the wall directly next to the thermostat. Do not hold it in your hand, as your body heat will skew the glass thermometer's reading. Leave it taped to the wall for 15 to 20 minutes.
Never guess the temperature based on how the room feels—always use a secondary glass thermometer to verify before messing with calibration settings.
After 20 minutes, compare the two numbers. If the glass thermometer says 74 degrees and your wall thermostat says 70 degrees, you know your unit is reading four degrees too low.
How you fix this depends on the age and style of your thermostat:
- Smart Thermostats (Nest, Ecobee, Honeywell): Open the companion app on your phone, or dive into the advanced settings menu on the touchscreen. Look for a setting called "Temperature Correction," "Calibration," or "Sensor Adjustment." You can manually tell the software to offset the reading by the exact number of degrees it is missing.
- Digital Push-Button Thermostats: You will likely need to look up the manual for your specific model online. Usually, entering calibration mode requires holding down the "Up" and "Down" arrows simultaneously for five seconds until the screen flashes, allowing you to adjust the baseline offset.
- Older Mechanical Dial Thermostats: Inside the cover, you will find a small curved vial of mercury attached to a coiled bimetallic strip. There is usually a small calibration screw nearby. Turning this screw slightly with a precision screwdriver will tilt the mercury vial, adjusting the baseline.
Wrapping Up Your Temperature Troubles
Dealing with a thermostat reading wrong temperature data is annoying, but it is rarely a catastrophic failure. By taking 30 minutes this weekend to check for ghost heat, brush off the winter dust, seal up wall drafts, and double-check the calibration, you can restore your home's comfort system to perfect working order. Not only will your living room feel significantly better, but your air conditioner will run more efficiently, keeping your energy bills right where they belong as the summer heat rolls in.