How to Winterize a Sprinkler System (And Blow Out Lines)
Don't let a hard freeze destroy your irrigation lines. Learn exactly how to blow out and winterize your sprinkler system before winter hits.
Full guide Landscaping, Drainage & Outdoor Master your yard with simple tips for proper drainage, healthy lawns, and safe trees.As October rolls in and temperatures begin to drop, protecting your outdoor plumbing becomes an urgent weekend project. Water left sitting in irrigation lines will freeze, expand, and easily shatter underground PVC pipes or crack expensive brass manifold valves. If you want to avoid a massive repair bill next spring, you need to know how to winterize sprinkler system before the first hard freeze hits.
Beyond the immediate financial hit, a burst pipe can lead to significant water damage, soil erosion, and even sinkholes if left undetected. Proactive winterization isn't just about saving money; it's about preserving your landscape and avoiding unexpected headaches that can extend well into spring. Taking the time now ensures a smooth start to your gardening season next year.
While some modern systems feature automatic drain valves, the most reliable way to ensure your pipes survive the winter is the blowout method. Using compressed air forces all residual water out of the lines, leaving nothing behind to freeze.
Why Do You Need to Winterize Irrigation Lines?
Water expands by about 9% when it freezes. When that expansion happens inside a closed rigid pipe, the pressure has nowhere to go. The resulting force easily bursts PVC piping, cracks plastic sprinkler bodies, and destroys the internal seals of your manifold valves.
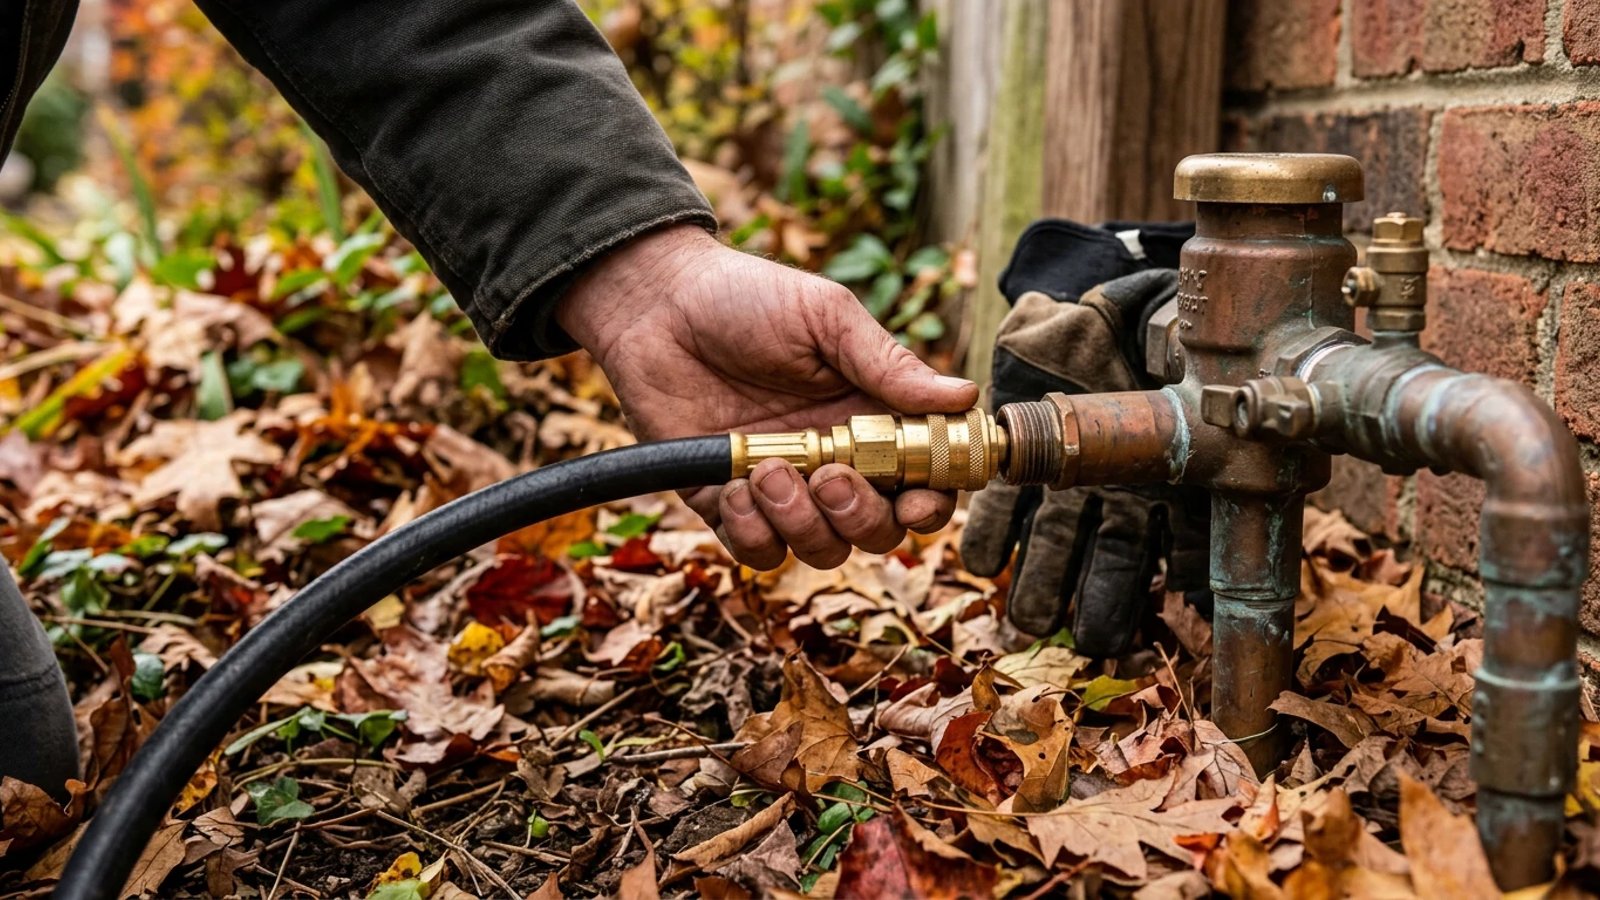
The most vulnerable and expensive component is the backflow preventer. This heavy brass assembly sits above ground, completely exposed to the wind and dropping temperatures. A cracked backflow preventer will cost you anywhere from $150 to $300 just for the part, not including the plumber's labor to sweat new copper fittings.
But damage isn't limited to the backflow preventer. Underground PVC or polyethylene pipes can develop hairline cracks that are nearly impossible to detect until the system is repressurized in spring, leading to invisible leaks that waste water and undermine your lawn. Even the smaller, less expensive components like sprinkler heads, solenoid valves, and underground fittings are susceptible. Replacing a dozen cracked spray heads or diagnosing a hidden leak can quickly turn a simple spring startup into a costly and frustrating excavation project. It's a classic case of an ounce of prevention being worth a pound of cure.
Understanding Your System's Drain Type
Before connecting an air hose, you need to know how your specific system is designed to drain. There are three primary methods:
- Manual Drain: These systems have manual valves located at the lowest points of the irrigation piping. You simply open them and let gravity pull the water out.
- Automatic Drain: These feature special spring-loaded valves that open automatically whenever system pressure drops below 10 PSI.
- Blowout Method: This uses an air compressor to force water out through the sprinkler heads. This is the industry standard and the most foolproof way to clear the lines.
If you're unsure which type of system you have, a good starting point is to consult your original irrigation system plans, if you have them. Otherwise, visually inspect your yard for manual drain valves, which look like small spigots or caps near the lowest points of your irrigation zones. For automatic systems, you might see small, spring-loaded valves, though these are often buried. When in doubt, the blowout method is the safest bet, as it actively removes water rather than relying on gravity or pressure differentials.
Even if you have manual or automatic drains, many homeowners still choose to blow out their lines to guarantee no water is left pooling in the natural dips and bellies of the underground pipes.
How to Winterize Sprinkler System (The Blowout Method)
Blowing out a sprinkler system requires a specific balance of air volume and pressure. High air volume (measured in CFM, or cubic feet per minute) is what pushes the water out. High air pressure (measured in PSI, or pounds per square inch) is what damages your pipes.
High air volume clears the pipes, but high air pressure destroys them.
Last October, I tested a standard 6-gallon pancake compressor on my own four-zone system. Because it only produced 2.6 CFM at 90 PSI, I had to let the tank recharge three times per zone. It took an hour of waiting and watching, but it successfully cleared the lines and saved me the $80 daily rental fee for a commercial tow-behind unit. If you have a massive yard with a dozen zones, renting a 50 CFM compressor from a local hardware store is the smarter move.
Before you begin, gather all your necessary tools: an air compressor with adjustable pressure, the correct quick-connect fitting for your blowout port (often a male air compressor fitting to a female garden hose thread, or a specific size NPT), a flathead screwdriver for the backflow preventer's test cocks, and potentially a portable air tank if your compressor is small. Also, identify all your irrigation zones and their corresponding numbers on your controller. Knowing the layout helps you work efficiently and ensures no zone is missed. It's also a good idea to wear safety glasses to protect your eyes from any debris or water propelled from the sprinkler heads.
Follow these exact steps to blow out your lines safely:
- Shut off the main water supply. Locate the dedicated irrigation shutoff valve, usually found in your basement or utility room, and turn it to the closed position.
- Relieve the system pressure. Go to your irrigation controller and turn on any zone for a few minutes. You will see a quick spurt of water from the heads before it stops. Leave the zone open.
- Drain the backflow preventer. Open the test cocks on your backflow preventer using a flathead screwdriver to let the above-ground water drain out.
- Connect the air compressor. Attach your compressor hose to the blowout port using a quick-connect fitting. This port is typically located directly after the backflow preventer.
- Set your compressor pressure. Adjust the regulator on your compressor so the output pressure does not exceed 50 PSI.
- Blow out the zones. Turn on the compressor and activate the zone furthest from the backflow preventer using your controller. Watch the sprinkler heads.
- Stop when you see mist. Once the steady stream of water turns into a fine mist, immediately shut off the zone. Running dry air through plastic gears for too long causes friction damage.
- Repeat for all zones. Work your way backward, zone by zone, toward the compressor. If you have a small compressor, let it fully recharge between each zone.
- Disconnect and power down. Once all zones are clear, turn off the compressor, disconnect the hose, and turn your irrigation controller to the "Off" or "Winter" setting.
Final Step: Shutting Down the Backflow Preventer
The blowout clears the underground lines, but you still need to protect the brass backflow preventer sitting above ground. Inside the ball valves of this device, water can get trapped behind the stainless steel ball.
To prevent this, find the two large handles on the ball valves. Turn them so they are at a 45-degree angle (half-open, half-closed). Do the same for the small slotted test cocks using a flathead screwdriver. Leaving them at a 45-degree angle ensures that any remaining drops of water have room to expand without cracking the brass housing.
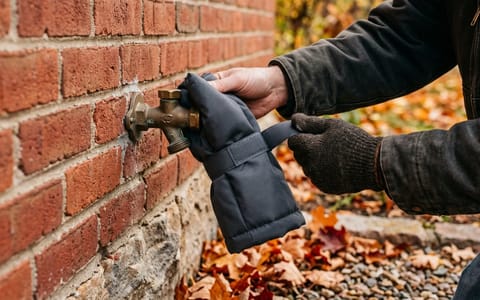
For an extra layer of protection, especially in regions with extremely harsh winters, consider wrapping your backflow preventer with insulation or purchasing a dedicated backflow cover. These covers, often made of insulated fabric or hard plastic, can shield the brass assembly from freezing winds and plummeting temperatures, adding another safeguard against costly damage. While the 45-degree angle helps with internal water expansion, external insulation protects the metal itself from extreme cold.
Should You Rent a Compressor or Call a Pro?
If you own a compressor that produces at least 2 to 3 CFM, and you only have a few zones, doing this yourself is entirely practical. You just need a $10 blowout adapter fitting from the hardware store and some patience.
However, if you have a sprawling property with 10 or more zones, a small garage compressor will overheat before you finish the job. Renting a tow-behind compressor costs around $75 to $100 for the day.
Professional services often include a comprehensive inspection of your system, ensuring all components are in good working order before winter. They can identify minor issues that might become major problems, such as leaky valves or damaged sprinkler heads, and address them before they lead to more extensive repairs. Furthermore, professionals have the right equipment for any system size, reducing the risk of accidental damage from improper air pressure or insufficient air volume. For many homeowners, the assurance and time saved make the professional service fee a worthwhile investment, guaranteeing your system is perfectly prepared for the cold months ahead.
Taking an hour this weekend to clear your irrigation lines is one of the highest-return maintenance tasks you can perform. Drain the water, regulate your air pressure carefully, and leave those valves half-open. Your pipes will sleep safely through the frost, ready to wake up leak-free when the ground thaws.
- High volume (CFM) matters more than high pressure (PSI) when blowing out lines.
- Never exceed 50 PSI for polyethylene pipes or 80 PSI for PVC.
- Always wear safety glasses, as compressed air can turn trapped debris into projectiles.
- Leaving ball valves half-open prevents trapped water from freezing and cracking the brass housing.