Spring Pest Prevention: How to Keep Bugs Out of Your Home
As the weather warms up, ants, spiders, and other pests start looking for ways inside your house. Learn how to proactively seal your home's exterior to stop them before an infestation begins.
As the winter thaw finishes and temperatures steadily climb, a dormant world wakes up—and unfortunately, much of it wants inside your house. Ants, spiders, centipedes, and other opportunistic insects start actively looking for shelter, moisture, and food as the ground warms. Heavy spring rains can also flood their natural ground habitats, driving them toward the dry safety of your living room. Effective spring pest prevention isn't about waiting until you see a line of ants marching across your kitchen counter and reaching for a chemical spray; it is about proactively sealing your home's exterior so they never cross the threshold in the first place.
By treating your home's exterior envelope as a fortress, you can physically block pests from entering. This approach is safer for your family and pets, creates a longer-lasting solution, and has the fantastic side effect of lowering your energy bills by sealing up drafts. Let us walk through the most critical areas to inspect and secure this season.
The Foundation Inspection: Sealing Cracks and Gaps
The foundation of your home takes a severe beating during the winter months. Freeze-thaw cycles cause the surrounding soil to expand and contract with immense force, which frequently leads to hairline cracks in concrete, block, and masonry walls. To a homeowner standing a few feet away, a 1/8-inch crack looks like a minor cosmetic issue. To a carpenter ant, a termite, or a centipede, it looks like a four-lane highway straight into your basement or crawlspace.
A thorough foundation inspection is the cornerstone of spring pest prevention. Pick a dry afternoon and slowly walk the entire perimeter of your house. Pay special attention to the corners, the areas directly under ground-floor windows, and the spots where utility pipes, dryer vents, or electrical wires penetrate the exterior walls.
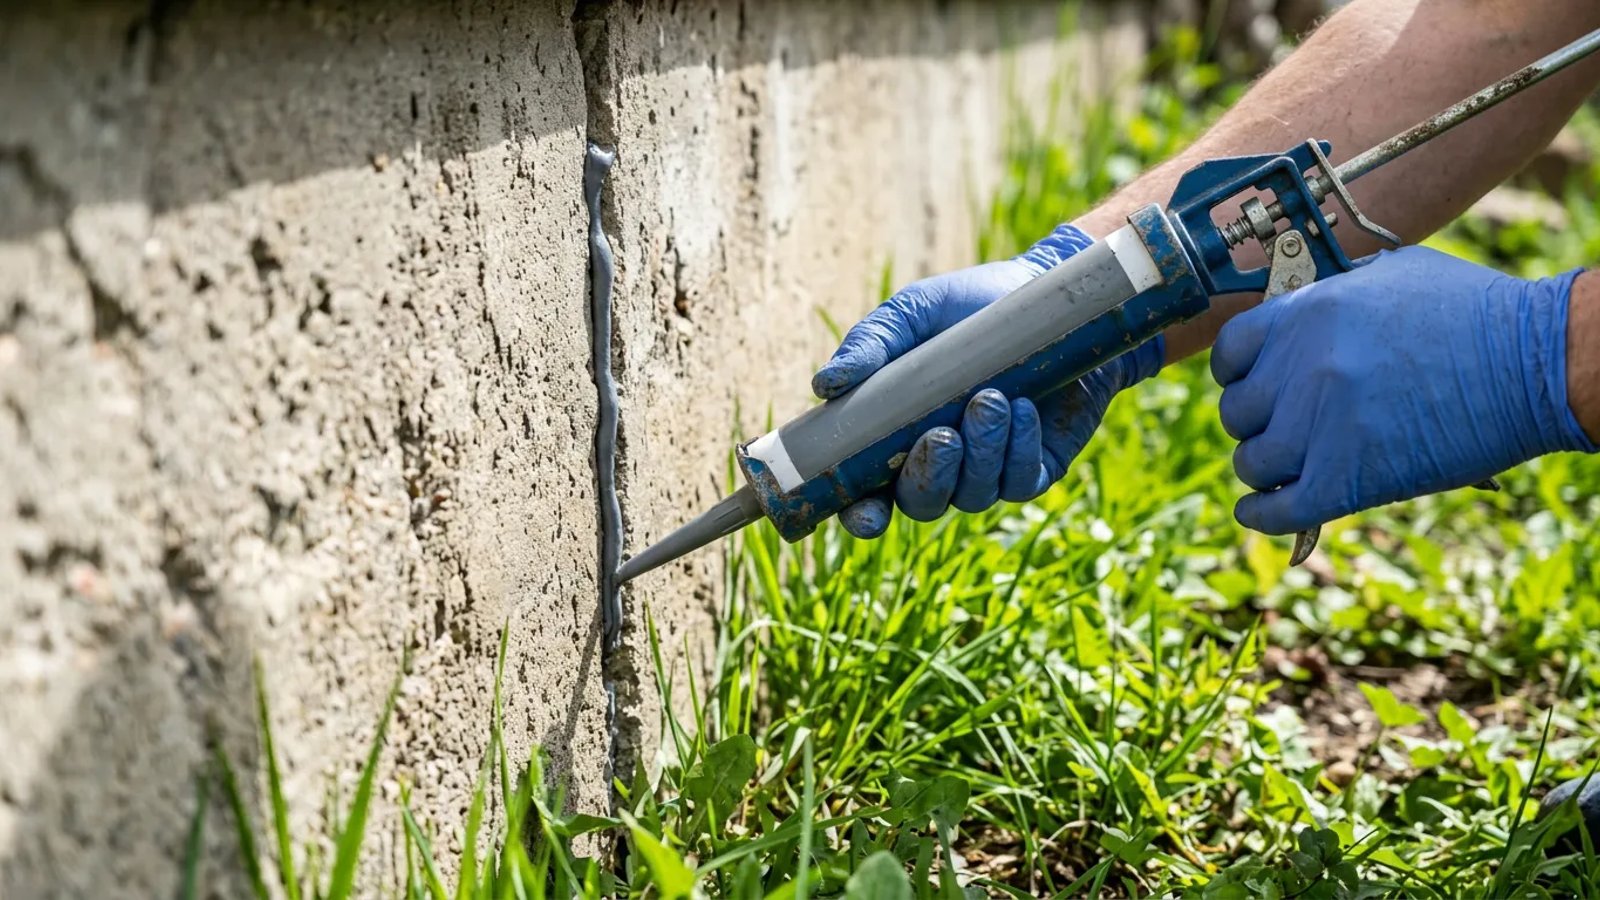
- Clean the area thoroughly. Use a stiff wire brush to scrub away loose dirt, crumbling concrete, and old, failing caulk from the crack. The new sealant needs a perfectly clean surface to adhere properly.
- Choose the right sealant. Standard acrylic painter's caulk will not survive exterior temperature swings. Pick up a tube of exterior-grade polyurethane masonry sealant, which usually runs about $8 to $12 at a local hardware store.
- Apply the caulk. Cut the plastic nozzle at a 45-degree angle. Push the caulk into the crack rather than pulling the gun away from it, ensuring the material fills the deep void completely rather than just bridging the surface.
- Tool the joint. Smooth the caulk with a gloved finger or a damp specialized tooling stick to create a tight, concave seal against the concrete edges.
Patching and Replacing Torn Window Screens
One of the best parts of spring is finally throwing the windows open to catch a fresh cross-breeze. But if winter storms, flying debris, or curious pets have pushed holes through your window screens, you are essentially rolling out the red carpet for mosquitoes, flies, wasps, and gnats.
Take the time to inspect every screen on the ground floor and the second story. Small tears—anything under an inch long—can often be fixed with a $5 adhesive screen patch kit. These mesh stickers simply press over the hole. However, if the mesh is pulling away from the aluminum frame, feels brittle and chalky from years of sun damage, or is sporting a massive hole, replacing the entire screen mesh is the smarter, better-looking move.
Replacing screen mesh is a highly approachable DIY task that takes about 10 to 15 minutes per window. You will need a roll of replacement fiberglass mesh, a length of rubber spline, and a spline roller tool. Lay the aluminum frame flat on a sturdy workbench or table. Pull out the old rubber spline with the tip of a flathead screwdriver and remove the old mesh. Lay the new mesh over the frame, ensuring it overlaps the edges. Use the convex side of the spline roller to gently push the mesh into the frame's groove, then use the concave side to press the new rubber spline in over it, locking the mesh tight. Finally, trim the excess mesh around the outside of the spline with a sharp utility knife.
Upgrading Weatherstripping and Door Sweeps
Doors are the largest intentional openings in your home, and they are notorious weak points for pest entry. If you can see daylight around the edges of your closed exterior doors, bugs can definitely get in. A gap as small as 1/16 of an inch is plenty of space for a spider, a roach, or a line of scout ants to squeeze through.
If you can slide a piece of paper under your closed exterior door, you have left enough room for pests to walk right in.
The best way to check your doors is the flashlight test. Have someone stand outside the door at night with a bright flashlight, slowly moving it around the perimeter of the door while you stand inside with the lights off. Wherever you see a beam of light shining through, you have a gap that needs sealing.
Start by checking the weatherstripping along the sides and top of the door frame (the jambs). Older open-cell foam tape compresses over time, dries out, and loses its rebound. Pull off the old material and clean the frame with rubbing alcohol to remove any lingering adhesive residue. Replace it with a high-quality silicone bulb weatherstripping or a tension V-seal. These materials cost slightly more—around $15 to $25 per door—but they last years longer than cheap foam and provide a far superior barrier against both insects and drafts.
Next, look at the bottom of the door. The door sweep drags across the threshold every time you open and close the door, causing the rubber or vinyl fins to wear down and tear. Unscrew the old sweep and install a new heavy-duty commercial-grade sweep. Adjust it so the fins press firmly against the threshold without making the door impossible to close. Not only will this block crawling insects, but it will also drastically reduce your air conditioning bills once the heavy summer heat arrives.
Clearing the Perimeter: Mulch, Brush, and Vegetation
Pests do not just randomly wander into your house from miles away; they are usually drawn to the immediate perimeter of your foundation by moisture and shelter. Once they establish a colony right next to your house, it is only a matter of time before they find a way inside. The landscaping choices you make right up against your siding play a massive role in whether you will deal with bugs this year.
Wood mulch is a favorite among gardeners because it retains moisture beautifully and breaks down into nutrient-rich soil. Unfortunately, termites, earwigs, roaches, and ants also love damp, decaying wood. If you pile wood mulch directly against your foundation siding, you are essentially building a sheltered, moist bridge for pests to bypass your concrete perimeter and access your home's wooden framing.
To fix this, pull all mulch, topsoil, and dead winter leaves at least 12 to 18 inches away from the foundation wall. Ideally, fill this "buffer zone" with crushed stone, river rock, or pea gravel. This creates a dry, barren, and hot strip of land that most insects are highly reluctant to cross.
Additionally, take a pair of bypass pruners and trim back any bushes, tree branches, or ornamental grasses that touch the roof or the sides of the house. Overhanging branches act like elevated highways for carpenter ants, squirrels, and mice, allowing them to bypass your ground-level defenses entirely and find entry points near your eaves, soffits, and attic vents.
Managing Exterior Moisture
Insects need water even more than they need food. If your home's exterior has standing water, poor drainage, or chronic damp spots, it will rapidly become a breeding ground for mosquitoes and a gathering spot for thirsty pests.
Check your exterior hose bibs (spigots) when you turn the water back on for the spring season. A spigot that drips just once every few seconds can keep the soil beneath it permanently saturated. Try tightening the packing nut behind the handle with an adjustable wrench first. If the dripping persists, shut off the water supply to that pipe and replace the internal rubber washer—a repair that costs less than a dollar in parts.
Finally, inspect your gutters and downspouts. Winter storms and late-falling leaves often leave them clogged with decaying debris. When heavy spring rains hit, clogged gutters overflow, dumping sheets of water directly at the base of your foundation. Clean out the debris with a scoop and a hose. Once the gutters are flowing freely, ensure your downspout extensions or splash blocks route the exiting water at least 4 to 6 feet away from the house to keep the foundation soil perfectly dry.
Taking a single weekend to secure the physical perimeter of your home is the smartest investment you can make against spring insect invasions. By focusing on robust physical barriers—sealing foundation cracks, tightening up door gaps, and removing damp, attractive habitats—you eliminate the root causes of infestations. A dry, well-sealed house naturally repels bugs, keeping your living spaces comfortable, clean, and completely pest-free all season long.