Easy Mini Split Maintenance: How to Clean and Stop Smells
Ductless mini splits are incredibly efficient, but they can quickly develop a musty, dirty-sock smell if neglected. Learn how to clean your filters, clear the condenser, and know when it's time for a professional deep clean.
Full guide HVAC & Climate Control How your home heats, cools, and moves air, and the decisions that matter.Ductless mini-split systems are fantastic for targeted heating and cooling, but they have a dark side. If left ignored, they can start blowing air that smells like dirty socks, stale vinegar, or a damp basement. This happens because the indoor wall units are essentially dark, wet boxes where condensation mixes with household dust, creating the perfect breeding ground for mold.
Regular mini split maintenance is the only reliable way to keep your indoor air fresh and your energy bills low. When the internal components get caked in debris, the system has to run longer and harder to achieve the temperature you set on the remote. This guide covers the essential DIY upkeep you can handle safely, as well as the warning signs that indicate you need a specialized deep clean.
Why Does My Mini Split Smell Musty?
The dreaded "dirty sock syndrome" is a common complaint among ductless system owners. When your mini split operates in cooling or dehumidification mode, the indoor evaporator coil gets ice-cold. Warm, humid room air passes over this coil, leaving behind condensation. This moisture drips down into a shallow plastic trough called the condensate drain pan. In humid environments, a single indoor unit can produce several gallons of condensation daily.
If your indoor filters are dirty, tiny particles of dust, pet dander, and skin cells bypass the mesh and stick to the wet coil and drain pan. According to the EPA guidelines on indoor air quality, mold only needs moisture and a food source (like organic dust) to thrive. The dark interior of your wall unit provides both.
Last year, I noticed our primary bedroom unit blowing air that smelled faintly of old gym clothes. After cutting the power and popping open the front panel, I shined a flashlight up into the air chute. I found a thick, fuzzy layer of gray buildup coating the cylindrical blower wheel. That buildup was restricting airflow by at least thirty percent and actively spreading spores into the room. It was a stark reminder of what happens when routine upkeep slips.
The dark, damp interior of a wall unit provides the perfect breeding ground for mold if dust is allowed to bypass the filters.
Mini Split Maintenance: How to Clean Filters Safely
The first line of defense against odors and poor efficiency is the reusable mesh filter located just under the front cover of the indoor unit. Unlike traditional central HVAC systems that use thick, disposable paper filters, mini splits rely on incredibly thin, delicate nylon screens.
Cleaning these screens requires a gentle touch. Aggressive scrubbing or using the wrong tools will tear the mesh, rendering the filter useless and forcing you to buy a $30 to $50 replacement.
- Turn off the unit. Power down the mini split using your remote control, and ideally, flip the dedicated breaker in your electrical panel.
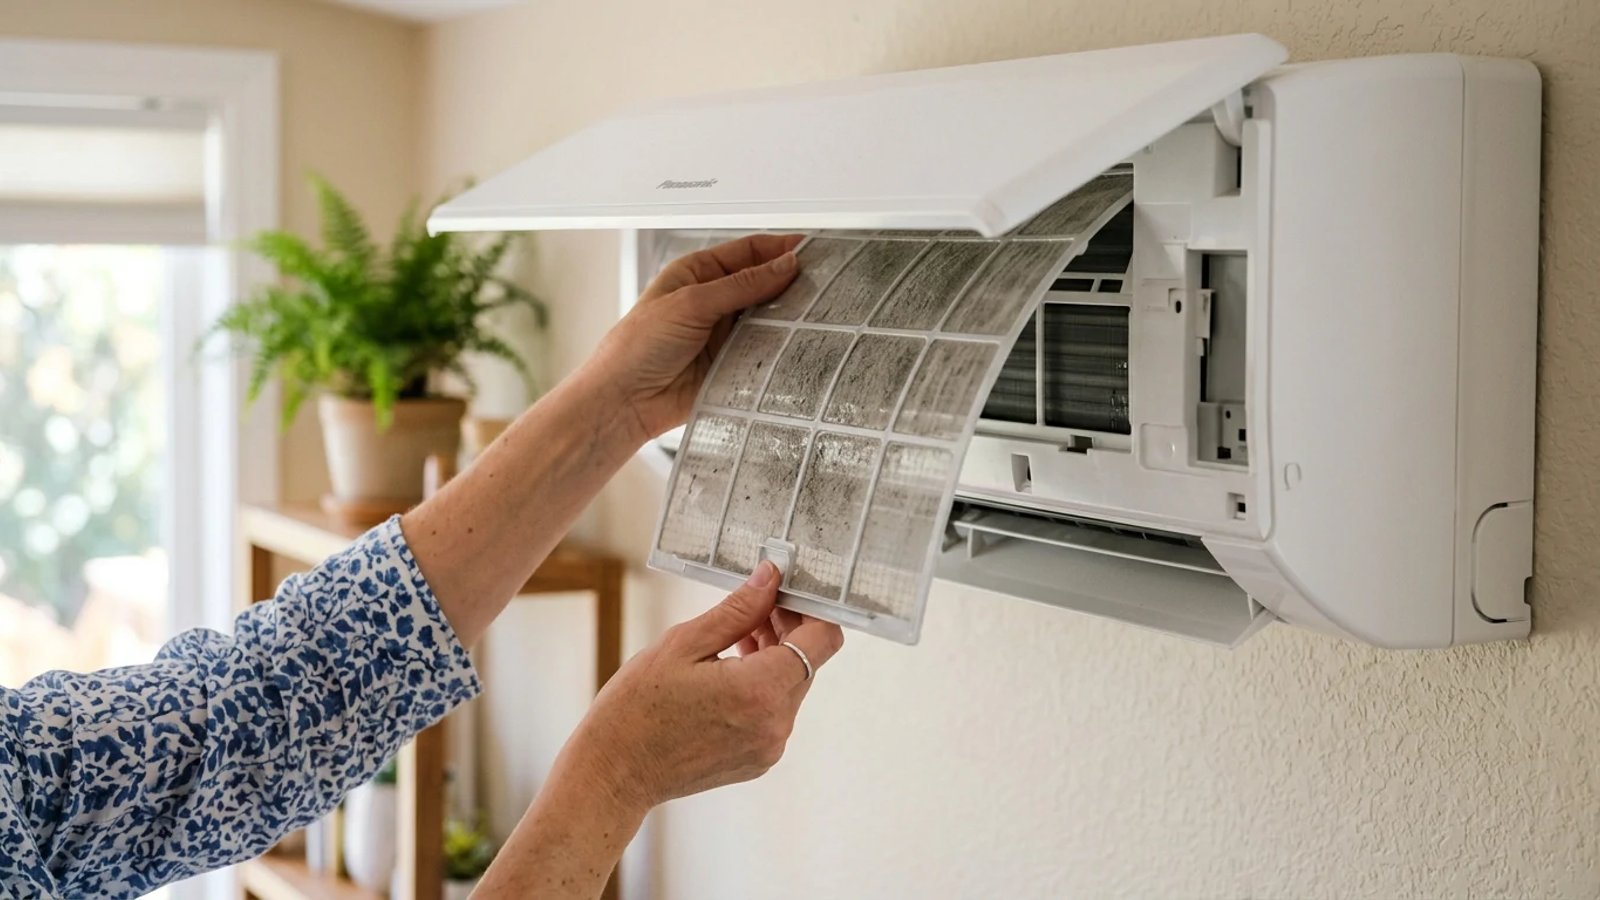
- Open the front panel. Gently pull up on the tabs located on the bottom left and right corners of the plastic cover until it clicks and holds itself open.
- Slide out the filters. Push up slightly on the bottom edge of the mesh screens to unclip them, then pull them straight down and out of their tracks.
- Rinse with warm water. Take the filters to a large sink or bathtub and run warm water over them from the back side to push the dust out the way it came in.
- Wash with mild soap. If the filters are greasy (common in kitchens), use a few drops of unscented dish soap and gently massage the mesh with your bare fingertips.
- Air dry completely. Shake off the excess water and lean the filters against a wall on a towel to dry completely before reinstalling them.
Wiping Down the Louvers and Outer Casing
While the filters are drying, turn your attention to the exterior of the indoor head unit. The directional louvers (the horizontal and vertical plastic blades that direct the air) often accumulate a visible layer of gray dust on their leading edges.
Use a clean, damp microfiber cloth to gently wipe down the entire plastic casing. Pay special attention to the top of the unit where the air intake vents are located, as dust settles heavily there. For the louvers, you can usually adjust them manually with a light touch to wipe both the top and bottom surfaces. Avoid spraying liquid cleaners directly onto the plastic, as the overspray can easily hit the sensitive electronic display or the internal circuit board located on the right side of the machine.
If you spot black spots or mold growth on the plastic air chute behind the louvers, wipe away what you can reach easily. However, do not jam your fingers or tools deep into the unit to clean the blower wheel yourself. The plastic fins on the wheel are surprisingly fragile, and snapping just one will throw the entire cylinder out of balance, causing the unit to vibrate violently and rattle against the wall.
What About the Outdoor Condenser Unit?
Your mini split is a two-part system, and the outdoor condenser does the heavy lifting of rejecting heat. If the outdoor unit cannot breathe, the indoor unit cannot cool or heat your home effectively. The Energy Star program notes that restricted airflow over condenser coils can reduce system efficiency by up to 20 percent.
Start by checking the perimeter. Shrubs, tall grass, and weeds should be trimmed back to provide at least 24 inches of clear space around the sides and front of the unit. In the fall, check behind the unit (the space between the condenser and your exterior wall) for accumulated dead leaves, which love to pile up and block the aluminum fins.
To clean the outdoor fins, turn off the power at the outdoor disconnect box (usually a gray metal box mounted on the siding next to the unit). Use a standard garden hose with a spray nozzle set to the "shower" or "cone" setting. Spray the fins from a downward angle to wash away pollen, dirt, and cottonwood seeds. Work your way around the back and sides until the water running out of the bottom of the unit is clear.
The Deep Clean: What Is a Bib Kit?
If you have cleaned your filters, wiped the louvers, and cleared the outdoor unit, but your mini split still smells musty when you turn it on, the problem is deep inside the indoor unit. The blower wheel and the back side of the evaporator coil are likely caked with mold and biological growth.
This is where standard DIY maintenance ends. Because the internal components are tightly packed and surrounded by sensitive electronics, cleaning them requires a specialized process called a "bib kit" deep clean.
During this service, a technician will remove the entire plastic outer casing of your indoor unit. They then attach a heavy-duty plastic funnel bag (the "bib") to the wall beneath the unit, running a drain tube into a bucket on the floor. After protecting the circuit board with waterproof covers, they use a specialized low-pressure sprayer to apply a foaming, non-corrosive coil cleaner directly into the fins and the blower wheel.
The pressurized water flushes the mold, dirt, and slime out of the deepest crevices, down the bib, and into the bucket. The water that comes out is typically pitch black. This level of cleaning restores the unit to factory-level airflow and completely eliminates the dirty sock smell.
Taking care of a ductless system is a straightforward routine. By committing to washing your indoor mesh filters once a month and keeping the outdoor unit free of yard debris, you will maintain excellent air quality and keep your energy consumption low. Plan to budget for a professional deep clean every one to two years to handle the inevitable buildup on the blower wheel, and your system will serve you quietly and efficiently for well over a decade.
- Clean your indoor mini split filters monthly to maintain airflow and prevent dust from reaching the internal coils.
- Never use a stiff brush or vacuum attachment on the delicate indoor mesh filters, as they tear easily.
- Rinse your outdoor condenser fins gently with a garden hose, but avoid pressure washers that can crush the aluminum fins.
- Hire an HVAC technician for a deep clean if your unit smells like vinegar or old socks despite clean filters.