Basement Water Leak: How to Find the Source and Fix It
Discovering water in your basement is terrifying, but it rarely means your foundation is ruined. Learn how to diagnose the source, fix poor exterior drainage, and seal minor cracks before the heavy fall storms arrive.
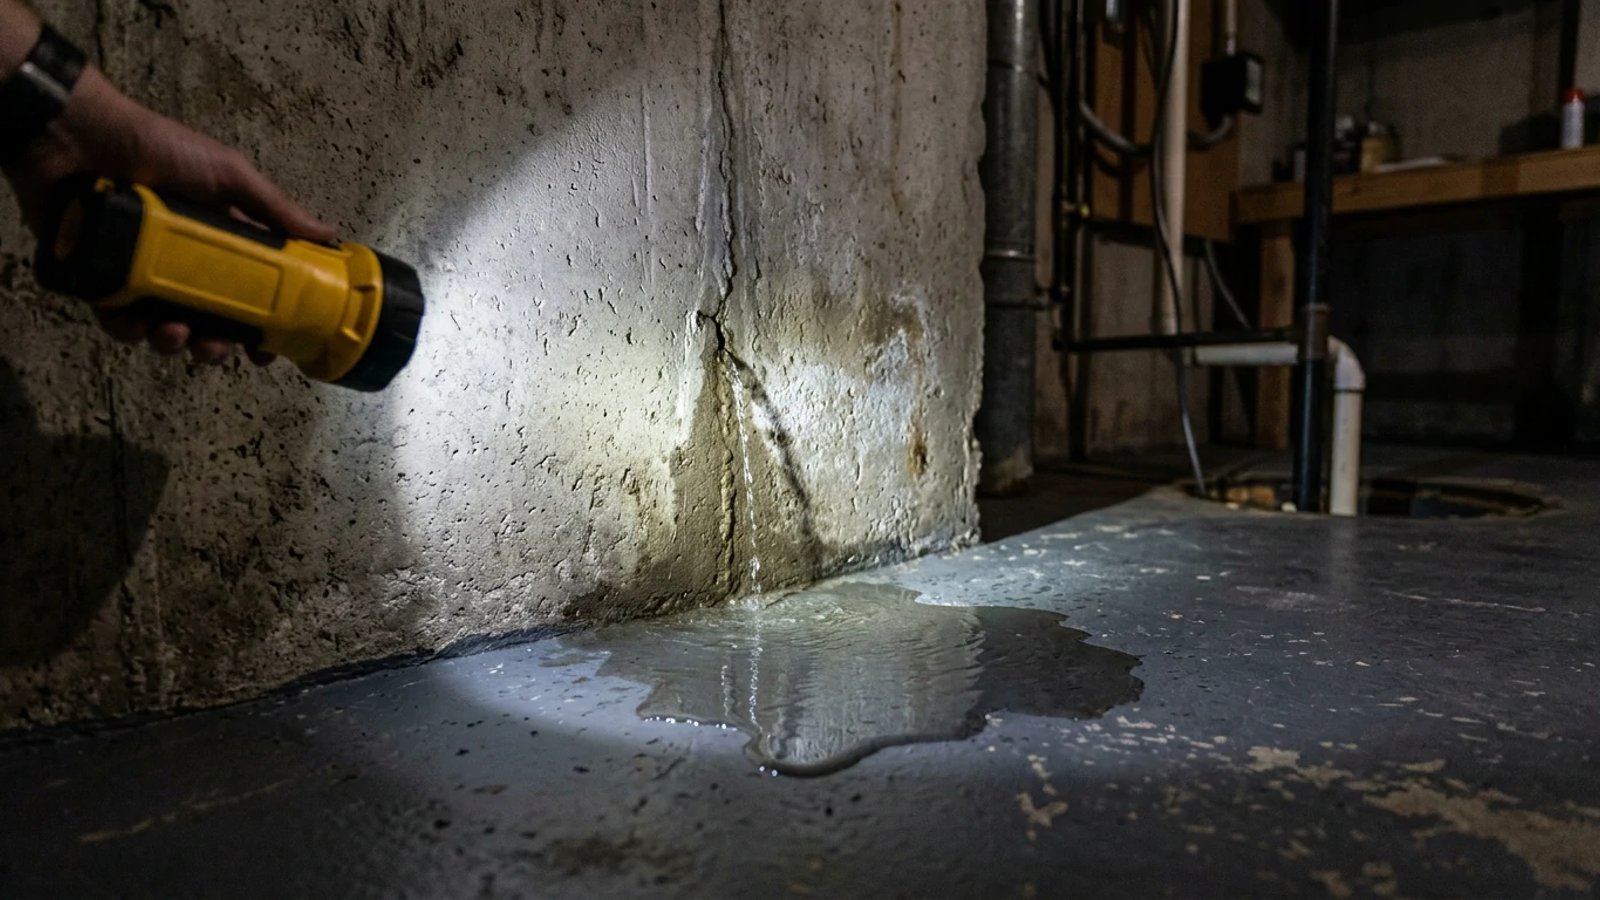
Full guide Foundation & Structure Learn how to spot dangerous foundation cracks and protect your home from costly structural damage.You walk downstairs to grab a storage bin, and your foot lands with a wet, heavy splash. A puddle is creeping across the concrete floor, or worse, water is actively trickling down the cinderblock wall. Panic sets in immediately. You grab your phone and search for a "basement water leak," convinced that your foundation is ruined and your savings account is about to be drained.
Take a deep breath. As we transition from late summer into wet fall weather, heavy rains frequently expose poor drainage and minor foundation flaws. The sudden appearance of water is alarming, but it is rarely a structural death sentence for your home. Most basement moisture issues are highly solvable, and many can be fixed with inexpensive materials from the hardware store.
Last October, right as the late-summer storms gave way to a wet fall, I walked down to my own basement to change the furnace filter and stepped right into a cold puddle near the water heater. After killing the breaker, I spent an hour tracing the trail of water back to a hairline crack hidden behind a storage rack. I was convinced the wall was failing, but a $40 injection kit and an afternoon of work completely solved the problem.
In this guide, we will walk through a clear triage process. You will learn how to safely inspect the area, diagnose the exact source of the water, and apply the right fix to protect your home before the next storm hits.
First Things First: Is the Water Safe?
Before you grab a mop or start moving soggy cardboard boxes, you must secure the area. Water and electricity are a lethal combination. If the water has reached any electrical outlets, extension cords, or baseboard heaters, do not step into the puddle.
Go straight to your main electrical panel and turn off the circuit breakers that supply power to the basement. If the panel is located in the flooded area, or if the water is deep enough to reach the bottom of the panel, do not attempt to touch it yourself. Call your utility company or a licensed electrician to cut the power safely.
Once the power is off, you need to act fast to prevent secondary damage. According to the EPA, mold can begin growing on damp surfaces within 24 to 48 hours. Remove any wet rugs, cardboard, and furniture from the area immediately. Set up fans and a dehumidifier to start drying the air while you hunt for the source.
Where Is the Basement Water Leak Coming From?
To fix the leak, you have to know exactly how the water is breaking in. Basements are essentially concrete boats sitting in the dirt. When it rains, the soil around the "boat" fills with water. Consider that a single inch of rain on a 1,000 square foot roof generates over 600 gallons of water around your foundation. If the water finds a path of least resistance, it will push its way inside.
Let's break down the three most common types of leaks.
1. Wall Cracks (The Trickle)
If you have poured concrete walls, vertical or diagonal hairline cracks are incredibly common. They occur naturally as the concrete cures and shrinks during the first few years after a house is built. For a long time, they might stay dry. But eventually, exterior soil expansion or a particularly heavy rainstorm will push water right through that tiny gap.
2. Floor Seepage (Hydrostatic Pressure)
If your walls are completely dry, but you see water pooling in the center of the floor or seeping up through the cove joint (the 90-degree angle where the floor slab meets the wall), you are fighting hydrostatic pressure. Soil acts like a giant sponge. When it rains heavily, that sponge fills up. Water is heavy—weighing about 60 pounds per cubic foot. That immense weight pushes down and forces water up through the porous concrete floor or the unsealed cove joint.
3. Over-the-Top Leaks
Sometimes, the foundation itself is perfectly fine, but water is entering above the concrete line. This happens when water pools against the siding and flows over the top of the foundation sill plate. It is almost always caused by overflowing gutters or a yard that slopes directly toward the house.
Immediate Exterior Fixes to Stop the Rainwater
Before you spend a single dime patching the inside of your basement, you must look outside. You cannot fight water from the inside out; you have to stop it from getting to the foundation in the first place.
The vast majority of basement leaks are actually roofing and drainage problems in disguise. Keep the water away from the house, and the basement will stay dry.
Start with your gutters. I always recommend grabbing an umbrella during the next heavy rainstorm and walking the perimeter of your house. Are the gutters overflowing? If they are clogged with late-summer leaves and debris, the water will spill over the edge and dump hundreds of gallons directly against your foundation wall.
Next, inspect your downspouts. A downspout that dumps water right at the base of the foundation is useless. Go to the hardware store and buy corrugated plastic downspout extensions. Attach them to the end of every downspout and route the water at least 4 to 6 feet away from the house.
Finally, check the grading. The soil around your house should slope away from the foundation. The general rule of thumb is a 5% grade, meaning the soil should drop 6 inches over the first 10 feet away from the house. If the soil is flat or slopes toward the siding, water will pool there. Buy a few bags of dense, clay-heavy topsoil (do not use mulch or gravel, which water flows right through) and build up the grade against the foundation.
How to Seal Minor Foundation Wall Cracks
If you have corrected the exterior drainage but still have a leaking vertical crack in a poured concrete wall, you can seal it yourself. Do not reach for a tub of hydraulic cement. While hydraulic cement is cheap and stops water fast, it dries completely rigid. Your foundation naturally expands and contracts with seasonal temperature shifts. Within a year or two, the rigid cement will break loose, and the crack will leak again.
Instead, use a low-pressure polyurethane injection kit. Polyurethane starts as a liquid that fills the entire depth of the crack, all the way to the outside dirt. It then expands and cures into a dense, flexible foam that moves with the wall.
Here is how to apply a standard two-part polyurethane injection kit:
- Clean the crack. Use a wire brush or 120-grit sandpaper to aggressively scrub away loose concrete, white mineral deposits (efflorescence), and old paint from the crack and the surrounding inch of wall.
- Attach the injection ports. Glue the plastic injection ports directly over the crack every 8 to 12 inches using the two-part epoxy paste provided in your kit.
- Seal the surface. Trowel the remaining epoxy paste over the entire length of the crack and over the wide bases of the plastic ports. This creates a hard surface seal so the liquid polyurethane doesn't spill out into the basement.
- Wait for the epoxy to cure. Let the surface seal harden completely. This usually takes 20 to 45 minutes, depending on the temperature and humidity in your basement.
- Inject the polyurethane. Starting at the lowest port on the wall, use a standard caulk gun to slowly inject the liquid polyurethane. Keep squeezing until you see the liquid oozing out of the port directly above it. Cap the lower port, move your gun to the next port up, and repeat the process.
- Remove the ports. After the polyurethane cures (typically 24 to 48 hours), take a hammer and chisel and knock the plastic ports off the wall for a flush finish.
Dealing with Basement Floor Seepage
If your water issue is hydrostatic pressure pushing moisture up through the floor or the cove joint, crack sealing will not help you. You cannot caulk the seam where the floor meets the wall; the water pressure will simply blow the caulk out or push the water further toward the center of the slab.
Fixing floor seepage requires managing the water table beneath the house. If extending your downspouts and fixing your exterior soil grading does not solve the floor seepage, you will likely need an interior drainage system.
This involves jackhammering a trench into the perimeter of the basement floor, installing a perforated pipe (a French drain) surrounded by washed gravel, and routing that pipe into a sump pump pit. When the groundwater rises, it enters the pipe rather than pushing through your floor. The sump pump then actively pumps the water up and out of the house.
When Should You Call a Foundation Professional?
While fixing downspouts and injecting minor vertical cracks are excellent weekend DIY projects, some basement water leaks require heavy machinery and professional expertise.
You should also call a professional waterproofing company if you are dealing with persistent floor seepage. Installing an interior French drain and a sump pump is incredibly labor-intensive. It requires renting a jackhammer, hauling thousands of pounds of concrete and wet dirt out of your basement in buckets, and hauling washed gravel back in. It is backbreaking work that is usually best left to a crew that can knock it out in two days.
Finding a basement water leak is stressful, but a methodical approach takes the panic out of the situation. By keeping the electricity safe, managing the rainwater outside, and sealing up the minor cracks inside, you can protect your foundation and keep your basement completely dry as the heavy fall rains roll in.
- Check your gutters and downspouts first—poor exterior drainage causes the vast majority of basement leaks.
- Grade the soil around your home to drop at least 6 inches over the first 10 feet away from the foundation.
- Use polyurethane, not hydraulic cement, to fix minor, non-structural wall cracks because it remains flexible as the foundation shifts.
- Floor seepage usually requires an interior French drain and sump pump system installed by a professional.