How to Repair Concrete Driveway Cracks Permanently
Don't let a minor driveway crack turn into a massive replacement bill. Learn how to prep, fill, and permanently seal concrete cracks to stop water damage and freeze-thaw expansion in its tracks.
Full guide Exterior: Siding, Garage & Decks Learn how to maintain your siding, garage doors, and decks to protect your home from the weather.Homeowners frequently ignore minor hairline fractures in their driveways, viewing them as a cosmetic annoyance rather than a structural threat. But a concrete slab is only as stable as the ground beneath it. When water penetrates those small gaps, it erodes the soil sub-base and freezes during winter months, causing the concrete to heave, sink, or shatter.
If you want to avoid a massive replacement bill, you need to repair concrete driveway cracks permanently before they expand. Crisp, dry fall weather provides ideal curing conditions to tackle this project before freezing temperatures arrive, and doing it right the first time will save you hours of frustrating rework.
Understanding and Repairing Concrete Driveway Cracks
Concrete is incredibly strong under compression, but it lacks tensile strength. This means it handles heavy weights well but snaps easily when pulled or bent. As the soil beneath your driveway settles over time, hollow voids form. When you drive a 4,000-pound vehicle over a section of concrete with no underlying support, the slab bends and eventually cracks.
According to 2026 guidelines from the American Concrete Institute, protecting the subgrade from water intrusion remains the single most critical factor in extending the life of a concrete slab. Water is the primary enemy. Rainwater flows into unsealed cracks, washing away the dirt and gravel base. In colder climates, this trapped water freezes and expands by about nine percent, acting like a hydraulic jack that forces the crack wider.
Identifying Different Types of Driveway Cracks
Before you run to the hardware store, take a walk down your driveway and inspect the damage. Not all cracks require the same level of attention. Hairline cracks are typically less than 1/8 inch wide and are often the result of normal concrete shrinkage during the original curing process. While they do not pose an immediate structural threat, sealing them early prevents water from turning them into larger problems.
Settlement cracks are the wider, more jagged gaps that indicate the ground beneath the slab has shifted. These are the primary targets for our repair process. You might also notice crazing, which looks like a network of tiny, shallow spiderweb cracks across the surface. Crazing is usually a cosmetic defect caused by the concrete drying too quickly when it was poured, and it rarely requires deep filling.
The Prep: Cleaning Out the Debris
Proper preparation dictates 80 percent of your success. You cannot apply filler or sealant to a dirty, dusty, or damp surface and expect it to bond permanently. The crack walls must be pristine.
Start by removing any weeds or grass growing in the gap. Use a stiff wire brush to aggressively scrub the interior walls of the crack. You want to knock loose any crumbling concrete, built-up dirt, and old organic material. A 5-in-1 painter's tool or a flathead screwdriver works exceptionally well for scraping out stubborn rocks wedged deep in the joint.
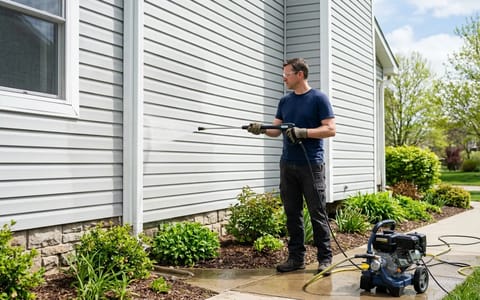
Once the heavy debris is loose, use a shop vacuum to pull the dirt out. If the driveway is heavily stained or covered in algae, follow up with a masonry cleaner and a pressure washer. A 3,000 PSI pressure washer with a 15-degree nozzle will blast away the remaining microscopic dust and create a clean, porous surface for the new sealant to grip.
When and How to Use a Foam Backer Rod
Many DIYers make the mistake of pumping endless tubes of expensive sealant deep into a bottomless crack. Not only is this a massive waste of money, but it also causes the repair to fail. Sealant needs to bond to the sides of the crack, not the bottom. If it bonds to three sides (left, right, and bottom), it will tear itself apart when the concrete shifts.
This is where a foam backer rod comes in. A backer rod is a flexible, cylindrical piece of closed-cell foam that you stuff into the crack to create a false bottom. It prevents the sealant from sinking too deep and ensures the filler only bonds to the vertical walls of the concrete.
You need a backer rod for any crack or expansion joint wider than 1/4 inch. Buy a rod that is slightly larger than the width of your crack. Typically, 1/2-inch or 5/8-inch foam works best for standard driveway gaps. Use a blunt wooden paint stirrer or a putty knife to push the foam down into the crack until it rests about 1/4 to 1/2 inch below the surface of the driveway.
Choosing Your Filler: Polyurethane Sealant vs. Concrete Patch
Walk down the masonry aisle at any hardware store, and you will see dozens of products claiming to fix concrete. They generally fall into two categories: rigid cement-based patches and flexible sealants. Choosing the wrong one guarantees you will be repeating this chore next year.
Rigid concrete patches, which often come in tubs or dry-mix bags, are excellent for repairing chipped corners or surface spalling. However, they are terrible for repairing active cracks. During the summer of 2025, I tested a cheap rigid patch on my own driveway against a self-leveling polyurethane sealant. The rigid patch cracked again by February, while the polyurethane stretched and held a watertight seal through the worst freezes.
Driveways are dynamic structures that constantly expand in the summer sun and shrink in the winter frost. Your repair material must move with them.
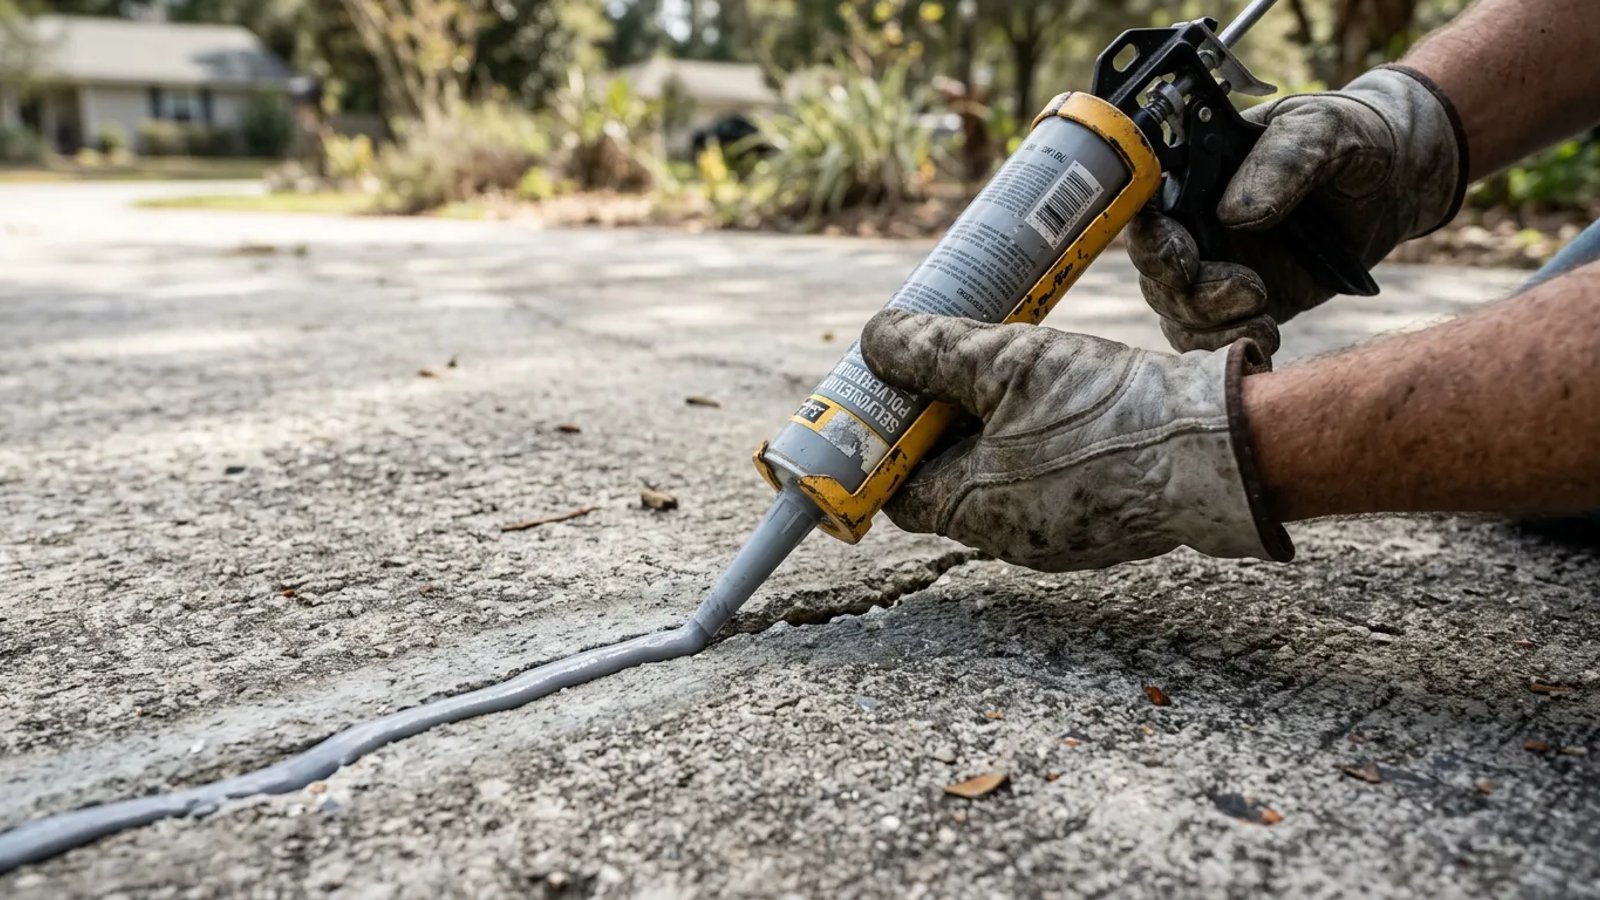
For a permanent fix, you must use a flexible, self-leveling polyurethane sealant. These products usually come in standard caulking tubes. The "self-leveling" feature is crucial; it means the liquid sealant will flow smoothly into the crevices and settle flat against the surrounding concrete without requiring any troweling or smoothing on your part.
Navigating 2026 Sealant Regulations
As of 2026, updated Environmental Protection Agency guidelines have phased out several high-VOC (volatile organic compound) driveway sealants. When shopping for your polyurethane filler, look for products labeled "Low-VOC" or "Zero-VOC" to ensure compliance with current retail standards. Fortunately, the newest generation of eco-friendly sealants cures faster and offers better UV resistance than older chemical formulas, preventing the rubbery patch from turning yellow in direct sunlight.
Step-by-Step Application and Curing Process
With your crack cleaned, dried, and prepped with a backer rod where necessary, you are ready to apply the self-leveling sealant. Work during a period when the temperature is between 50 and 90 degrees Fahrenheit, and ensure there is no rain in the forecast for at least 24 hours.
- Load the caulking gun. Cut the plastic tip of the polyurethane sealant tube at a 45-degree angle. Make the opening slightly smaller than the width of the crack you are filling. Puncture the inner foil seal with the metal rod attached to your caulking gun.
- Apply steady pressure. Insert the nozzle into the crack and slowly pull the gun toward you. Squeeze the trigger with consistent, even pressure. Allow the self-leveling liquid to flow down and fill the gap until it sits perfectly flush with the driveway surface.
- Do not overfill. Self-leveling sealant spreads as it settles. If you pump too much into the joint, it will overflow and create a shiny, raised gray bump on your driveway that looks worse than the original crack.
- Blend with play sand. Polyurethane sealant dries with a glossy, rubbery finish that stands out against weathered concrete. While the sealant is still wet, lightly sprinkle dry play sand over the top of the repair. The sand embeds into the surface, hiding the gloss and helping the patch blend seamlessly into the surrounding slab.
- Allow proper curing time. Keep vehicles, pets, and foot traffic off the repaired area. The surface will become tack-free in about 1 to 2 hours, but the sealant needs a full 3 to 5 days to cure completely beneath the surface.
Taking an afternoon to properly prep and fill the gaps in your driveway is one of the highest-return maintenance tasks a homeowner can perform. By keeping water out of the sub-base, you preserve the structural integrity of the concrete and ensure your driveway remains smooth, safe, and solid for decades.
- Ignoring small concrete cracks allows water penetration, leading to major heaving and shattering during freeze-thaw cycles.
- Rigid concrete patches often fail; flexible polyurethane sealants expand and contract with the slab for a permanent fix.
- Proper preparation is 80% of the job—never apply sealant to a dirty, dusty, or damp crack.
- Adding a light layer of play sand over wet sealant helps camouflage the repair to match your existing driveway.