How to Flush a Tankless Water Heater (And Stop Cold Bursts)
Stop the dreaded cold water sandwich. Learn how to flush your tankless water heater with vinegar to remove scale buildup, restore efficiency, and save on plumber fees.
Full guide Plumbing Learn how your home plumbing works and how to stop leaks before they ruin your house.Homeowners love the endless hot water of a tankless system, but that luxury comes with a mandatory maintenance requirement. In my experience, if you are experiencing the dreaded "cold water sandwich"—a sudden, shocking burst of cold water mid-shower—your unit is likely choked with mineral scale. Learning how to flush a tankless water heater is a core maintenance skill that keeps your system running efficiently and saves you a steep annual service fee.
When hard water runs through the narrow copper heating coils of a tankless unit, the intense heat bakes calcium and magnesium onto the metal. Over time, this scale restricts water flow and acts as an insulator, forcing the burner to work harder to reach your set temperature.
This increased workload not only drives up your energy bills but also significantly shortens the lifespan of your unit's expensive heat exchanger. Ignoring this essential maintenance can lead to premature system failure and costly replacements.
Why Does My Tankless Water Heater Run Cold?
Tankless heaters rely on precise flow sensors and temperature thermistors to modulate their gas burners. When scale builds up on the heat exchanger, the water cannot absorb heat fast enough. This often occurs when water flow through the unit drops below 0.5 gallons per minute (GPM). The unit's computer detects this imbalance, assumes the system is overheating, and shuts down the burner to protect the internal components. A few seconds later, it resets and fires back up. That brief shutdown is what sends a slug of unheated water straight to your showerhead.
Beyond the discomfort, this constant cycling of the burner due to scale buildup creates unnecessary wear and tear on components, leading to potential breakdowns. Regular flushing prevents this erratic behavior, ensuring a steady supply of hot water and preserving your system's integrity.
When we bought our current house, the previous owners hadn't flushed their gas unit in four years. I pulled out the inline filter and it was completely choked with solid white calcium flakes. The heater was throwing low-flow error codes daily until I spent an afternoon clearing the blockage and running a heavy descaling cycle.
The Department of Energy notes that regular maintenance is absolutely required to keep these units operating at their rated 80-90% efficiency and to extend their lifespan past the 20-year mark.
By performing this simple annual task yourself, you not only save on professional service fees but also proactively protect your investment, ensuring consistent performance and avoiding unexpected repair costs down the line. It's a small effort with significant long-term benefits for your home and your wallet.
The DIY Flush Kit: What You Need
Plumbers typically charge between $150 and $300 for an annual descaling service. You can build your own reusable flush kit for about $100 at any local hardware store. Once you own the tools, the only ongoing cost is a few dollars for vinegar.
Assembling your own kit provides a sense of accomplishment and gives you control over your home's maintenance schedule. It's a straightforward project that empowers you to handle a crucial task without relying on external services, saving you time and money year after year.
- A 5-gallon bucket: Any clean plastic utility bucket will work. Ensure it's sturdy enough to hold several gallons of liquid without tipping.
- A submersible utility pump: Look for a 1/6 HP pump. It needs to be strong enough to push water up and through the heat exchanger. Expect to pay around $50-$70. A model designed for continuous duty is ideal for this circulation task.
- Washing machine hoses: You need two standard stainless steel braided hoses with 3/4-inch female connections. Braided hoses are more durable and less prone to kinking during the flushing process.
- White vinegar: Buy 4 gallons of standard food-grade white vinegar. Avoid industrial-strength cleaners, as they can damage your unit's components.
How to Flush a Tankless Water Heater Step-by-Step
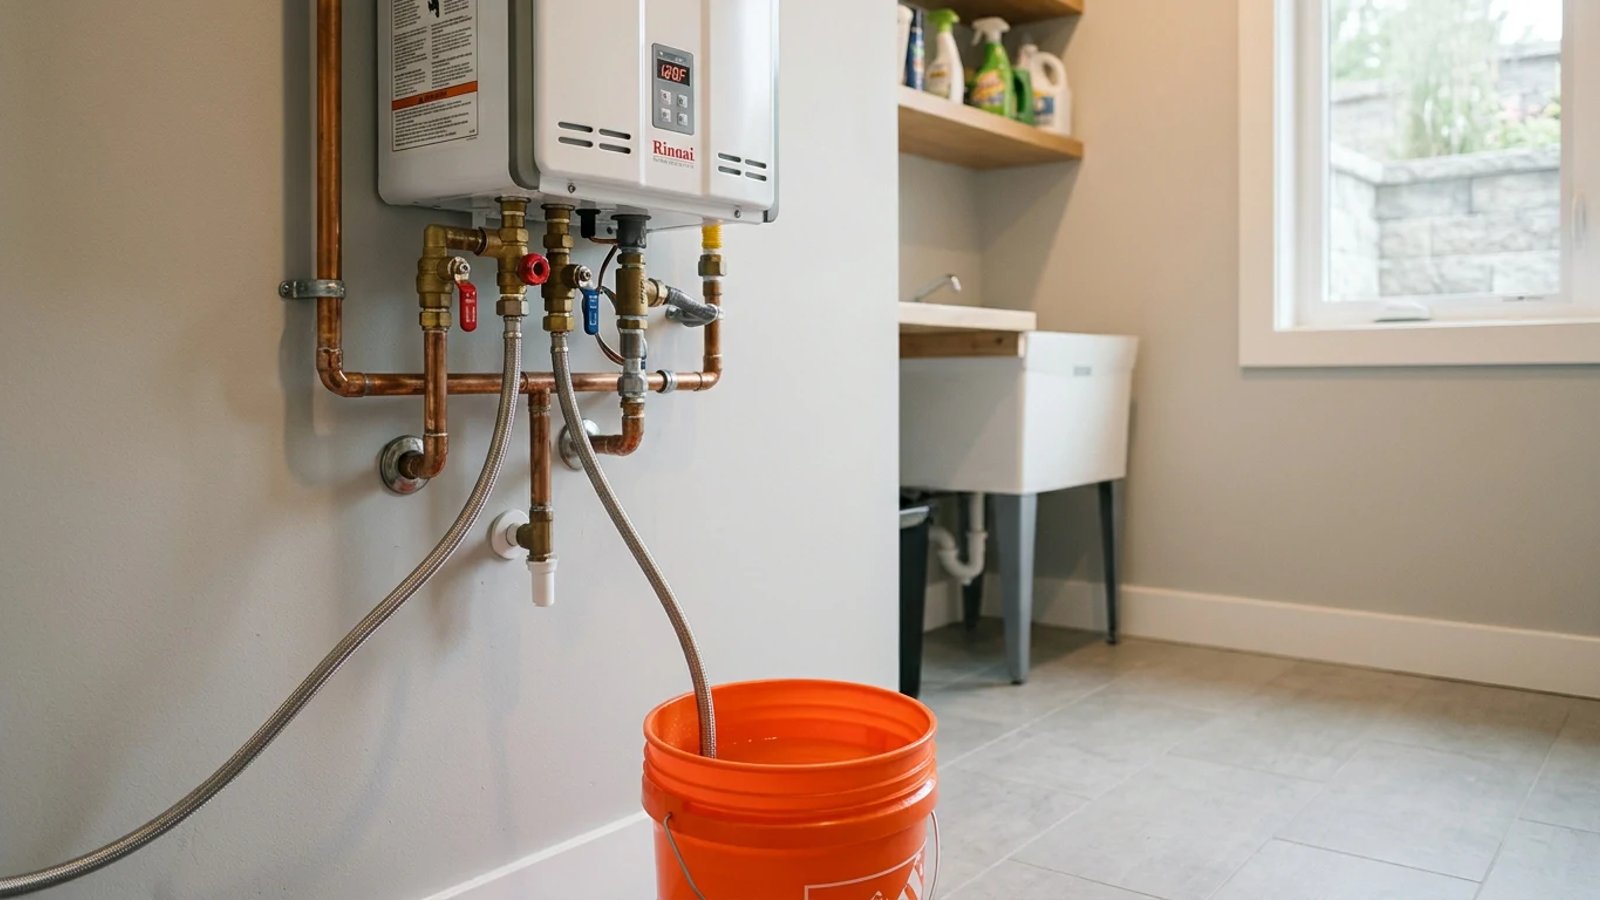
Before you begin, locate your unit's isolation valves. These are the red (hot) and blue (cold) valves mounted directly underneath the heater. They have built-in service ports specifically designed for this maintenance task.
Safety is paramount when working with gas and electricity. Always ensure all power and fuel sources are disconnected before proceeding with any maintenance. Having towels and a small bucket nearby for drips can also make the process cleaner.
- Shut off the power and gas. Unplug the unit from its 120-volt outlet and turn the yellow gas valve to the perpendicular (off) position.
- Close the main water valves. Turn the main red and blue isolation valve handles so they are perpendicular to the pipes. This stops water from entering the house and traps the system.
- Remove the service port caps. Slowly unscrew the caps on the hot and cold service ports. Have a towel ready, as a small amount of residual water will drip out.
- Connect the hoses. Attach one washing machine hose to the cold service port and attach the other end to your submersible pump. Attach the second hose to the hot service port and let the free end rest inside your 5-gallon bucket.
- Add the vinegar. Place the pump inside the bucket and pour in 3 to 4 gallons of white vinegar until the pump is fully submerged.
- Open the service ports. Turn the small T-handles on both the hot and cold service ports to the open position so fluid can flow through them.
- Circulate the vinegar. Plug in the submersible pump. The pump will push vinegar into the cold side, through the heat exchanger, and out the hot side back into the bucket. Let this run continuously for 45 to 60 minutes.
The Final Rinse and Filter Cleaning
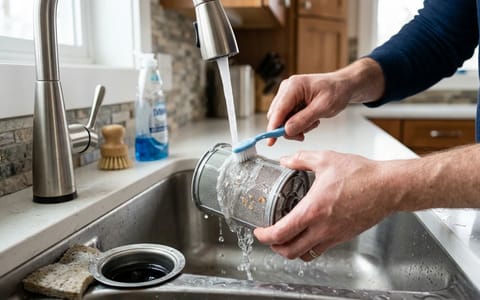
After an hour, the vinegar in your bucket might look cloudy or even take on a slight blue or green tint. This is completely normal and indicates that the acidic vinegar has successfully dissolved the calcium scale and cleaned the internal copper pipes.
The color change is a visual confirmation that the descaling solution has done its job, effectively breaking down mineral deposits that were impeding your heater's performance. Don't be alarmed by any discoloration; it's a sign of a successful cleaning.
Turn off the pump and dump the used vinegar down a drain. Now, you need to flush the vinegar out of the heater so your tap water doesn't smell like salad dressing.
Leave the hot service port open with its hose draining into the empty bucket. Close the cold service port and remove the pump hose. Slowly open the main cold water isolation valve. Fresh water from your municipal line will rush into the heater, pushing the remaining vinegar out the hot service port into your bucket. Let about 5 gallons of fresh water flush through, then shut the main cold valve again.
This thorough rinse is crucial to eliminate all traces of vinegar from the system, preventing any lingering odors or tastes in your tap water. Repeat the fresh water flush if you detect any vinegar smell.
Restoring Your Hot Water
With the system flushed and the filter cleaned, you are ready to put the heater back into service. Close the hot service port and remove the discharge hose. Reinstall the caps tightly on both the hot and cold service ports.
Open both the main hot and cold isolation valves completely. Before turning the gas or electricity back on, go inside your house and turn on a hot water faucet in the kitchen or bathroom. Air will sputter out of the faucet for a minute or two. Once the water runs in a steady, clear stream, turn the faucet off.
Purging the air from the lines is a vital step to prevent airlocks and ensure smooth operation when the unit restarts. Take your time with this to avoid any sputtering or inconsistent water flow later.
Finally, plug the unit back into the electrical outlet and turn the gas valve back to the parallel (on) position. The digital display should light up, and the next time you turn on a shower, you will be back to enjoying endless, consistent hot water.
Mark your calendar to repeat this process once a year. If you live in a region with exceptionally hard water, checking the inline filter and running a flush every six months will keep your system running perfectly.
Consistent maintenance is the secret to extending the life of your tankless water heater and enjoying its benefits for decades. By making this annual or semi-annual task a priority, you ensure peak efficiency, prevent unexpected repairs, and maintain the comfort of endless hot water in your home.
- Always turn off the gas and electricity to the unit before starting the flush.
- Use food-grade white vinegar, not harsh chemical cleaners, to protect your potable water supply.
- Clean the inline water filter before turning the system back on—it often catches the largest calcium flakes.
- Purge air from the lines by running a hot water faucet inside the house before turning the unit's power back on.